15 UFO Death
When a UFO is shot, we will hide it's current meshes and replace them with separate UFO chunks that will be shot off in different directions. We'll also add a particle effect for the explosion.
-
Start up Blender and delete the cube that it shows by default.
-
From the menu choose File - Import - WaveFront (obj) since our UFO is an obj file. Choose the Low_poly_UFO.obj file from your Assets/Models/Ufo folder
-
If your laptop has a number pad on the right, then press the . key there to move the view to show the UFO. Otherwise, with your mouse in the main 3D area press the Space Bar to bring up the tool menu. Type in View Selected and press Enter. This should show the UFO with no material applied.
-
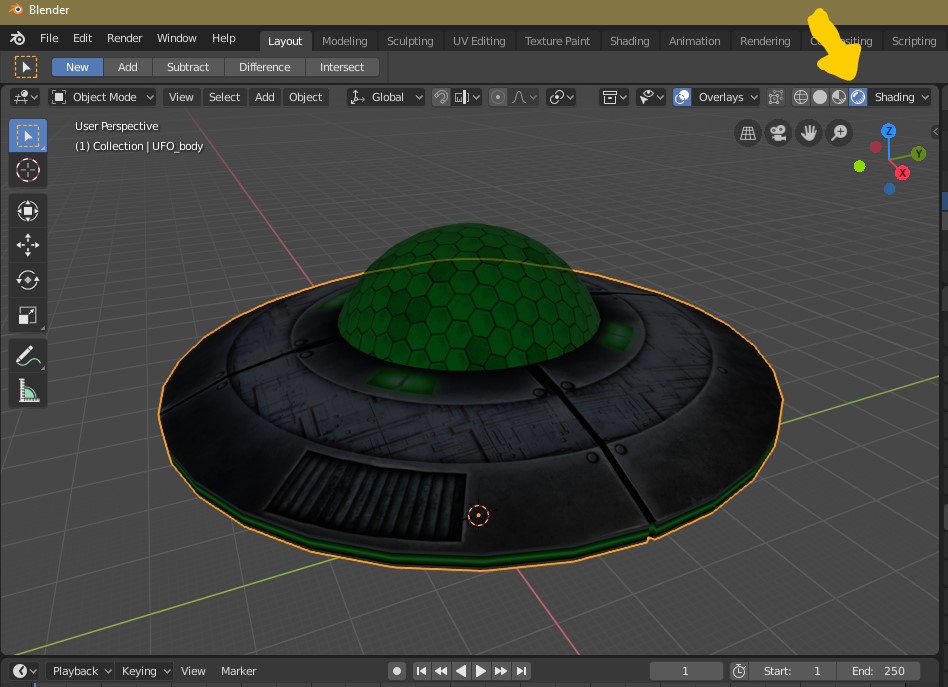
Press the button indicated below to see the materials applied
-
Four buttons to the left of that one turn on the X-Ray mode. It says Show whole scene transparent when you hover over it. This will allow us to select both sides of the UFO at once.
-
In the Shading menu to the right of these buttons, check the option for Backface Culling. This will make Blender look the same as Unity, where you can't see the back-sides of the faces. This is usually good thing, but once we start breaking up the ship, we'll be able to see the inside of it, and if we don't create inside faces, then the UFO will just become transparent when you look inside.
-
In the Hierchy/Scene Collection window select the UFO_cockpit mesh. We're going to start breaking this up.
-
With the mouse in the 3D area press TAB to enter edit mode. If the faces are selected they'll be yellow.
-
We want all of the faces selected so press A. Then press SHIFT + D and then ENTER to duplicate all of these faces. Press SPACE and type in Flip Normals to find that command, and then press ENTER. This will give us inside faces that are facing the opposite direction.
-
We want to un-select them so press ALT + A. Press C for the Circle Select tool and drag over the mesh to select about a third of the faces. Once you're happy press ENTER or Right-Click to finish the selection.
-
Press P for the Separate tool and choose Selection. This will move these faces to a separate mesh.
-
Repeat the above for as many pieces as you want for the cockpit. I'm breaking mine into 3 pieces.
-
Press TAB to exit edit mode for the cockpit mesh, and repeat the above process for the UFO_body mesh.
-
In the Hierarchy view toggle the visibility so you only see one mesh at a time. For each one, decide if any faces should be deleted. Some of the bits could have been vaporized in the explosion.
-
Delete the Camera and the Light from the Scene Collection / Hierarchy
-
Choose File - Export - FBX. FBX is the most common format for games. Browse to your Assets/Models/Ufo folder and name the file UfoChunks.fbx. Press the Export FBX button in the top right to finish.
-
Back in Unity find the UfoChunks model and in the Inspector change the Scale Factor to 1/6 to be consistent with the unbroken UFO model.
-
In the import settings swtich to the Materials tab and we'll assign our upgraded materials to this model. For UFO_texture choose UFO_Glass and for UFO_texture2 choose UFO_Texture
-
Drag the UfoChunks model from your Assets folder into the Hierarchy. Then drag it from there into your Assets/Prefabs folder and when asked, choose Original Prefab.
-
Open the prefab editor for this new prefab.
-
For each of the meshes inside, add a Rigidbody component (with default settings, we do want gravity to affect these). Set the Mass to .001 for these so they don't end up pushing other things around.
-
For each of the meshes inside add a Box Collider component. We don't need to be too fussy with these colliders
-
On the UfoChunks prefab object add a new Empty called ExplosionPosition and move this to the center of the UFO
-
On the UfoChunks prefab object add a new script called UfoExplode
-
Add a pubic GameObject variable for the ExplosionPosition. Save the script, and assign this in the Unity editor to the position you created above.
-
Add these other fields to the UfoExplode script:
 public float ExplosionForce = 1f;
 public float ExplisionRadius = 0.1f;
-
In the Start() function add code to apply an explosive force separately to each of the chunks from our explosion position
     foreach(var chunk in GetComponentsInChildren<Rigidbody>())
     {
         chunk.AddExplosionForce(ExplosionForce, ExplosionPosition.transform.position, ExplisionRadius);
     }
-
On the UfoChunks prefab object add a Particle System component.
-
Set the Shape to Sphere and move the position y of the shape up to 4 so that it's in the center of the UFO.
-
In the Renderer settings change the material to Default-Particle
-
Set the following values on your particle system: Duration = 0.2 Looping = off Start Lifetime = 1 Start Speed = 20 Stop Action = Destroy
Emission - Rate Over Time = 1000 Shape - Radius = 0.001 Shape - Radius Thickness = 0 Color Over Lifetime = Gradient going from orange to red to grey Size Over Lifetime = Ramp down
When the particle system finishes, it will delete the entire UfoChunks prefab for us. So nothing more to clean up.
-
Open the UFO prefab add add a new script component called Die
-
Open this script and add a new public GameObject variable named ChunksPrefab
-
Save the script and in the Unity editor set this to our UfoChunks prefab
-
Add a function to the script that when called will delete this game object, and create the chunks prefab in its place
 public void DieNow()
 {
     Destroy(gameObject);
     Instantiate(ChunksPrefab, this.transform.position, this.transform.rotation);
 }
-
Open the Player prefab's Gun component's PlayerShoot script.
-
Inside the if(hitSomething) { } code block add code to make the thing we hit die IF it has a Die script attached to it.
     // Does the thing we hit have a Die script?
     var dieScript = hitInfo.transform.GetComponent<Die>();
     if (dieScript != null)
     {
         dieScript.DieNow();
     }
Oops. We can destroy the mothership in one shot. This is because it's a variant of a UFO which now has a Die script.
- Open the Mothership prefab and remove the Die (Script) component (disabling the checkbox isn't good enough)
Our UfoChunks prefab needs an Audio Source with an explosion sound in it. Choose from one of the included sounds, or add your own.
-
Select the clip you want
-
Change the Spatial Blend to 3D
-
Change the Volume Rolloff to Linear, and the Max Distance to 200
While we're on the subject of sounds, now would be a good time to add engine sounds to the player's ship and the UFO.
-
Open your Assets/Sounds/Engines folder and preview the sounds. Decide which you want for the UFO and which you want for the Player Ship. I'm using warp engine engage_0 and enginehum
-
Open the Player prefab and add an Audio Source component. Select the AudioClip you've chosen.
-
Turn on Loop so it keeps playing. For the player ship, leave Spatial Blend at 2D since we're in the ship.
-
Repeat the above for the UFO prefab, but set the Spatial Blend to 3D so we can hear which direction the UFO is. Set the Volume Rolloff to Linear and the Max Distance to 100