12 Laser
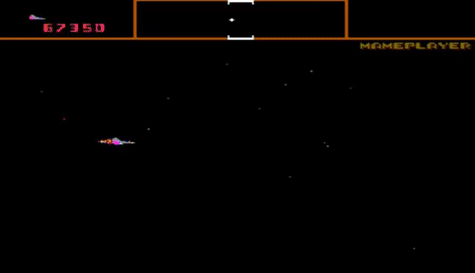
The laser effect was really cool on the original Defender arcade game. So I want to do it justice by making something cool in our version.
-
In your Hierarchy create a new Empty game object and rename it to Laser.
-
Drag this into your Assets/Prefabs folder to convert it to a prefab.
-
Change the Scale - Z of this object to 100. The scale z is going to be the length of the laser. We'll later change this in code to make it extend exactly long enough to hit things it's pointed at.
-
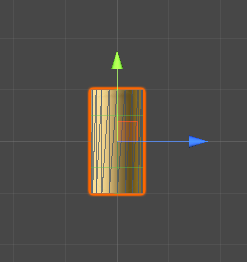
Add a Cylinder game object to the prefab. Note that the cylinder mesh has a diameter of 1m and a height of 2m.
-
Since we want to change the height later depending on how far the laser should go, it will make things easier on us if we set Scale - Y to 0.5
-
Set the cylinder's position to X=0, Y=0, Z=0.5. This will mean that the cylinder will have one end at the base of the prefab. When we stretch the prefab, the laser will only stretch in one direction.
-
Set the cylinder's Rotation X to 90 so that it's facing in the Z direction
-
In the Mesh Renderer set Light Probes to Off and Cast Shadows to Off
-
Remove the Capsule Collider. We'll be doing the collisions a different way.
We'll make a glowing material that changes color.
-
Create a Laser folder in Assets/Models.
-
In that folder create a new Material and name it Laser
-
Drag this material onto your prefab Laser/Cylinder object
-
On the material enable Emission and set the HDR to white with Intensity of about 3 to make it glow.
-
On the Laser prefab's Cylinder add a new Script component called LaserColor
-
This script is going to need these variables declared
 public float ColorChangeSpeed = 2f;
 public float Saturation = 1f;
 public float Luminance = 1f;
 public float Intensity = 5f;

 private Renderer LaserRenderer;
 private Material LaserMaterial;
-
In the Start() function set the renderer and material
     LaserRenderer = GetComponent<Renderer>();
     LaserMaterial = LaserRenderer.material;
-
In the Update() function calculate a new hue based on the time and the color change speed. Then use this combined with the Saturation, Luminance, and Intensity values to compute a new color for the laser's Emission Color
     float hue = (Time.time * ColorChangeSpeed) % 1f;
     Color laserColor = Color.HSVToRGB(hue, Saturation, Luminance, true);
     LaserMaterial.SetColor("_EmissionColor", laserColor * Intensity);
When a laser is created, it should quickly fade away. We'll do this with a script that decreases its width and then destroys it.
-
In the Laser prefab's Inspector add a new script called LaserLifespan
-
Add a public float variable for the number of seconds the laser will stay on screen, and a variable to keep track of how old the laser is.
public float LifeSpan = 0.3f;
private float Age = 0;
-
In the Update() function, add time to the age, and scale it down until it's time to kill it.
     Age += Time.deltaTime;
     if (Age >= LifeSpan)
     {
         Destroy(gameObject);
     } else
     {
         // Scale down the X, and Y, but keep the Z scale value the same
         float scale = 1 - (Age / LifeSpan);
         transform.localScale = new Vector3(scale, scale, transform.localScale.z);
     }
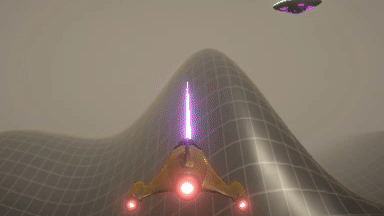
We want lasers to emit from the player ship's gun. In order to do this, we need a game object that indicates the position of the gun.
-
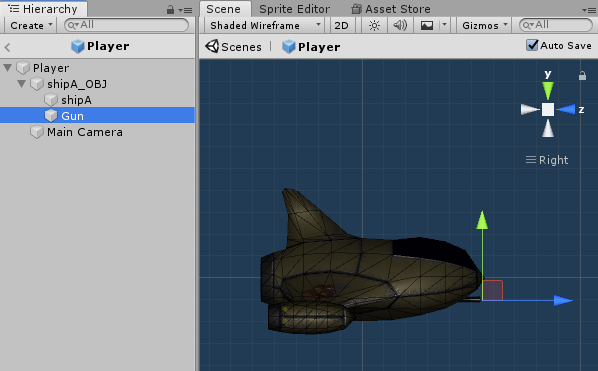
Open the Player prefab and rotate it to the Top view.
-
Create a new Empty game object and name it Gun. Drag this inside the shipA_OBJ model because we want it to move how the ship model moves.
-
Position the object so it's at the front of the ship.
-
Switch to the Right view and adjust the position to be at the end of the gun in the model
-
Add a Script component to the gun and name it PlayerShoot
-
In that script add a variable so we can wire up which prefab to use for lasers
public GameObject LaserPrefab;
-
In the Update() function, when the Space button is pressed, create a new laser.
     if (Input.GetKeyDown(KeyCode.Space))
     {
         // Create a new laser at the position and rotation of the gun
         Instantiate(LaserPrefab, transform.position, transform.rotation);
     }
-
Save the script, then back in the Unity editor select the correct Laser prefab.
Your Asset/Sounds/Weapons already has some sounds for you to choose from. But if you want the authentic original Defender arcade machine laser sound, you can right-click the link below and save it to your Assets/Sounds/Weapons folder.
If we wanted the sound to play for each laser blast completely, we could attach an audio source to the Laser prefab and set this to Play On Awake. But for mine, I want to be true to the arcade version and have one laser sound disappear when a second one starts. So I'll be adding the Audio Source to the gun.
-
In the Player prefab drill down to the Gun object and add an Audio Source component.
-
For the Audio Clip select the shooting sound you want from your Assets. I'm going to choose the LaserFire01 sound
-
Make sure Play On Awake is Not Checked
-
Set the Spatial Blend to 3D (1)
-
Set the Volume Rolloff to _Linear Rolloff
-
In the PlayerShoot script, add a new variable for the audio source
private AudioSource LaserSound;
-
Add code to the Start() function to get that component
LaserSound = GetComponent<AudioSource>();
-
Add code to the Update() function so when you instantiate a laser prefab, you also play the sound.
LaserSound.Play();