Timeline View
Timeline view is the most basic user interface where users can see the code edit history and interact with the history. To open the timeline view, click "Azurite -> Timeline View -> Open Timeline".

The resulting screen would look like below. The timeline visualization is shown at the bottom.

Each row in the timeline view corresponds with each source file being edited in the code editor. By default, the most recently edited file moves to the top row automatically; this enables quickly recognizing the most recently edited files by reading the file names from top to bottom.
You can also filter the files so that you can focus on the history of certain files. You can show a single file and hide all others, or show all the files that belong to the same Eclipse project by right-clicking the file name in the Timeline view.

If you have one or more hidden rows (or files), "Unhide All" button will appear at the bottom left hand side.

Whenever an edit operation (insertion, deletion, or replacement) is performed in the code editor, a rectangle representing that edit is added at the right end of the timeline. Each rectangle belongs to one of the rows, indicating where the edit was performed.
Insert, Delete, and Replace operations are color-coded as green, red, and blue, respectively.
-
: Insertions
-
: Deletions
-
: Replacements
-
: Insertions resulted from external file changes
-
: Deletions resulted from external file changes
 : Insertions
 : Deletions
 : Replacements
 : Insertions resulted from external file changes
 : Deletions resulted from external file changes
The external changes can be added in various situations. For example, if you replace a source file to another version using a version control system (e.g., Subversion, Git), Azurite will calculate the diff's between the last known file state and the new file state, and display them as external changes in the Timeline View.
The horizontal location and width of a rectangle represents the time and duration of the edit performed. Similarly, the vertical location and height of a rectangle within the row represents the relative location of the edit within the file. There is a minimum width and height of a rectangle so that users can easily identify or select even small edits.
More detailed information of each edit is shown as a tooltip which is shown on mouse hover.
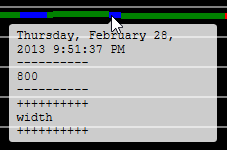
In this screenshot, the blue rectangle corresponds to an edit performed at 9:51pm, 02/28/2013. This edit replaced a constant number "800" with a variable named "width".
You can scroll or zoom the timeline view arbitrarily. Scrolling can be done by using either the scrollbars presented in the timeline, or the mouse shortcuts.
| Action | Shortcut |
|---|---|
| Horizontal Scrolling | Mouse Wheel |
| Vertical Scrolling | Shift + Mouse Wheel |
| Horizontal Zooming | Ctrl + Mouse Wheel |
| Vertical Zooming | Ctrl + Shift + Mouse Wheel |
A vertical line at the right edge of the current session indicates now, which is drawn in yellow to be distinguishable.
One of the common ways of backtracking is to go back to a certain point in the past when a specific event happened. As Kent Beck says in his book "Test-Driven Development: By Example":
it would be great if the programming environment helped me with this, working as a checkpoint for the code every time all of the tests run.
To support this, Azurite detects significant coding events and displays them in the Timeline View. The following table summarizes the supported coding events.
| Icon | Coding Event |
|---|---|
| Passed JUnit test | |
| Failed JUnit test | |
| Application run | |
| File save (disabled by default) | |
| Version control commands such as Commit | |
| User-defined tag |
An event is displayed on the timeline as a vertical line with an icon representing that event at the bottom. Further event types can be trivially added in the future.
You can left-click on any event icon to move the time marker to that location. Right-clicking any of the icons brings up a context menu with convenient commands such as Undo All Files To This Point.
You can also tag the current point in time, so that it can be easily referred back to when needed, which was one of the most requested features from our users. A tag works exactly same as the other events, and shows a tag-shaped icon (![]() ). You can give a name to each tag, which is shown on mouse hover, or leave it anonymous.
). You can give a name to each tag, which is shown on mouse hover, or leave it anonymous.
To tag the current point, you should use the "Describe what you are doing" menu.

Note that unlike the regular undo stack, the edit history contains all the edits that have ever been performed, in chronological order. Any undo operations are also added to the end of the timeline, just like any other operation, and the operation which was undone is skill kept in the view. This makes it possible to see all previous operations and states of the files.
Timeline view supports two layout options: real-time mode and compact mode (default). You can switch between the two modes by clicking the "Compact Mode" button from the Azurite menu, or the timeline view toolbar.


In real-time mode, the rectangles are horizontally located proportionally to the actual time that they were made. However, there is a significant problem with this approach. There are many gaps between the changes because developers use only about 20% of their time actually editing code (link to the research), which makes it difficult to navigate through the edit history in the timeline.
To resolve this problem, Azurite provides compact mode, which is used by default. In compact mode, all the horizontal gaps between rectangles are removed so that times when you are not editing are not displayed, and all the edits are shown contiguously.
We kept the real-time mode as an option because it can be useful in some situations. For instance, you could better reconstruct your previous working context by seeing the size of the gaps and grouping the edits temporally. You can switch between the two modes at any time.