Main analytics user: teacher

- If you do not have an account, sign up in the analytics front-end to create a teacher account. For that teachers have to provide a username, email and password, and select Teacher as the type account. Finally, teachers have to click on “Create My Account” to create the account (see Figure 1).

Figure 1.: Analytics System Sign Up page.
-
After creating the teacher account, teachers can login in the analytics front-end.
-
After login in the Analytics System, teachers can access the teacher main view. In this view, teachers have an overview of their activities, public games and their classes (see Figure 2). On the left bottom part of this view, teachers can see the list of public games available for them (that have been published by developers). From this view, teachers can create activities and classes:
-
To create a new activity, teachers can use the Create a new Activity form on the top of the page. To create an activity, teachers have to provide an activity name, the game they want to use in the activity (one from the game of public games) and a class from the list of previously created classes by the teacher. Then teachers have to click on “New activity”. The activity will then appear on the list of created activities below.
-
To create a new class, teachers can use the Create a new Class form on the right bottom part. To create a class, teachers have to provide a class name and click on the “New class” button. The class will then appear on the list of created classes below. See how to set up a class for further information.
-
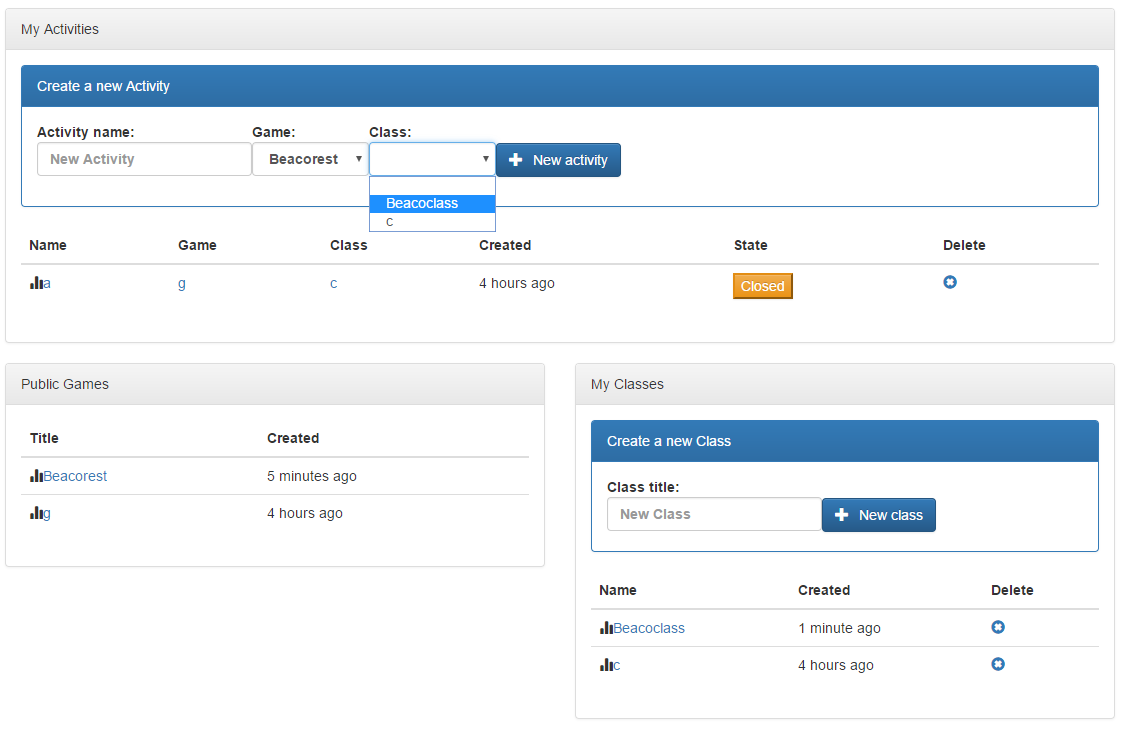
Figure 2.: Analytics System main page for teachers. On this page, teachers can access the list of available games, and create classes and activities.
As seen on Figure 2, the initial state of activities is “Closed”. To start collecting information from students, teachers have to click on the state that will change to “Opened”.
- Clicking on a class from the teacher main view, teachers can access the class main page (see Figure 3). From this page, if required, LTI can be configured by typing the secret (see top right part) and clicking on “Configure Lti”. Also, if more teachers are involved in the same class, they can be added from this view (see top bottom part) by typing their username and clicking on “+”.
- From this page, activities can also be created for this class providing an activity name and the game teachers want to use in the activity (one from the game of public games). The activity is created after clicking on “New activity”. The activity will then appear on the list of created activities below.
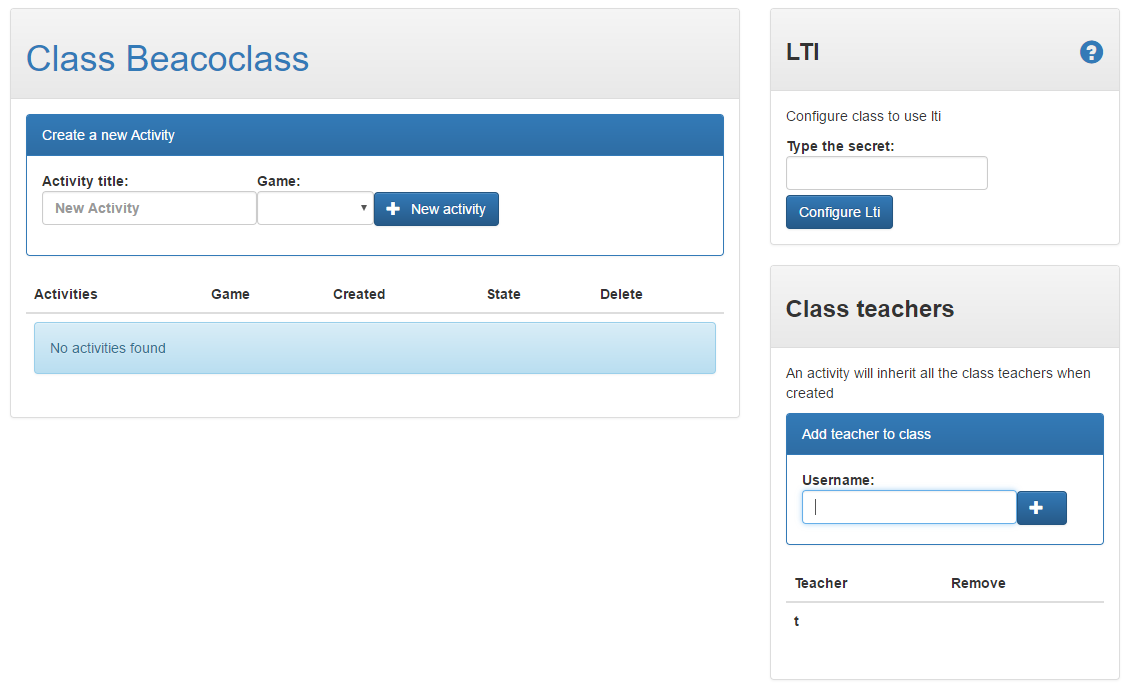
Figure 3.: Analytics System class main page. On this page, activities can be created, teachers can be added to a class and LTI can be configured.
-
Clicking on an activity (either from the teacher main page or from the class main page), teachers can access the activity main page (see Figures 4, 5 and 6). This page has three tabs:
- Information tab (see Figure 4): this tab provides information about the game used in the activity. It includes the link to the game (if it has been added by developers) and the tracking code.
- Students tab (see Figure 5): teachers can allow (or disallow, as they are by default) anonymous users by ticking on “Allow anonymous users”. A complete class may be added by uploading a class file and clicking on “Add class”. Also, specific students can be added to the activity by providing the username of the student and clicking on “Add student”.
-
Real-time tab (see Figure 6): on this tab, teachers receive the information obtained from the students data, collected at real-time during the activity.
- On the top part of the page, teachers can see the number of Alerts and Warnings triggered in the activity for each student. Clicking on a specific student provides details of the alerts and warnings that student has triggered.
- On the bottom part of the page, teachers can see the default set of teacher visualizations.
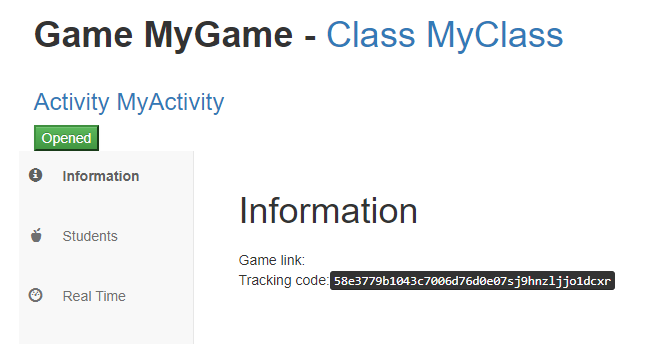
Figure 4.: Analytics System activity main page. On the information tab of the activity, teachers can find information about the game including tracking code.
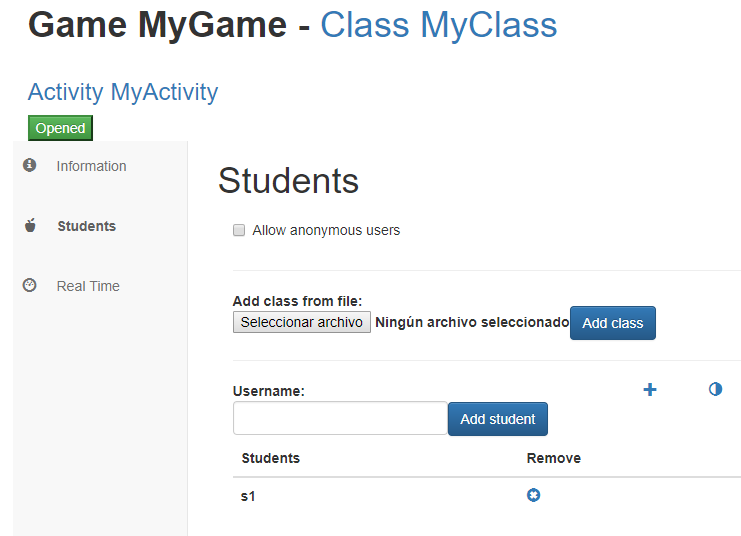
Figure 5.: Analytics System activity main page. On the students tab of the activity, teachers can allow anonymous users or include students or a complete class.
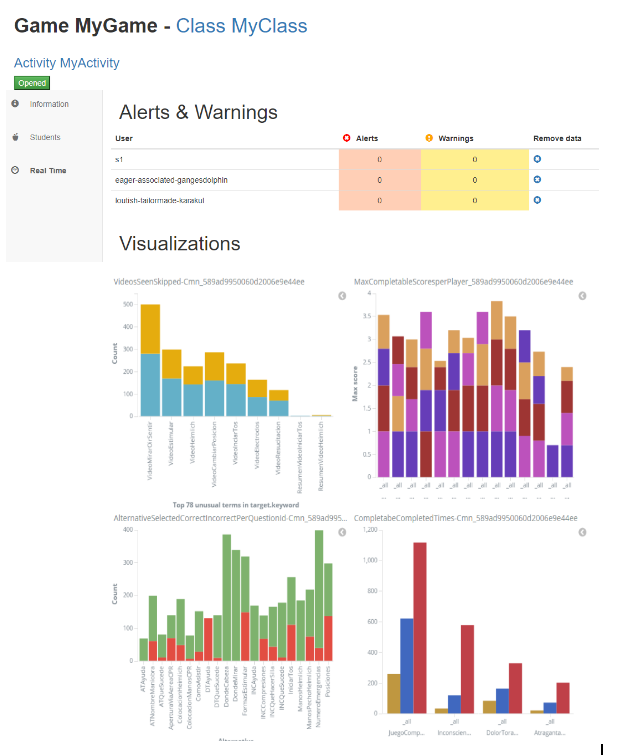
Figure 6.: Analytics System activity main page. On the real time tab of the activity, teachers can see alerts, warnings and visualizations displayed with the information tracked from students.
After creating a game, log in as teacher, and you create a class.
- For creating a class you have to make a post with the class name as body
{“name”: “activityname”, “gameId”: “ID”, “versionId”: “ID”, “classId”: “ID”}to https://analytics.beaconing.eu/api/proxy/gleaner/activities/ - Once you have the activity, you have to start the activity sending a post request to https://analytics.beaconing.eu/api/proxy/gleaner/activities/:activityId/:event. Here event can be start or end.