- Short Description
- Pitch Video
- The Architecture
- Long Description
- Project Roadmap
- Getting Started
- Trial Run
- Built with
Manually assessing photos of onsite information before pushing out notifications to CFRs can be faster.
Speed up photo classification and assessment, pushing out notifications simultaneously. Visual Recognition of the photos will allow quicker assessment, resulting in simultaneous notification of SCDF personnel, CFRs and non-CFRs, bridging the time lag of manually assessing and pushing out notifications thereafter.
Visual Recognition Tool to reduce assessment time and to reduce burden on emergency hotline.


- User reports a fire with a picture using an app
- App interface receives image and queries Google Maps for geolocation
- Google Maps finds geolocation of user and replies to app interface
- App interface receives geolocation and calls IBM Watson Visual Recognition service
- Visual Recognition service uses machine learning to classify fire immage
- Visual Recognition queries and classify using available fire images
- Geolocation of user and classification of fire is sent to SCDF for appropriate response
- App interface receives completion of task from Visual Recognition and broadcast message to nearby civilians and user
- User receives appropriate notification from app interface informing of completion of request, and evacuation message
- Nearby civilians receives appropriate notification from app interface
More details regarding our application

Visit this link to create your own image classification bucket.
git clone the repo and cd into it by running the following command:
git clone https://github.com/cloud-annotations/classification-ios.git
cd classification-iosCopy the model_ios directory generated from the classification walkthrough and paste it into the classification-ios/Core ML Classification folder of this repo.
In order to develop for iOS we need to first install the latest version of Xcode, which can be found on the Mac App Store
Launch Xcode and choose Open another project...

Then in the file selector, choose classification-ios.
Now we’re ready to test! First we’ll make sure the app builds on our computer, if all goes well, the simulator will open and the app will display.
To run in the simulator, select an iOS device from the dropdown and click run.

Since the simulator does not have access to a camera, and the app relies on the camera to test the classifier, we should also run it on a real device.
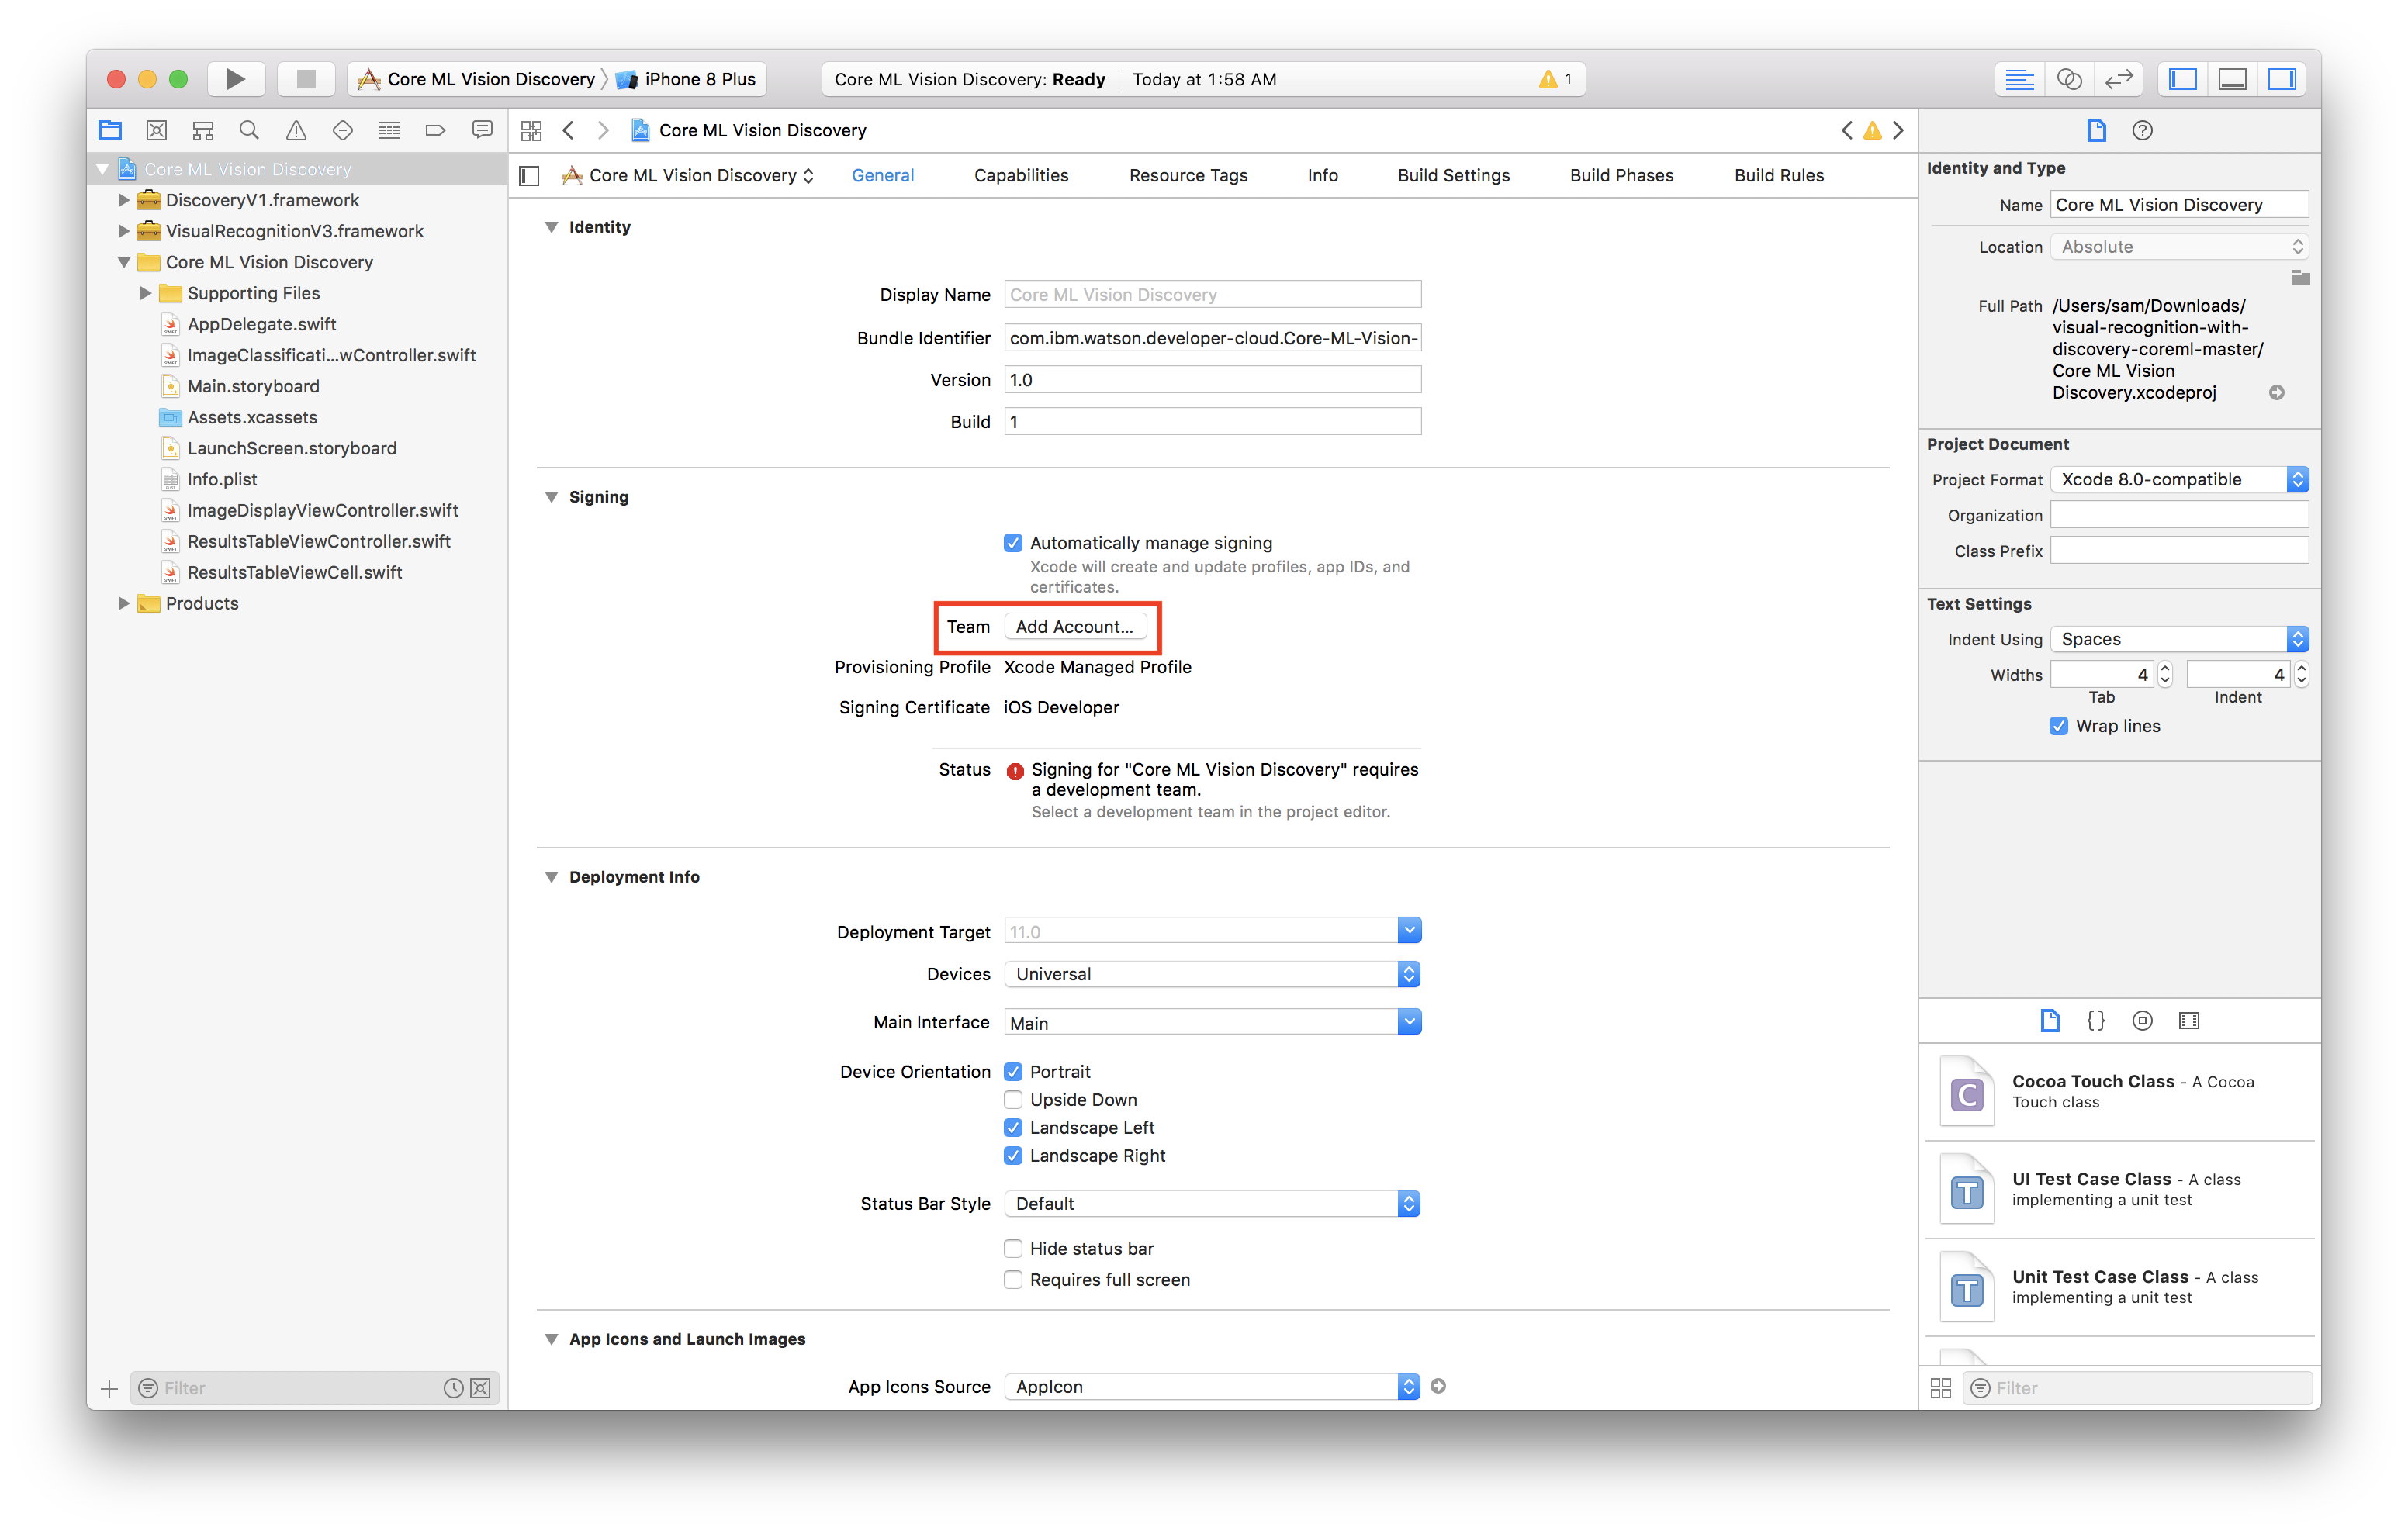
- Select the project editor (The name of the project with a blue icon)
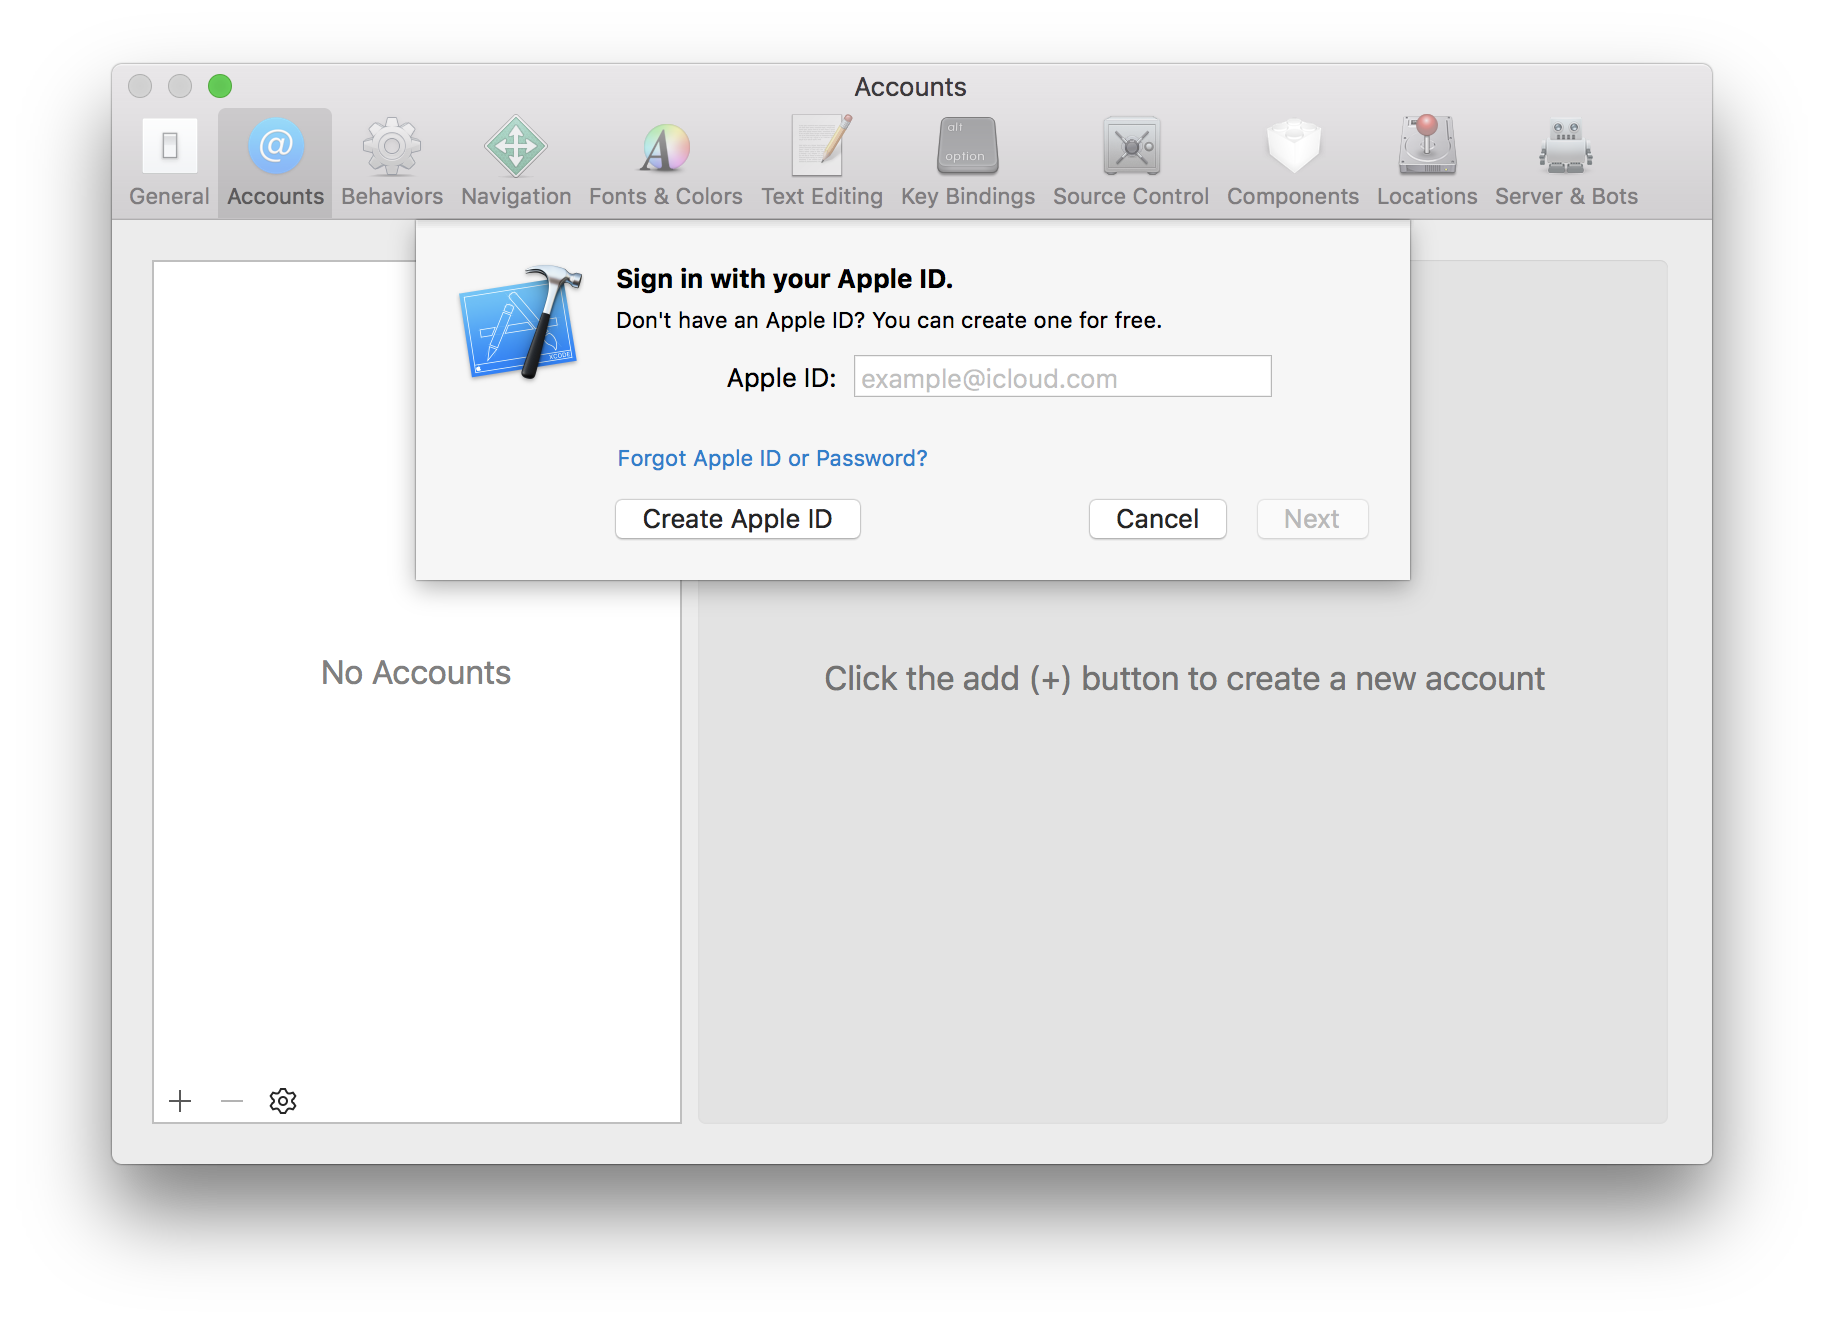
- Under the Signing section, click Add Account
- Login with your Apple ID and password
- You should see a new personal team created
- Close the preferences window
Now we have to create a certificate to sign our app with
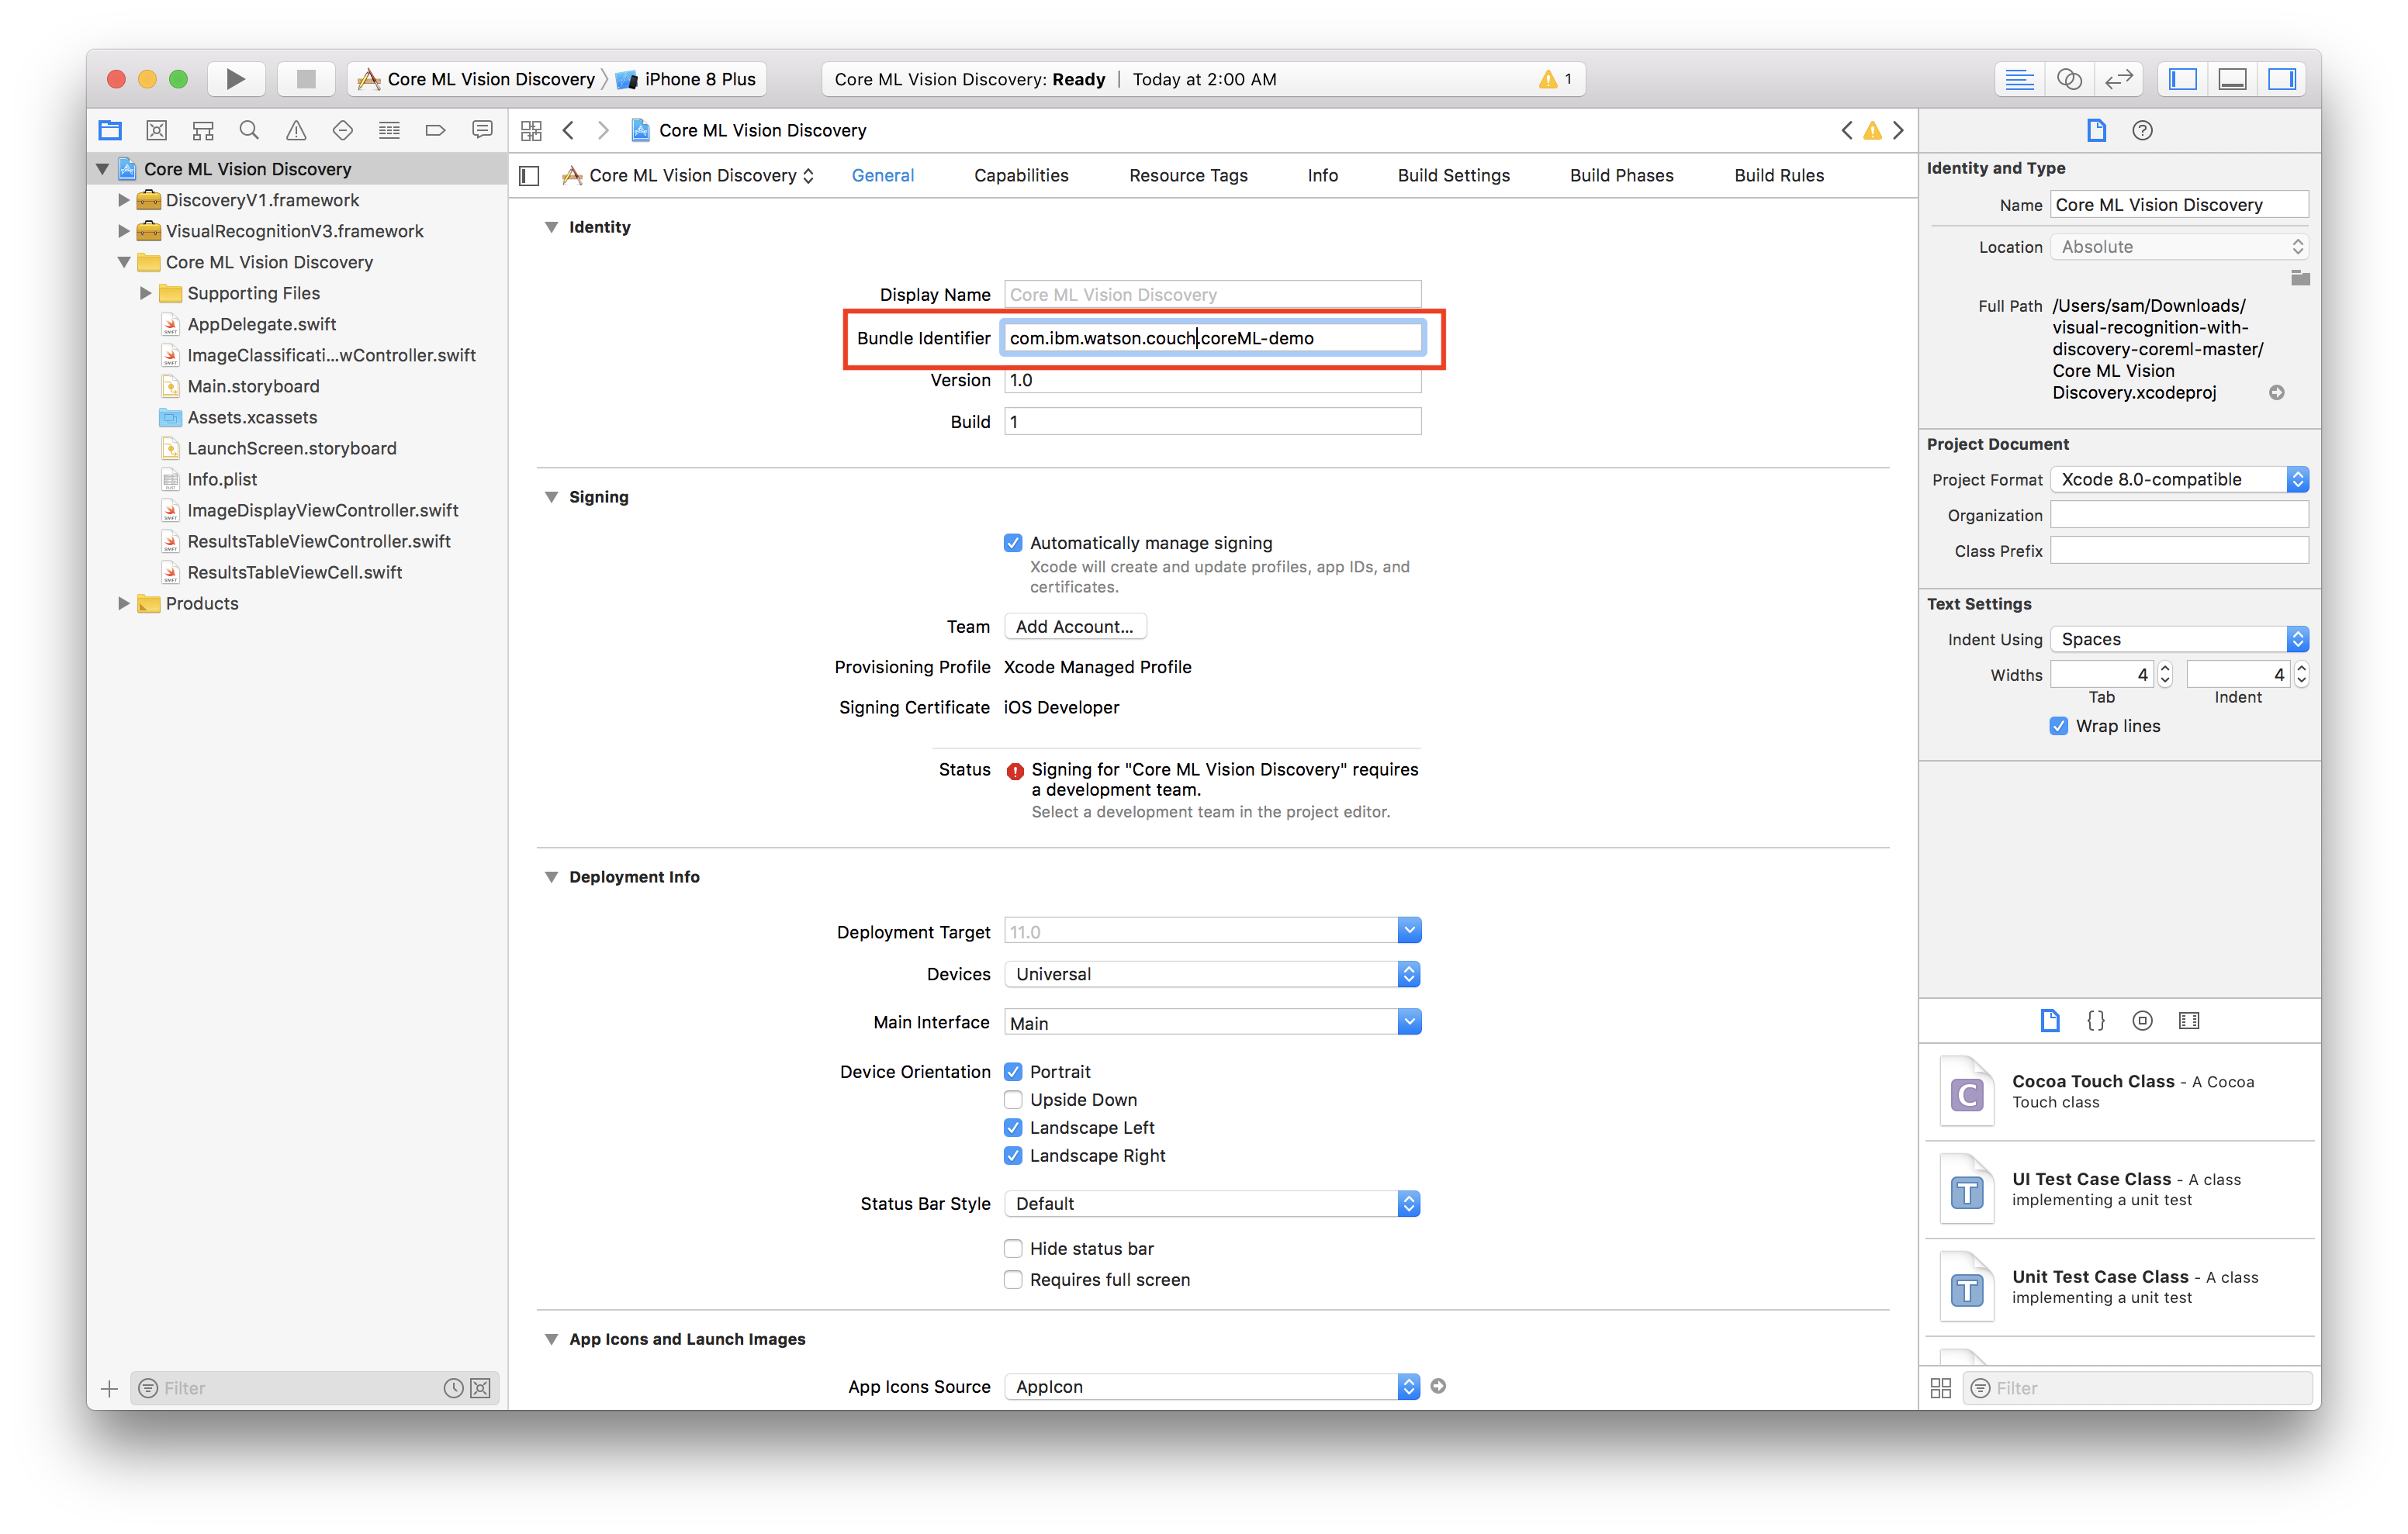
- Select General
- Change the bundle identifier to
com.<YOUR_LAST_NAME>.Core-ML-Vision - Select the personal team that was just created from the Team dropdown
- Plug in your iOS device
- Select your device from the device menu to the right of the build and run icon
- Click build and run
- On your device, you should see the app appear as an installed appear
- When you try to run the app the first time, it will prompt you to approve the developer
- In your iOS settings navigate to General > Device Management
- Tap your email, tap trust
Now you're ready to run the app!
The classification-ios file in this repository contains the trained model that we did. You may download and try to run it on your Xcode platform to see how our app works.
- IBM Cloud Annotations - Building an image classification instance
- IBM Cloud - Create a machine learning instance
- IBM Watson Visual Recognition - To integrate the visual recognition function into the app
- Xcode - To run and test the application on the simulator interface