a.Launch an EC2 instance and select the appropriate instance type(t2.micro).
b.Make sure the security group for your EC2 instance has an inbound rule for TCP port 8080, which is the default port that Jenkins uses.
 c.Install Jenkins: Run the following commands to install Jenkins on the EC2 instance:
sudo yum update -y
sudo systemctl reboot
sudo amazon-linux-extras install java-openjdk11(Hit the y key in your keyboard when asked before installation commences)
Add Jenkins repository to the ec2:
sudo tee /etc/yum.repos.d/jenkins.repo<<EOF
[jenkins]
name=Jenkins
baseurl=http://pkg.jenkins.io/redhat
gpgcheck=0
EOF
Import GPG repository key.
sudo rpm --import https://jenkins-ci.org/redhat/jenkins-ci.org.key
Update the list of repositories to confirm it is working.
$ sudo yum repolist
Loaded plugins: langpacks, priorities, update-motd
jenkins                                                                                                                                    | 2.9 kB  00:00:00
jenkins/primary_db                                                                                                                         | 161 kB  00:00:00
repo id                                                                     repo name                                                                       status
amzn2-core/2/x86_64                                                         Amazon Linux 2 core repository                                                  22,852
amzn2extra-docker/2/x86_64                                                  Amazon Extras repo for docker                                                       36
amzn2extra-java-openjdk11/2/x86_64                                          Amazon Extras repo for java-openjdk11                                               64
jenkins
Install jenkins server on ec2
sudo yum install jenkins
Start and enable the jenkins service
sudo systemctl start jenkins
sudo systemctl enable jenkins
Check the jenkins service status:
systemctl status jenkins

a. Web console can be accessed on: http://44.202.218.107:8080 b. the default login password is store in this file:
$ sudo cat /var/lib/jenkins/secrets/initialAdminPassword
cf7c4824450c442cb9c8add2b03229ad
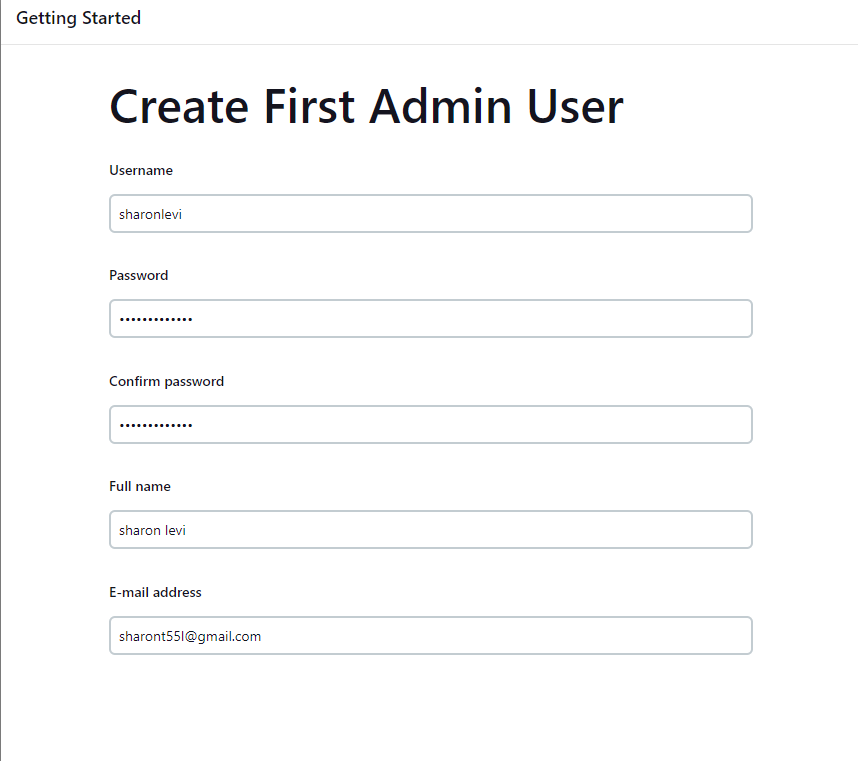
c. Copy the password and paste it in the jenkins setup wizard page d. Choose "install suggested plugins" option. e. Create first administartor user:
 f. Create jenkins Url(in my case i route it to the int college url)

a. install docker on the jenkins server:
sudo yum install docker
b. Enable docker service at AMI boot time:
sudo systemctl enable docker.service
c. Start the Docker service
sudo systemctl start docker.service
d. Check the docker service status:
sudo systemctl status docker.service
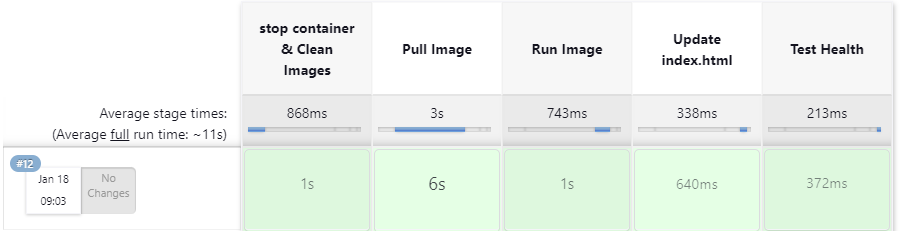
a. From the main menu select "New" b. Enter an item name and choose the "Pipeline" option c. Write the following script in the pipeline section(in the bottom of the page)
pipeline {
    agent any
    stages {
        stage('stop container & Clean Images') {
            steps {
                script {
                    sh 'docker stop nginx'
	                sh 'docker rm nginx'
	                sh 'docker rmi nginx'
                }
            }
        }
        stage('Pull Image') {
            steps {
                script {
                    docker.image('nginx').pull()
                }
            }
        }
        stage('Run Image') {
            steps {
                script {
                    sh 'docker run -d --name nginx -p 8081:80 -d --restart unless-stopped nginx'
                }
            }
        }
        stage('Update index.html') {
            steps {
                script {
                    sh 'docker exec $(docker ps -q) bash -c "echo The current time in UTC is: $(date -u) > /usr/share/nginx/html/index.html"'
                }
            }
        }
        stage('Test Health') {
            steps {
                script {
                    sh 'curl -k -X GET http://localhost:8081'
                }
            }
        }

    }
}
d. Click "Save"
e. Select "Build Now" from the left menu
f. Make sure the build run successfully(each step will turn to green color)