We have prepared a Zookeeper cluster based on Docker and completed most of the configuration and preparation work within the Docker containers. Users can quickly experience FaultFuzz through this cluster.
Users can install the Zookeeper cluster by the document INSTALL.md. Note that the server used to run FaultFuzz should satisfy the requirements in REQUIREMENTS.md.
git clone https://github.com/fwhdzh/FaultFuzz.git

cd faultfuzz
mvn clean install

cd faultfuzz-backend
mvn spring-boot:run
User can update faultfuzz-backend/src/main/resources/application.properties to specify the port that the server runs on.
We have provided deploy FaultFuzz frontend as a website on AppSmith cloud.Users can go to the “Check connection” web page, enter the address of the web server, and click the "Check connection" button to confirm that the backend is running and the frontend can uccessfully establishes a connection with the backend.

Then the user can access the test server through the frontend of FaultFuzz. After inputting the address of the test server, the user can click the "check connection" button to confirm that the backend has been started and the frontend can correctly connect to the backend.
We provide a
Configuration web page for
users to specify the configurations used to test a target distributed
system. The configurations can be divided into four categories, i.e.,
Workloads & bug checker, Faults & fault injection points,
Observer and Test controlle.
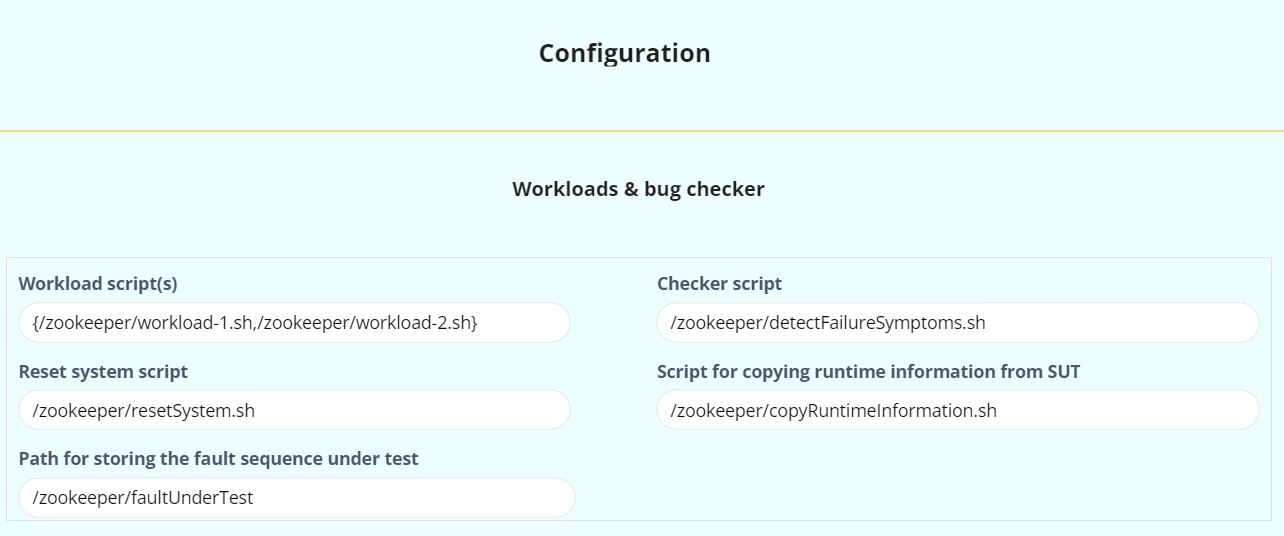
We offer a Use Pre-defined Zookeeper Configuration button on our website, which can fill the majority of the Zookeeper's configuration options onto this page. The left configuration options are the locations of certain scripts and folders. All the required scripts have been included in our artifact, which users can download and specify their paths of them on this page.
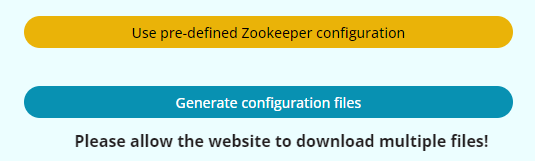
After entering the configuration information, users can click the
Generate configuration files button to generate and download two
configuration files, named FaultFuzz-backend-configuration.properties and FaultFuzz-SUT-configuration.sh.
The file FaultFuzz-backend-configuration.properties should be copied to the backend of FaultFuzz. The FaultFuzz-ctrl-0.0.1-SNAPSHOT.jar will use FaultFuzz-backend-configuration.properties as an input argument.
The FaultFuzz-SUT-configuration.sh should be copied to each node in SUT. In our Zookeeper cluster, we have prepared the environment already.
So the only thing the users need to do is to copy FaultFuzz-SUT-configuration.sh to /SUT-configuration folder of each docker container.
After finishing configuration, the user can go to the Test and result
page, enter the path of FaultFuzz test controller jar file (FaultFuzz-ctrl-0.0.1-SNAPSHOT.jar) and the path of the configuration file (FaultFuzz-backend-configuration.properties). When the user clicks the Start test button, FaultFuzz will automatically perform fault injection testing for SUT. Users can also pause, resume or stop the test by clicking the corresponding buttons.
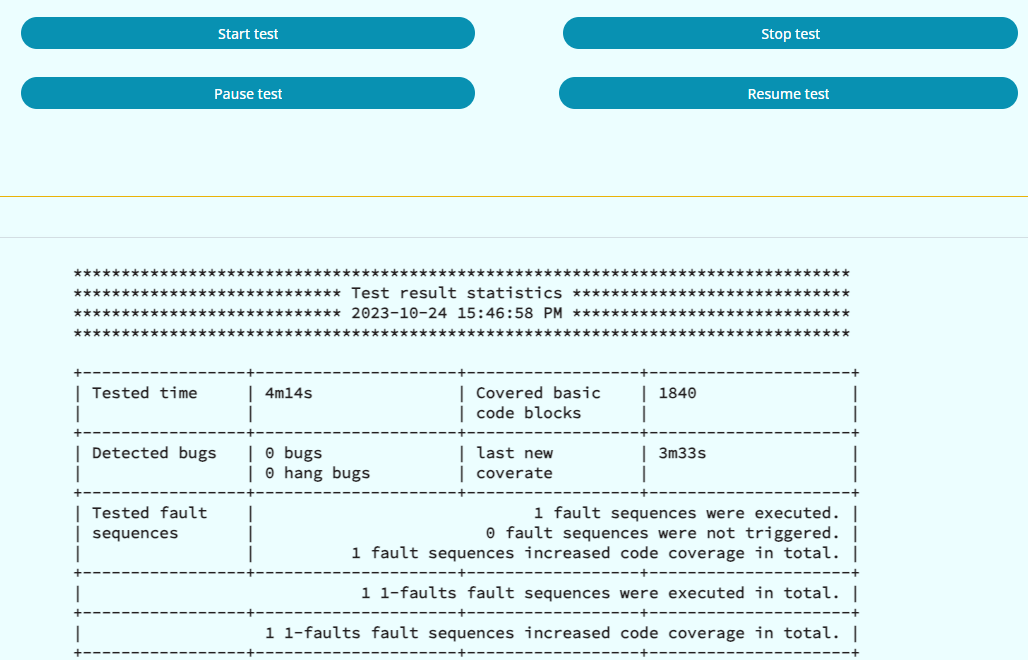
FaultFuzz displays quantitative statistics of the runtime test results at the bottom of the web page, including the elapsed testing time, the total number of detected bugs, the total number of tested fault sequences, the total number of covered basic code blocks and so on. If the user wants to further observe one specific bug, she can check the detailed bug reports.