| timezone | UTC+8 |
|---|
GitHub ID: Eeeeye
Telegram: @Eeeeye
大三
项目核心是将 Telegram (前端入口)、Qwen-VL (视觉中枢) 与 ZetaChain (支付结算) 串联。
| 模块 (Module) | 技术栈 (Tech Stack) | 核心任务 (Key Tasks) | 交付标准 (Deliverable) | | 交互接口 (Interface) | Telegram Bot API(Python/Node.js) | 1. 搭建 Bot 框架,处理用户上传的图片/截图。2. 实现群组聊天监听与私聊交互逻辑。3. 消息反馈优化(处理中、支付成功通知)。 | 一个能响应 /start 和接收图片的 TG Bot | | AI 视觉中枢 (AI Agent) | Qwen-VL + Function Calling | 1. 部署/调用 Qwen-VL,识别图中文字(OCR)与意图。2. 提取关键信息:收款地址 (0x..)、金额、币种。3. 编写 Tool:将提取的信息转化为 ZetaChain 交易参数。 | 识别准确率 > 90% 的解析脚本 | | 全链支付 (Payment) | ZetaChain ZRC-20 | 1. 修改 value-transfer 示例合约,适配 Agent 调用。2. 确保能处理“用 BTC 支付 ETH 地址”的逻辑(ZRC-20 Swap)。3. 部署至 Athens 测试网。 | 合约地址 + 能够跨链转账的测试脚本 | | 统筹与演示 (PM & Demo) | MVP Design | 1. 设计“截图 -> 识别 -> 支付”的标准流程。2. 准备测试素材(带有二维码或地址的推文截图)。3. 录制手机端操作视频。 | 演示视频 + Deck |
-
Day 1:打通视觉与合约 (Back-end Logic)
-
上午:跑通 Qwen-VL API。输入一张带有 ETH 地址的截图,输出 JSON:
{"address": "0x...", "chain": "ETH", "intent": "payment"}。 -
下午:部署 ZetaChain 基础转账合约。确保能通过代码触发 ZRC-20 转账。
-
晚上:联调核心链路。脚本读取图片 -> 解析地址 -> 自动发起一笔测试网交易。
-
-
Day 2:接入 Telegram 交互 (Frontend Integration)
-
上午:创建 Telegram Bot,实现“接收图片”并转发给后台 AI 的功能。
-
下午:加入“确认支付”步骤。AI 解析完不要直接转账,而是让 Bot 返回一个按钮:“识别到向 [地址] 支付 [金额],是否确认?”
-
晚上:优化体验。增加“查询中...”的状态提示,防止用户以为卡死了。
-
-
Day 3:打磨与演示录制 (Polishing)
-
上午:准备 3 个典型的测试 Case(例如:一张捐款海报、一条带地址的推文、一个 NFT 详情页)。
-
下午:录制 Demo。推荐使用手机录屏,展示 TG Bot 的原生移动端体验,这非常加分。
-
晚上:剪辑视频,在视频关键帧标注“Qwen-VL 识别中”和“ZetaChain 结算中”。
-
项目名称: ZetaLens (全链识图支付助手)
演示场景: 手机端 Telegram
预计时长: 2 分钟
[0:00-0:30] 痛点与开场 (Hook)
(画面:用户浏览 Twitter 或 Discord,看到一个很长的钱包地址,试图复制粘贴却很难操作)
“评委们好。在移动端 Web3 时代,最反人类的体验就是——我看到一个很棒的项目或一张 NFT,想打赏或购买,却要在手机上长按复制地址、切钱包、切网络、算 Gas。
今天,我们带来了 ZetaLens。它是一个基于 Telegram 的全链识图支付助手。看见,即支付。”
[0:30-1:30] 核心流程演示 (The Magic)
-
Step 1: 视觉识别 (Qwen-VL 发力点)
(画面:用户直接把一张带有捐赠地址的海报截图,转发给 ZetaLens Bot)
“演示开始。我在推特上看到了一个公益募捐的海报。我不需要打字,直接把截图发给 ZetaLens。
这里是 Qwen-VL 的发力点。 它拥有强大的多模态能力,不仅读出了海报里的文字,还精准提取了其中的 ETH 钱包地址,并识别出我想‘捐赠’的意图。”
-
Step 2: 智能询价与确认
(画面:Bot 回复:“识别到 ETH 地址 0x...,建议捐赠 0.01 ETH,当前 Gas 极低。是否确认?”)
“Agent 自动帮我查询了链上状态,并生成了一个简单的确认卡片。”
-
Step 3: 全链支付 (ZetaChain 发力点)
(画面:用户点击‘用 BTC 支付’按钮 -> 弹出成功通知)
“注意,我的钱包里只有比特币测试币。但我点击确认后,这里是 ZetaChain 的发力点。
通过 ZRC-20 协议,合约在底层自动将我的 BTC 转换并结算到了目标的 ETH 地址上。
整个过程,我没有离开过 Telegram,也没有处理过任何私钥。”
[1:30-2:00] 总结 (Closing)
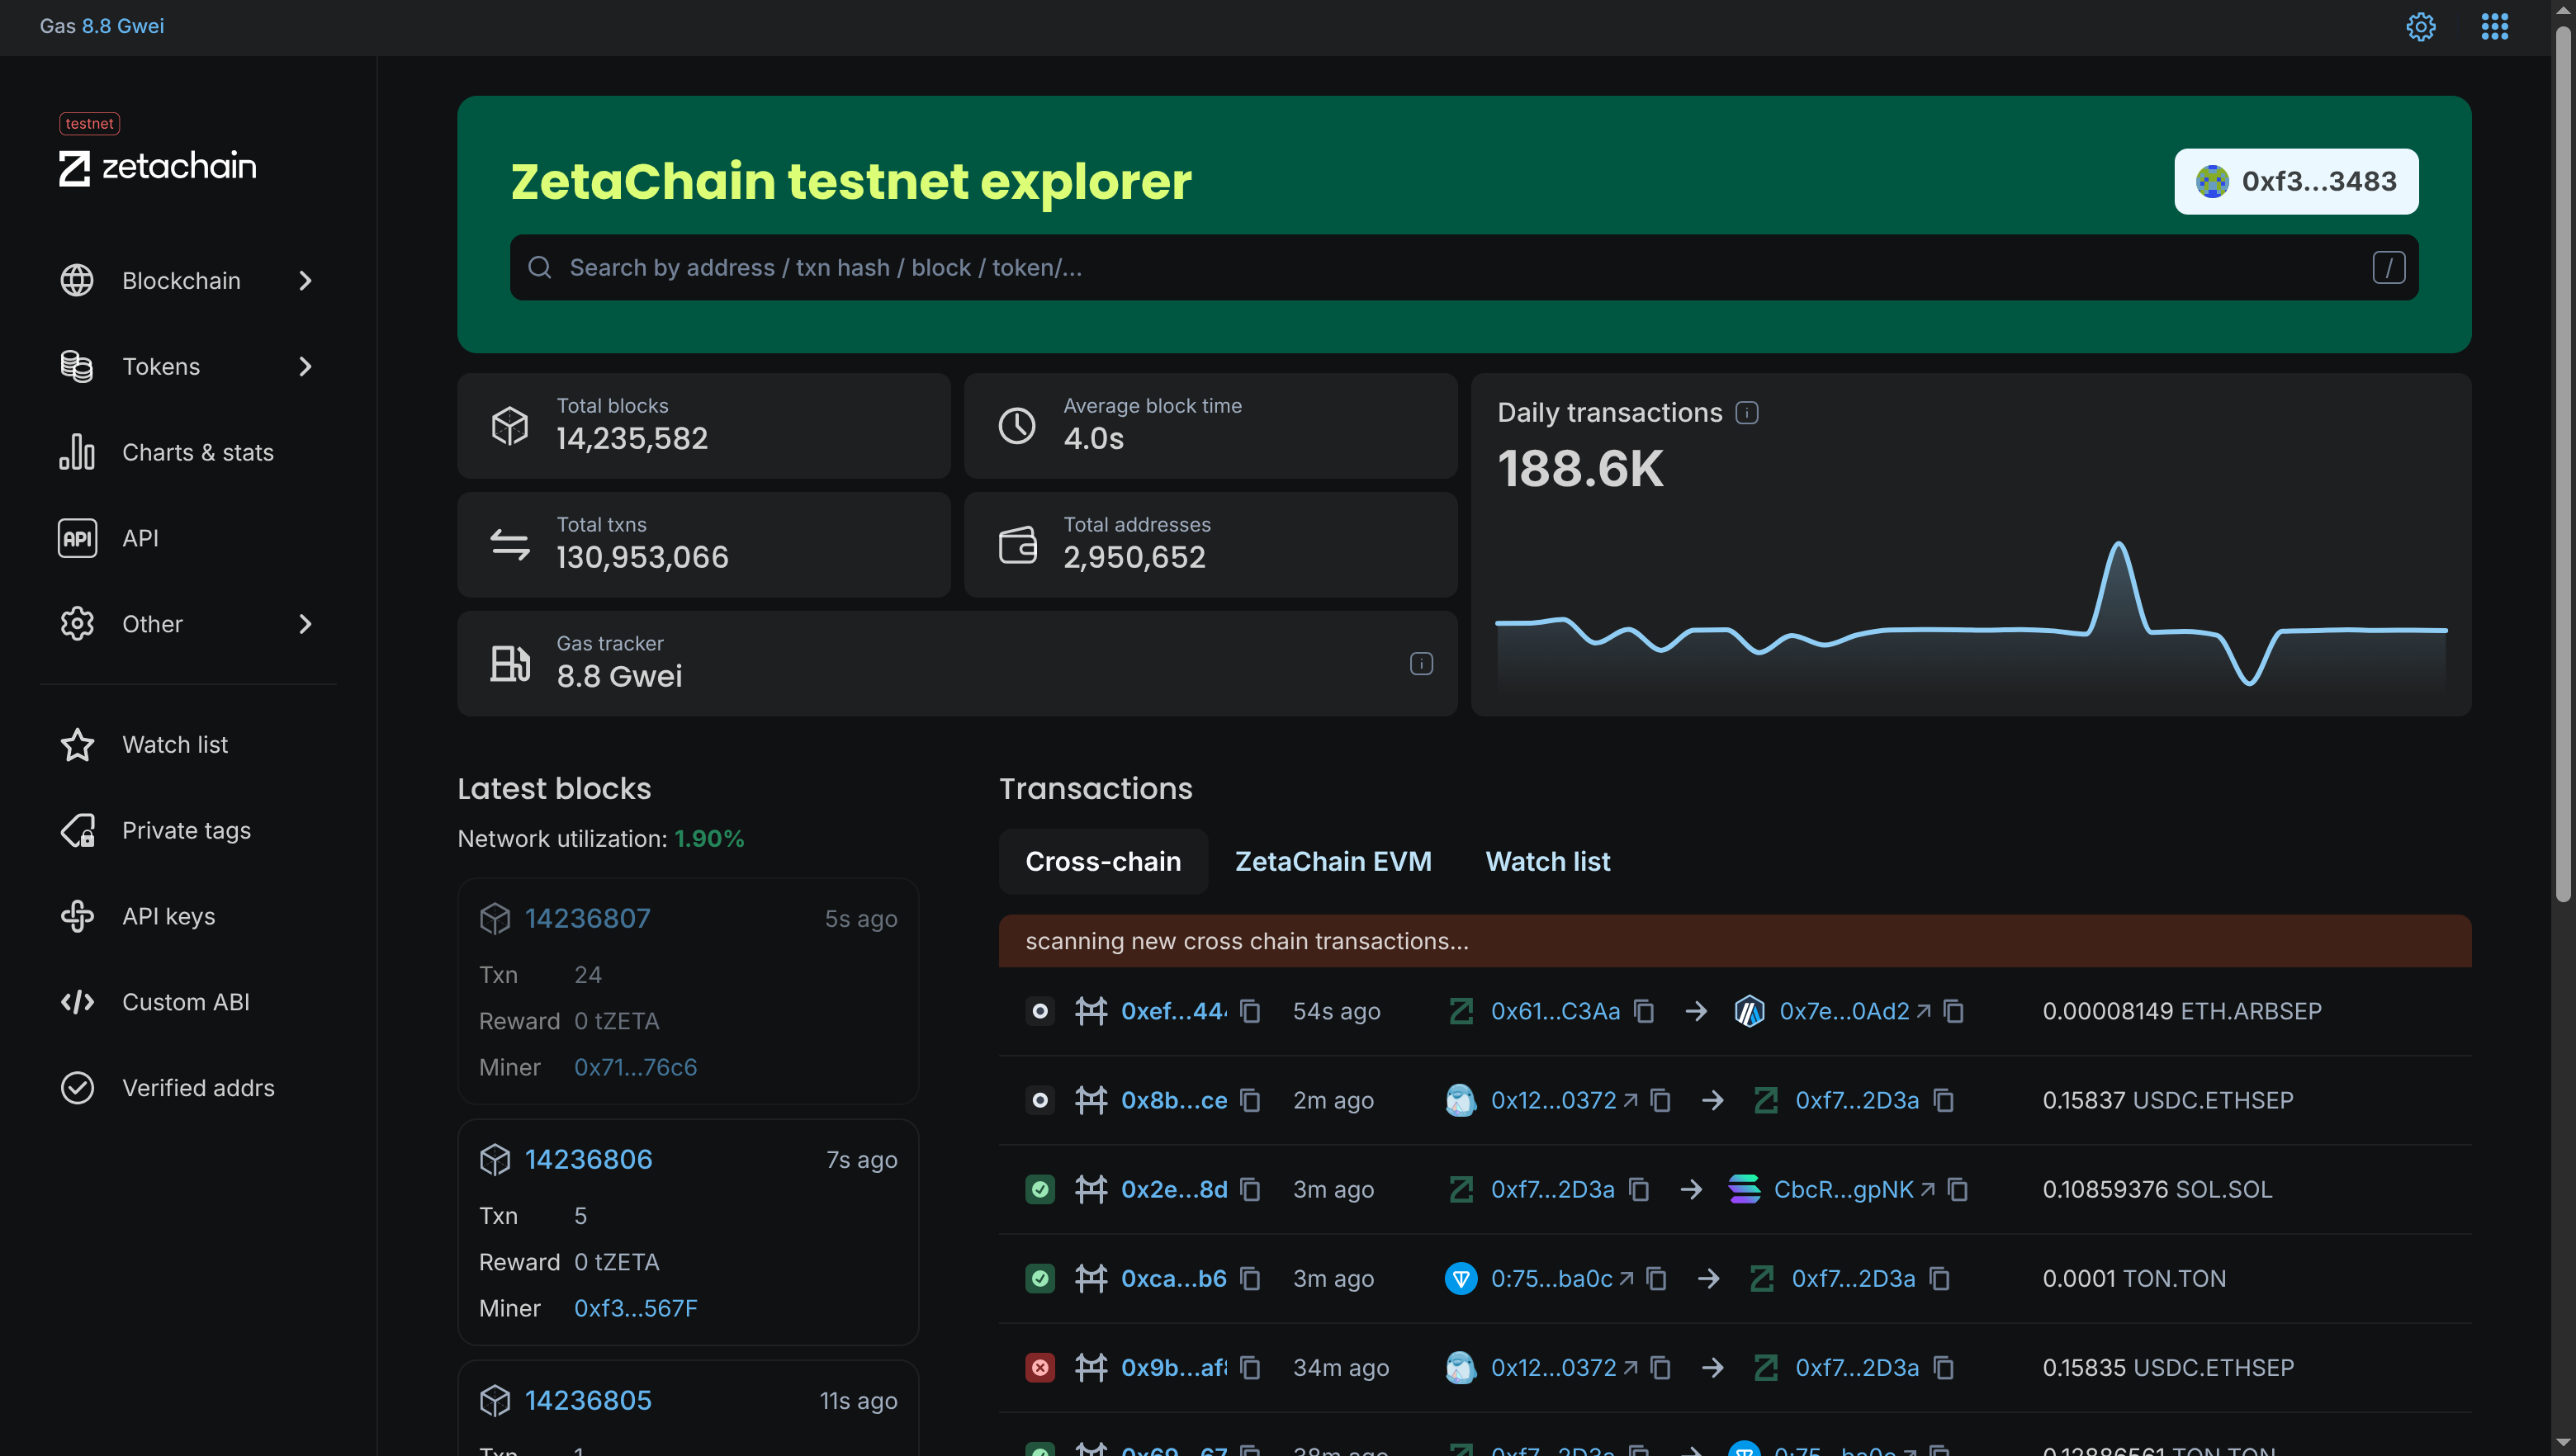
(画面:展示 Transaction Hash 浏览器界面,证明交易真实发生)
“ZetaLens 让 Web3 的支付体验像发微信红包一样简单。
Qwen 帮我们‘看懂’世界;
ZetaChain 帮我们‘连接’价值。
谢谢大家。”
“Universal Web3 Copilot”
核心理念: 这是一个浏览器插件或 Telegram Bot,AI 负责读懂网页/聊天内容,ZetaChain 负责打赏或支付。
**项目名称:** ZetaLens (全链识图支付助手)
* 目标用户 / 场景:
* Web3 新手或创作者经济参与者。
* 场景:用户在推特上看到一个很棒的 NFT 图片或文章,截图发给 Bot,说“这图不错,查查价格,我想买/打赏作者”。
* 关键功能 (MVP):
* 多模态识别 (Multimodal): 利用 Qwen-VL (Vision Language) 识别用户上传的图片内容或合约地址。
* 智能询价: Agent 调用工具查询该资产在 ZetaChain 上的价格。
* 一键支付: 用户确认后,Agent 构建交易,通过 ZetaChain 向目标地址发送代币(支持用 BTC 支付 ETH 上的资产)。
* 技术路线:
* Interface: Telegram Bot (容易开发,且移动端体验好)。
* AI Agent: Qwen-VL 模型(识别图片)+ Tool Use(查询价格 API)。
* Blockchain: ZetaChain 用于处理跨链支付结算(利用 ZRC-20 的互操作性)。
* 复用 Demo:
* ZetaChain: hello-world 或 value-transfer 基础转账代码。
* AI: Qwen 的 react_agent (Reasoning + Acting) 模式。
构建一个具备真实资产操作能力的 AI Agent。
-
输入: 自然语言指令(如“给 Alice 转 0.001 ZETA”)。
-
处理: LLM 识别意图,提取结构化参数,自动规划并执行。
-
输出: 链上交易 Hash 及区块链浏览器链接。
本项目采用了经典的 ReAct (Reasoning + Acting) 架构,数据流向如下:
-
Intent Layer (意图层): 用户输入自然语言。
-
Reasoning Layer (推理层): Qwen 模型(作为大脑)分析语义,判断需要调用
transfer_zeta工具,并根据 JSON Schema 提取to_address和amount。 -
Interface Layer (接口层):
-
使用
pydantic风格定义工具参数,强制约束 LLM 的输出格式。 -
安全防御: 在执行前进行参数清洗(
w3.to_checksum_address)和余额检查。
-
-
Execution Layer (执行层):
-
通过
Web3.py连接 ZetaChain RPC 节点。 -
离线签名: 使用本地私钥对交易进行签名(
sign_transaction),保证私钥不接触网络。 -
广播: 将签好名的 Raw Transaction 发送至内存池(Mempool)。
-
在开发过程中,遇到并解决了由库版本更新导致的典型兼容性问题。
-
问题描述: 代码运行时报错
AttributeError: 'SignedTransaction' object has no attribute 'rawTransaction'。 -
根本原因 (Root Cause):
-
Web3.py在 v6 版本中进行了重大重构,全面转向 Pythonic 的 蛇形命名法 (snake_case)。 -
旧版教程或 v5 版本使用的是驼峰命名法 (
rawTransaction)。
-
-
解决方案:
-
查阅文档确认版本差异。
-
将属性调用修改为
signed_tx.raw_transaction。
-
-
工程启示: 在依赖第三方库(尤其是 Web3 这种快速迭代的领域)时,必须关注 Changelog 和大版本更新带来的 Breaking Changes。
-
环境变量管理: 严禁在代码中硬编码私钥。使用
.env文件配合python-dotenv是工业界的标准做法,能有效防止 Git 泄露风险。 -
地址校验: 以太坊地址存在 Checksum 机制(大小写敏感),必须使用
to_checksum_address规范化输入,否则会导致交易失败或资金丢失。
通过代码,深入理解了一笔交易的物理构成:
-
Nonce: 防止重放攻击的计数器。
-
Gas Limit: 交易允许消耗的最大计算量。
-
To/Value: 目标与金额(需转换为 Wei)。
-
Signature: 数学证明,证明该交易确实由私钥持有者发起。
-
Function Calling: LLM 不直接操作区块链,而是输出一个“函数调用请求”(JSON)。
-
System Prompt: 通过系统提示词("你拥有真实资金操作权限...")来设定 AI 的行为边界和严肃程度。
当前 MVP 主要是命令行交互,为了备战黑客松,下一步可以考虑:
-
工具扩展: 增加
check_balance(查询余额)或swap_token(代币兑换)工具。 -
前端接入: 使用 Streamlit 或 React 构建可视化界面。
-
Human-in-the-Loop: 在发送交易前,增加一个“人工确认”步骤(如在前端弹出确认框),提高安全性。
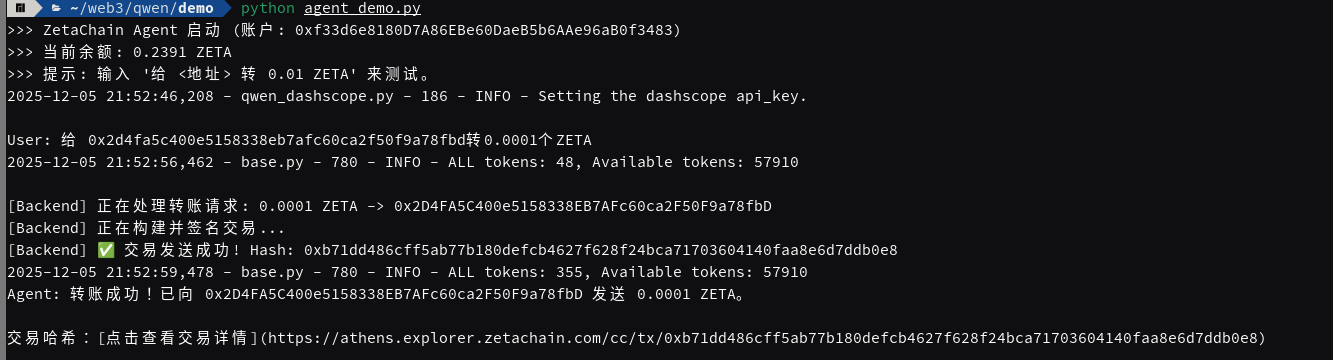
进入浏览器查看交易哈希:
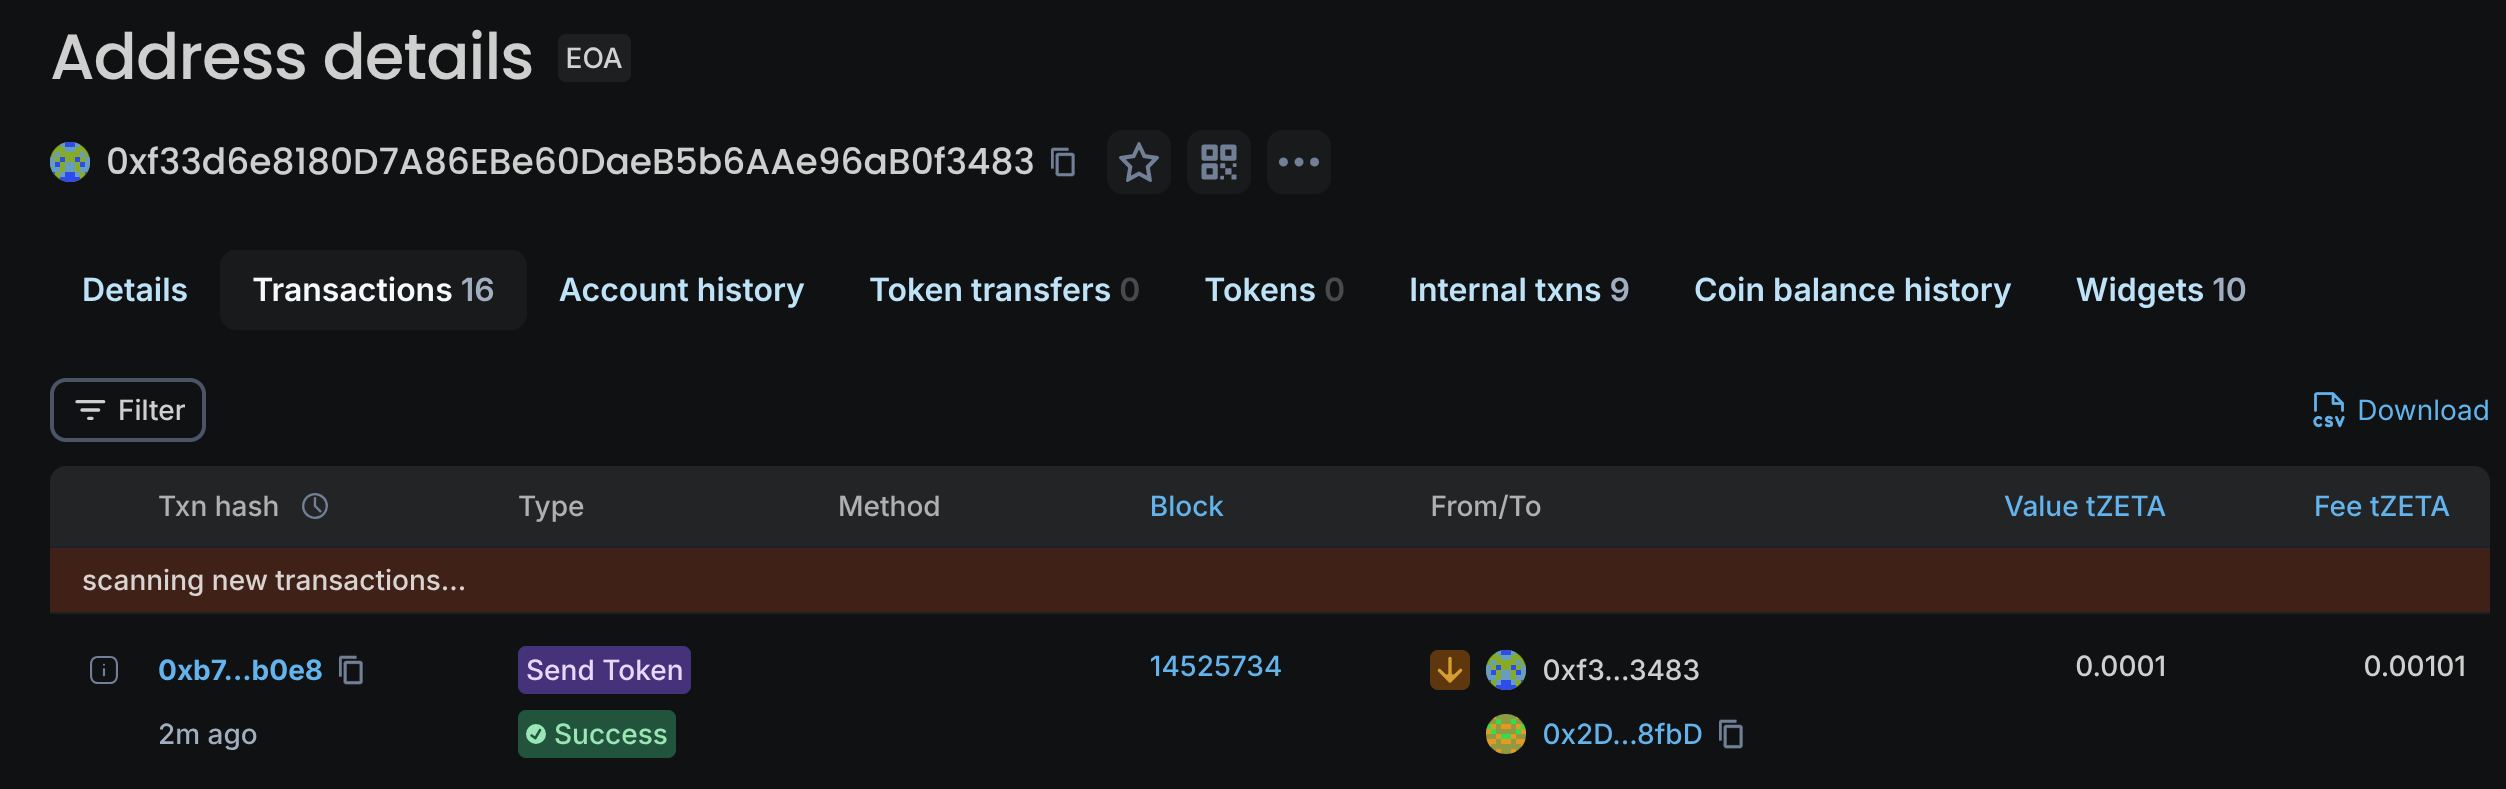
今天最大的收获不是代码本身,而是理解了全链操作的底层逻辑:
-
ZRC-20 的双重性:它在 ZetaChain 内部是普通的 ERC-20,但一旦调用
withdraw,它就变成了控制原生链(BTC/ETH)资产的“遥控器”。- 心得:开发时必须严格区分
transfer(链内记账)和withdraw(跨链销毁/释放),后者涉及高昂的外部 Gas 和 TSS 签名等待时间。
- 心得:开发时必须严格区分
-
TSS (门限签名) 的信任假设:ZetaChain 没有单一的私钥托管方。通过 MPC(多方计算),验证节点共同签署交易。
- 心得:这对应用层的意味着——跨链不是即时的,UI 交互必须预留“等待签名”的状态提示。
在设计“如何将意图转化为交易”时,我对比了两种方案,最终确认了 "Off-chain Compute, On-chain Settlement" 的企业级标准。
-
纯 Python 编排 (Client-Side):
- 缺陷:如果我要“Swap 然后 Withdraw”,Python 需要让用户签两次名。如果第一步成功第二步失败,资金会卡在中间状态(ZRC-20),用户体验和安全性极差。
-
Solidity 聚合 (On-Chain Adapter):
-
优势:原子性 (Atomicity)。编写一个
Adapter合约,将Approve+Swap+Withdraw打包成一个函数。 -
结论:链下 Python 只负责“组装数据”,链上 Solidity 负责“资金结算”。 这是 DeFi 开发的黄金法则。
-
实战部分完成了两个核心组件的解耦:
A. 链上执行层 (Solidity)
-
编写了
ZetaDeFiAdapter合约。 -
利用
delegatecall或直接调用的方式,在一个 Transaction 内完成资产置换与跨链触发。一旦任何环节出错,状态全额回滚,资金零风险。
B. 链下中间件 (Python Web3)
-
编写了
ZetaMiddleware类。-
ABI Encoding:Python 不需要私钥,它的任务是生成精确的 Hex CallData。
-
地址编码:解决了 ZRC-20
withdraw接口需要bytes类型参数的问题(尤其是非 EVM 链地址如 BTC 地址的转码)。
-
以下内容今天架构设计的伪代码实现,展示了 链下编排 (Python) 与 链上原子执行 (Solidity) 的协作逻辑。
作为保险箱,保证资金进出要么全部成功,要么全部回滚。
Solidity
// Contract: ZetaAgentAdapter
// 部署在 ZetaChain 上

Function swapAndWithdraw(tokenIn, tokenOut, amountIn, minOut, recipient_bytes):

    // 1. [资金归集] 从用户钱包把 ZRC-20 (如 ETH) 拉到本合约
    // 前提:用户已经在链下签过 approve
    TransferFrom(User, ThisContract, amountIn)

    // 2. [授权路由] 允许 Uniswap 动用这笔钱
    Approve(UniswapRouter, amountIn)

    // 3. [执行交换] ETH -> BTC
    // 换出来的 ZRC-20 BTC 暂时留在本合约
    actualAmountOut = UniswapRouter.swap(tokenIn, tokenOut)

    // 4. [触发跨链] 调用 ZRC-20 标准接口
    // 销毁 ZRC-20 BTC -> 触发 TSS -> 目标链转账
    ZRC20(tokenOut).withdraw(recipient_bytes, actualAmountOut)

    // 交易结束。
    // 如果第 3 步因为滑点失败,第 1 步的转账也会自动退回。
作为翻译官,不触碰私钥,只生成机器能读懂的指令。
Python
Class ZetaMiddleware:

    Function build_transaction_payload(intent_json):
        """
        输入: {"action": "swap_withdraw", "token": "ETH", "target": "BTC", ...}
        输出: 待签名的交易对象 (Dict)
        """

        # 1. [地址转码] 解决 ZRC-20 异构链地址问题
        # 例如: "tb1q..." (String) -> 0x5a1f... (Bytes)
        recipient_bytes = encode_btc_address(intent_json["recipient"])

        # 2. [ABI 编码] 将意图翻译为 Hex CallData
        # 指向我们上面写的 Adapter 合约,而不是直接指向 Token 合约
        call_data = web3.eth.contract.encodeABI(
            fn_name="swapAndWithdraw",
            args=[
                intent_json["source_token_addr"],
                intent_json["target_token_addr"],
                to_wei(intent_json["amount"]),
                0,  # 滑点保护 (简化)
                recipient_bytes
            ]
        )

        # 3. [构造载荷] 返回给前端/Agent
        return {
            "to": ADAPTER_CONTRACT_ADDRESS,  # 目标是我们的聚合合约
            "data": call_data,               # 包含了所有复杂逻辑的指令
            "value": 0,                      # ZRC-20 操作通常不需要附带 ZETA
            "gasLimit": ESTIMATED_GAS        # 预估 Gas
        }
git clone https://github.com/QwenLM/Qwen-Agent.git
cd Qwen-Agent
pip install -e ./
-
按照示例脚本
assistant_add_custom_tool.py,在环境中搭建代理并运行聊天循环。代理使用llm_cfg配置连接到 DashScope 服务,利用默认的qwen-max模型。 -
注意到如果未在
llm_cfg中显式设置api_key,DashScope 会从环境变量DASHSCOPE_API_KEY中读取密钥qwen.readthedocs.io。因此只需在系统环境中设置该变量即可正常访问模型。 -
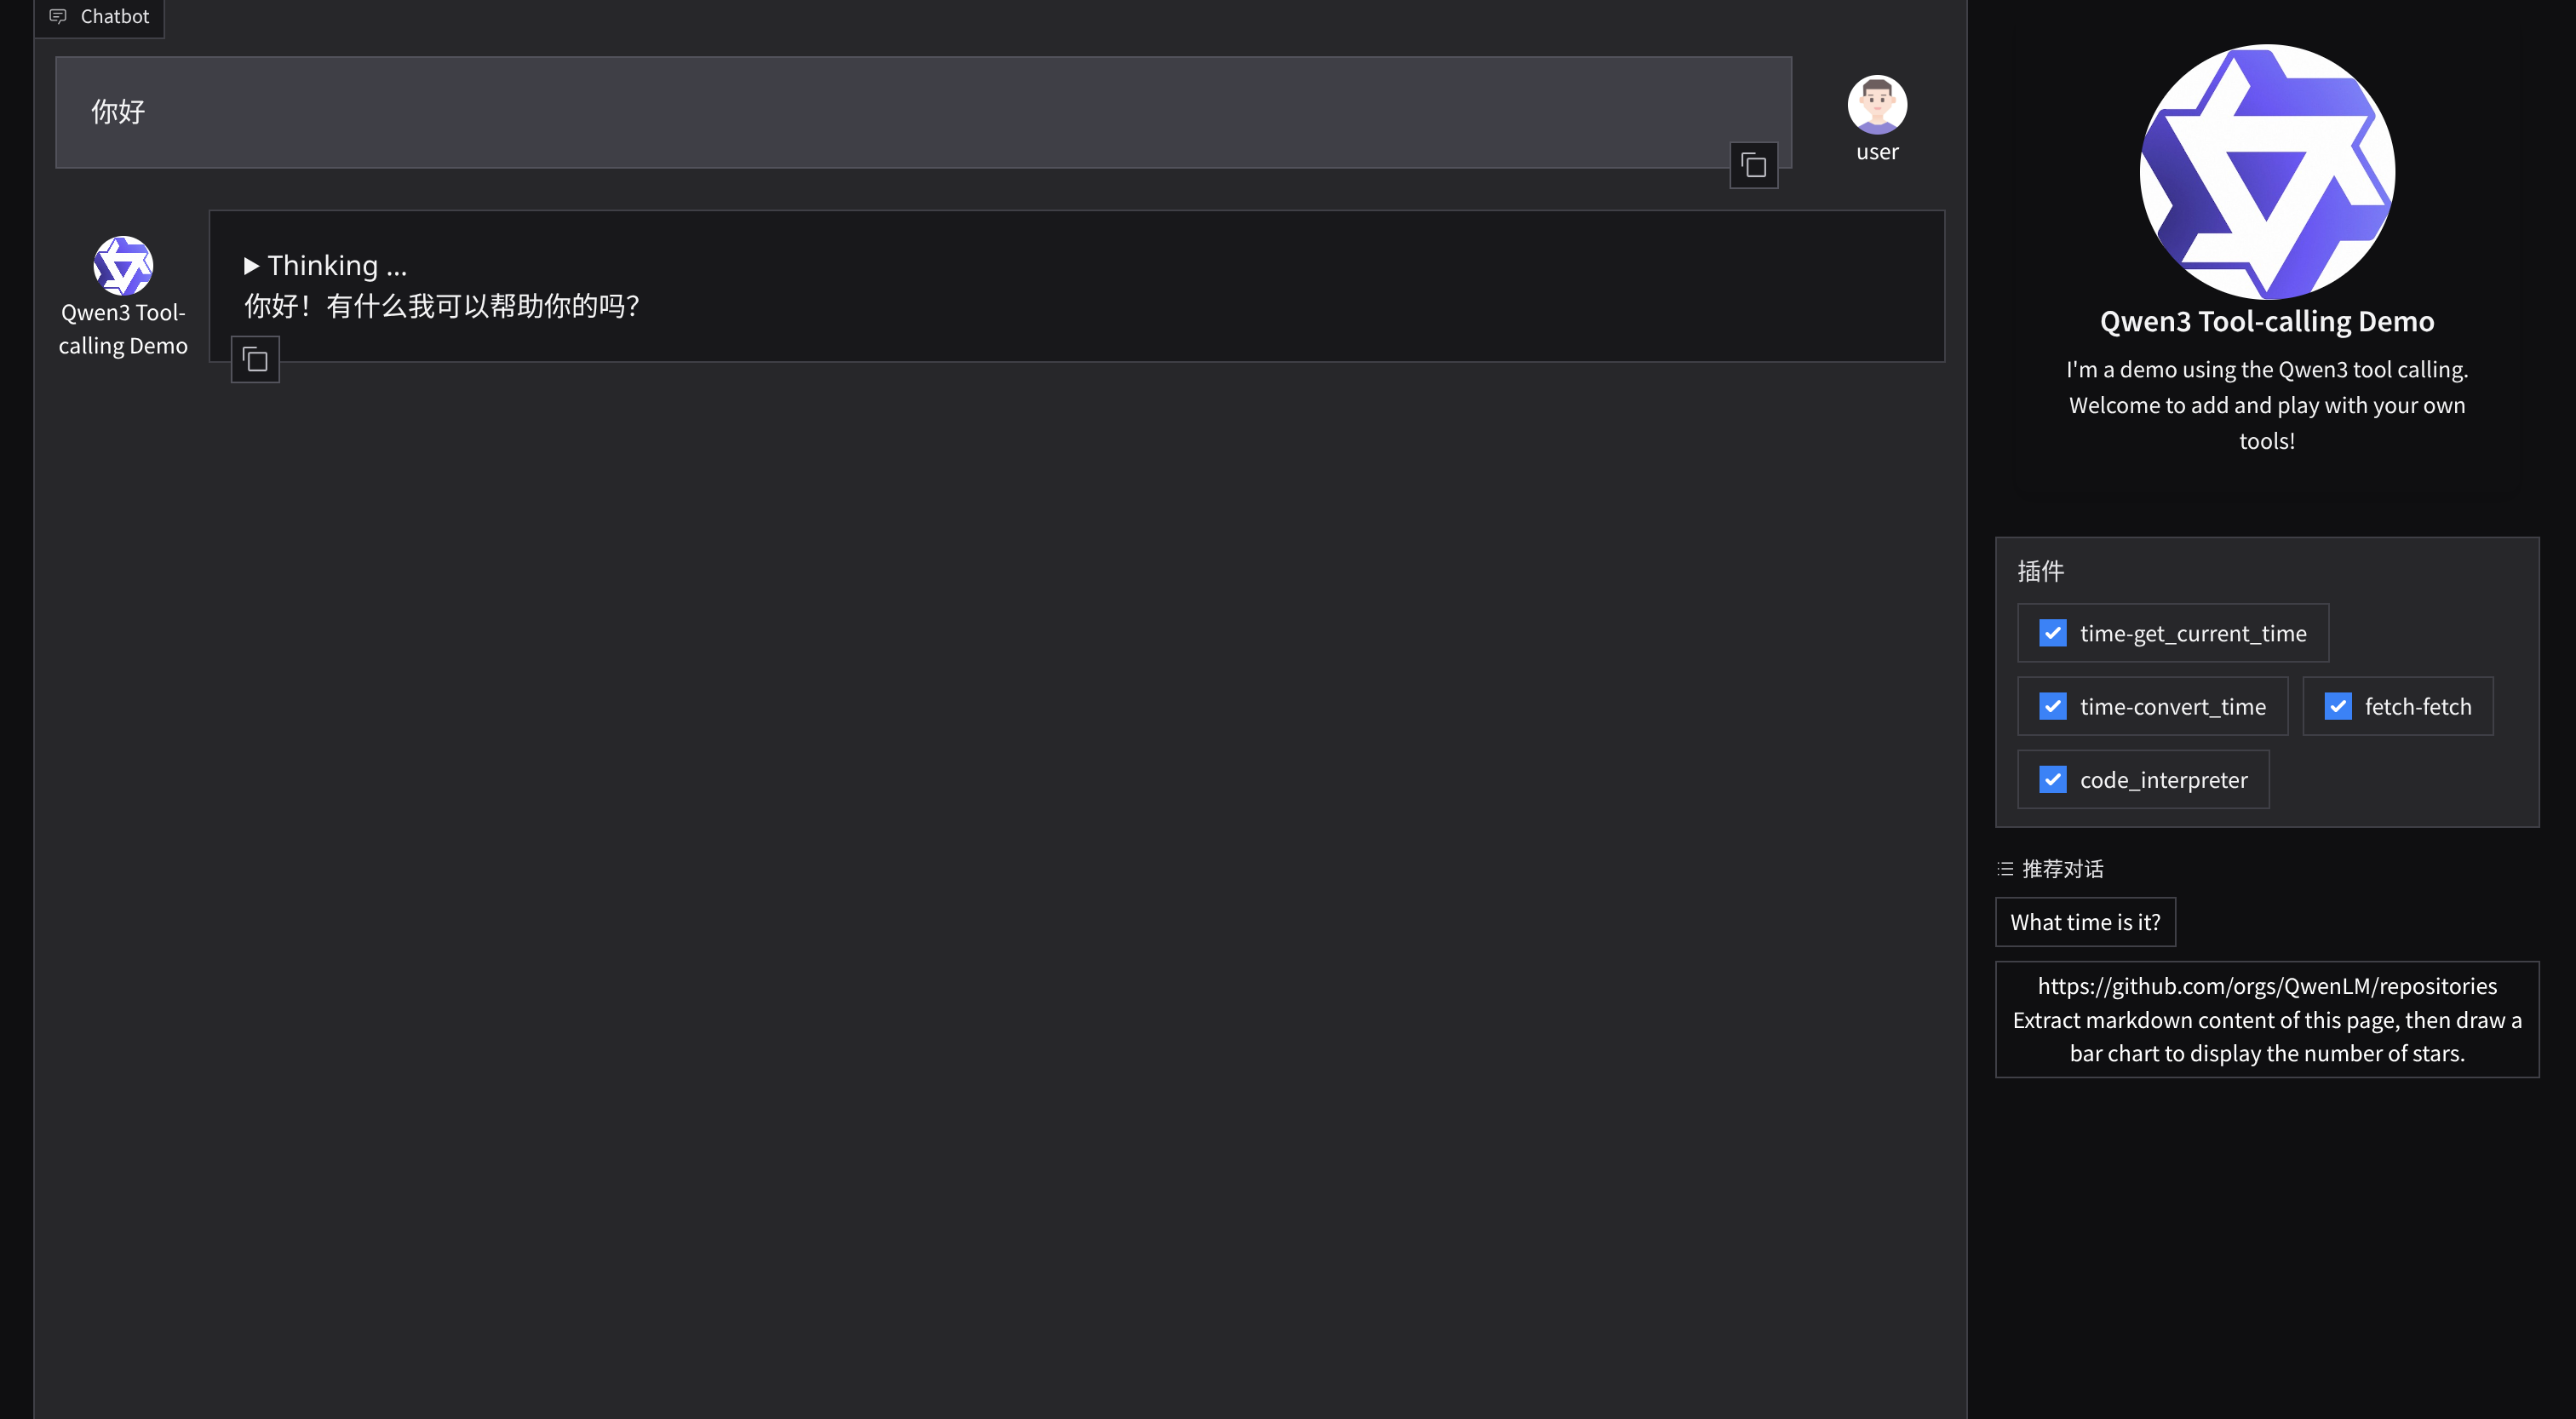
运行示例后,代理能响应输入,调用内置的
code_interpreter工具下载并展示图像,展示了工具调用链路。 -
先取消终端的代理(使用国内的阿里云):
unset HTTP_PROXY HTTPS_PROXY ALL_PROXY http_proxy https_proxy all_proxy
cd examples
python assistant_qwen3.py
2025-12-03 00:05:55,899 - mcp_manager.py - 141 - INFO - Initializing MCP tools from mcp servers: ['time', 'fetch']
2025-12-03 00:05:55,905 - mcp_manager.py - 370 - INFO - Initializing a MCP stdio_client, if this takes forever, please check the config of this mcp server: time
⠇ referencing==0.37.0
⠋ referencing==0.37.0
Installed 32 packages in 8ms
2025-12-03 00:21:22,809 - mcp_manager.py - 370 - INFO - Initializing a MCP stdio_client, if this takes forever, please check the config of this mcp server: fetch
Installed 44 packages in 7ms
* Running on local URL: http://127.0.0.1:7860
To create a public link, set `share=True` in `launch()`.
访问链接 可以看见图形界面:
本次作业创建了两个简单工具:
-
StringUppercase:将输入字符串转换为大写。工具描述说明其功能,参数定义只有一个
text,在call方法中解析 JSON 字符串并返回大写结果。 -
AddNumbers:计算两个数字的和。参数包含
a和b,call方法解析为浮点数后求和并返回。
为了让代理自动读取 DashScope 的 API Key,在初始化 llm_cfg 时读取环境变量 DASHSCOPE_API_KEY 并写入 api_key 字段。这样用户只需在系统中设置该变量即可直接运行。
-
调用
Assistant构建代理,将string_uppercase和add_numbers两个工具加入function_list。 -
编写了命令行界面,支持
test_uppercase、test_add和chat三种模式。前两者用于验证工具调用,后者提供交互式聊天。 -
在测试模式中输入“请把字符串"hello world"转成大写字母”,代理正确地调用
StringUppercase返回HELLO WORLD;输入“What is the sum of 12.5 and 7.3?”,代理调用AddNumbers返回19.8。
"""
This script demonstrates how to build a minimal agent using the
Qwen‑Agent framework and how to register a couple of simple tools.
The goal of the assignment is to help you familiarise yourself with
the core concepts of Qwen‑Agent—LLM, Agent, Tools and Memory—by
writing a small program that the agent can interact with. Two
examples of custom tools are provided:
1. **StringUppercase** – converts an input string to upper case.
2. **AddNumbers** – returns the sum of two numeric inputs.
Running this script requires Qwen‑Agent to be installed (e.g. via
``pip install -U qwen-agent``) and access to a Qwen model service. The
``llm_cfg`` dictionary should be adjusted to point to your chosen
model. By default it uses ``qwen-max`` on DashScope. If you are
running a local Qwen server (e.g. via ``vLLM`` or ``Ollama``), update
the ``model``, ``model_server`` and ``api_key`` fields accordingly.
Example usage:
python qwen_agent_custom_tool.py test_uppercase
python qwen_agent_custom_tool.py test_add
python qwen_agent_custom_tool.py chat
The first two commands run self‑contained tests to verify that the
agent automatically calls the corresponding tool. The ``chat`` mode
starts an interactive loop where you can ask the agent to perform
different tasks.
"""
import json
import json5 # type: ignore
import sys
import os
from typing import Dict, Any
try:
from qwen_agent.agents import Assistant
from qwen_agent.tools.base import BaseTool, register_tool
except ImportError as exc:
raise ImportError(
"qwen_agent package is required to run this script. "
"Install it via 'pip install -U qwen-agent' and ensure you have a "
"running Qwen model service (e.g. DashScope, vLLM, or Ollama)."
) from exc
@register_tool('string_uppercase')
class StringUppercase(BaseTool):
"""A simple tool that converts the provided string to upper‑case.
The tool expects a single parameter ``text`` of type string and
returns a JSON object containing the uppercased version of the
input. The agent uses the ``description`` and ``parameters``
definitions to decide when and how to call this tool.
"""
# Describe the purpose of the tool for the agent. This text helps
# the model decide when to call the tool.
description = 'Convert the input string to upper case.'
# Define the input parameters accepted by this tool.
parameters = [
{
'name': 'text',
'type': 'string',
'description': 'The string to be converted to upper case.',
'required': True,
},
]
def call(self, params: str, **kwargs: Any) -> str:
"""Implementation of the tool.
The ``params`` argument arrives as a JSON string encoded by the
agent. We parse it using ``json5.loads`` (which is more lenient
than the built‑in ``json`` module), perform the upper‑case
conversion, and return the result as a JSON string.
Args:
params: JSON‑encoded string containing a ``text`` field.
**kwargs: Additional fields provided by the agent (ignored).
Returns:
A JSON‑encoded string with a single key ``result``.
"""
data: Dict[str, Any] = json5.loads(params)
original = data.get('text', '')
uppercased = str(original).upper()
return json.dumps({'result': uppercased}, ensure_ascii=False)
@register_tool('add_numbers')
class AddNumbers(BaseTool):
"""A simple tool that computes the sum of two numbers.
The tool accepts two parameters ``a`` and ``b`` of type number and
returns their sum. This demonstrates how Qwen‑Agent can handle
numerical inputs and produce structured outputs.
"""
description = 'Compute the sum of two numbers and return the result.'
parameters = [
{
'name': 'a',
'type': 'number',
'description': 'The first addend.',
'required': True,
},
{
'name': 'b',
'type': 'number',
'description': 'The second addend.',
'required': True,
},
]
def call(self, params: str, **kwargs: Any) -> str:
"""Implementation of the addition tool.
The ``params`` argument contains JSON with ``a`` and ``b``. We
parse them, convert to floats (to handle both integers and
decimals), perform the addition and return a JSON string.
"""
data: Dict[str, Any] = json5.loads(params)
a = float(data.get('a', 0))
b = float(data.get('b', 0))
result = a + b
return json.dumps({'result': result}, ensure_ascii=False)
def build_agent() -> Assistant:
"""Initialise the Assistant agent with our custom tools.
This function constructs an ``Assistant`` configured to use a Qwen
model hosted via DashScope by default. It will automatically read
the ``DASHSCOPE_API_KEY`` environment variable at runtime and
populate the API key field if present. To use a locally hosted
model (e.g. vLLM or Ollama), override the values in ``llm_cfg`` as
noted below.
"""
# Base configuration for the LLM. The environment variable
# DASHSCOPE_API_KEY will be used if set.
llm_cfg = {
# Choose the model name. For a local vLLM/Ollama deployment,
# replace this with your model name, e.g. 'Qwen3-4B-Instruct'.
'model': 'qwen-max',
# Specify the model service type. 'qwen_dashscope' tells the
# agent to use Alibaba DashScope. When using a local service,
# remove this field and set ``model_server`` instead.
'model_type': 'qwen_dashscope',
# Generation hyper‑parameters can be tuned here if needed.
'generate_cfg': {
'top_p': 0.8,
},
}
# Auto‑populate the API key from the environment variable. If
# DASHSCOPE_API_KEY is not set, Qwen‑Agent will attempt to fetch
# it internally when using DashScope. This assignment simply
# mirrors the environment variable into the config for clarity.
api_key_env = os.getenv('DASHSCOPE_API_KEY')
if api_key_env:
llm_cfg['api_key'] = api_key_env
# Create the agent. The ``function_list`` tells the agent which
# tools are available. The names must match those used in
# ``register_tool`` decorators.
bot = Assistant(
llm=llm_cfg,
name='SimpleToolAgent',
description='An agent with custom tools for upper‑casing strings and adding numbers.',
system_message='You are a helpful assistant that uses tools when appropriate.',
function_list=['string_uppercase', 'add_numbers'],
)
return bot
def run_test_uppercase() -> None:
"""Test the uppercase tool by asking the agent a simple question."""
agent = build_agent()
messages = [
{
'role': 'user',
'content': '请把字符串"hello world"转成大写字母。',
},
]
print('Query: 请把字符串"hello world"转成大写字母。')
for resp in agent.run(messages=messages):
print('Response:', resp)
def run_test_add() -> None:
"""Test the addition tool by asking the agent to add two numbers."""
agent = build_agent()
messages = [
{
'role': 'user',
'content': 'What is the sum of 12.5 and 7.3?',
},
]
print('Query: What is the sum of 12.5 and 7.3?')
for resp in agent.run(messages=messages):
print('Response:', resp)
def interactive_chat() -> None:
"""Provide a simple REPL for chatting with the agent.
Users can type natural language requests such as “Convert the string
‘apple’ to uppercase.” or “Add 15 and 28 for me” and the agent
should automatically call the appropriate tool.
"""
agent = build_agent()
messages = [] # maintain chat history
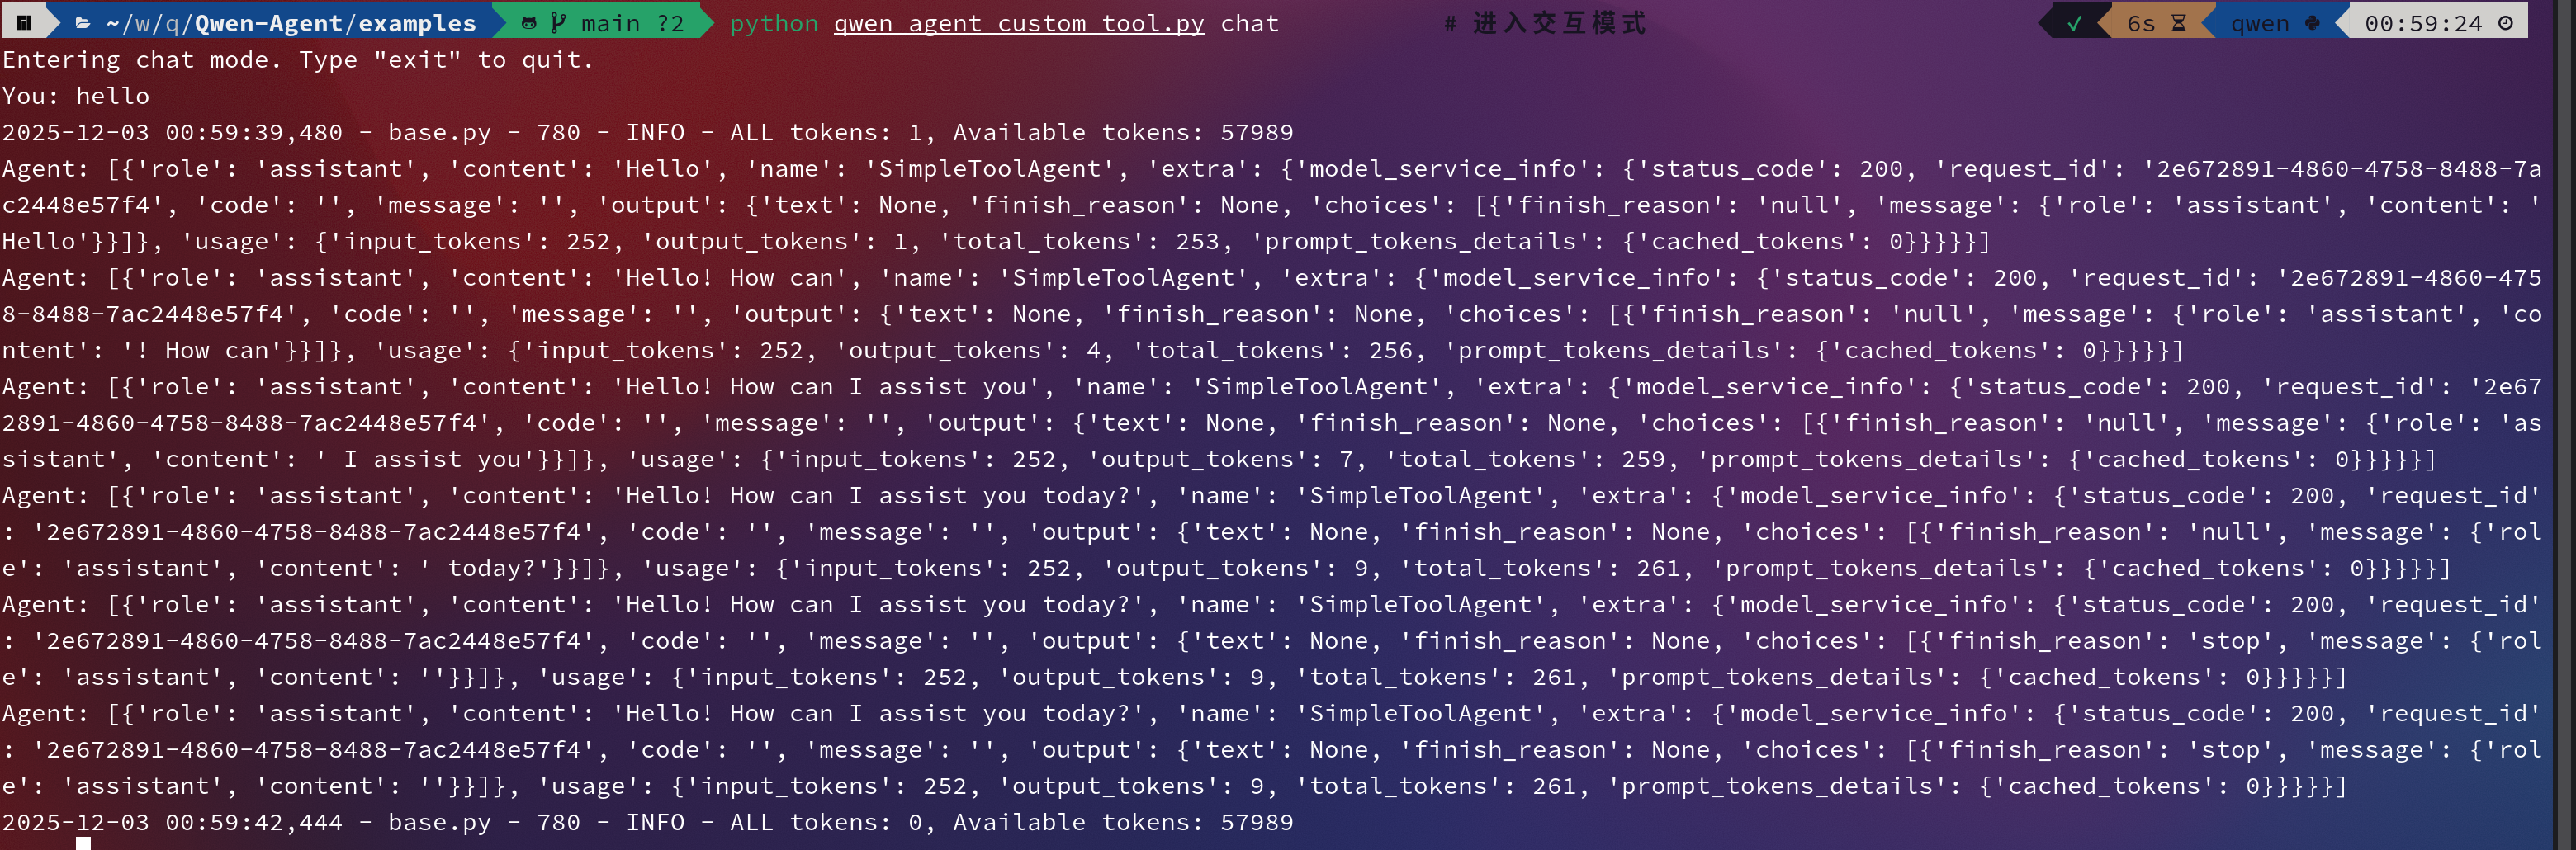
print('Entering chat mode. Type "exit" to quit.')
while True:
user_input = input('You: ').strip()
if not user_input:
continue
if user_input.lower() in {'exit', 'quit'}:
print('Exiting.')
break
messages.append({'role': 'user', 'content': user_input})
for resp in agent.run(messages=messages):
# Print each streaming response element. In practice, you can
# refine this to display the tool results nicely.
print('Agent:', resp)
# The assistant might return multiple messages (including tool calls);
# here we extend the conversation state accordingly.
messages.extend(resp for resp in agent.run(messages=[]))
if __name__ == '__main__':
# Basic command line interface to run tests or start chatting.
if len(sys.argv) > 1:
mode = sys.argv[1].lower()
else:
mode = 'help'
if mode == 'test_uppercase':
run_test_uppercase()
elif mode == 'test_add':
run_test_add()
elif mode in {'chat', 'repl'}:
interactive_chat()
else:
编写脚本 满足两个功能
运行测试:
python qwen_agent_custom_tool.py test_uppercase  # 测试大写功能
python qwen_agent_custom_tool.py test_add       # 测试求和功能
python qwen_agent_custom_tool.py chat           # 进入交互模式
成功运行
本阶段的核心任务是打通 AI(自然语言理解) 与 Web3(链上交互) 之间的“最后一公里”。 具体目标包括:
-
理解 Qwen-Agent 框架的基本组成(LLM, Agent, Tools, Memory)。
-
利用 LLM 的 Function Calling 能力,将非结构化的自然语言(如“帮我换币”)转化为结构化的 JSON 参数。
-
解决工程实践中的环境变量管理与 API 鉴权问题。
本次实战基于 ReAct (Reasoning + Acting) 模式。AI 不再只是单纯的对话生成器,而是一个代理(Agent):
-
Reasoning (推理): 分析用户意图(“用户想在 Base 链交易”)。
-
Acting (行动): 决定调用特定工具(
parse_swap_intent)并填充参数。
传统的 NLP 使用正则表达式(Regex)提取信息,难以处理口语化表达(如“大饼”、“刀”)。 通过定义 Schema (JSON Schema),我们约束 LLM 必须按照特定的 Key-Value 格式输出,实现了从模糊语言到精确代码的桥梁。
为了让 AI 准确提取 DeFi 参数,我基于 BaseTool 定义了一个自定义工具。
关键代码逻辑:
@register_tool("parse_swap_intent")
class ParseSwapIntent(BaseTool):
    # Prompt Engineering: 在描述中通过自然语言定义“业务规则”
    parameters = [{
        'name': 'token_in',
        'type': 'string',
        'description': '用户卖出的代币。如果用户说 "U", "USDT", "刀",必须统一转换为 "USDC"。', # 规则注入
        'required': True
    }, ...]
- 亮点:通过
description实现了零代码逻辑转换。不需要写 Python 代码去匹配 "刀" 或 "U",模型根据语义理解自动将其标准化为 "USDC"。
为了解决 API Key 的安全存储与跨目录读取问题,采用了 python-dotenv 方案。
解决方案:
from dotenv import load_dotenv, find_dotenv

# 使用 find_dotenv() 递归查找根目录的 .env 文件
# 解决脚本在子目录运行时无法读取环境变量的问题
load_dotenv(find_dotenv(), verbose=True)
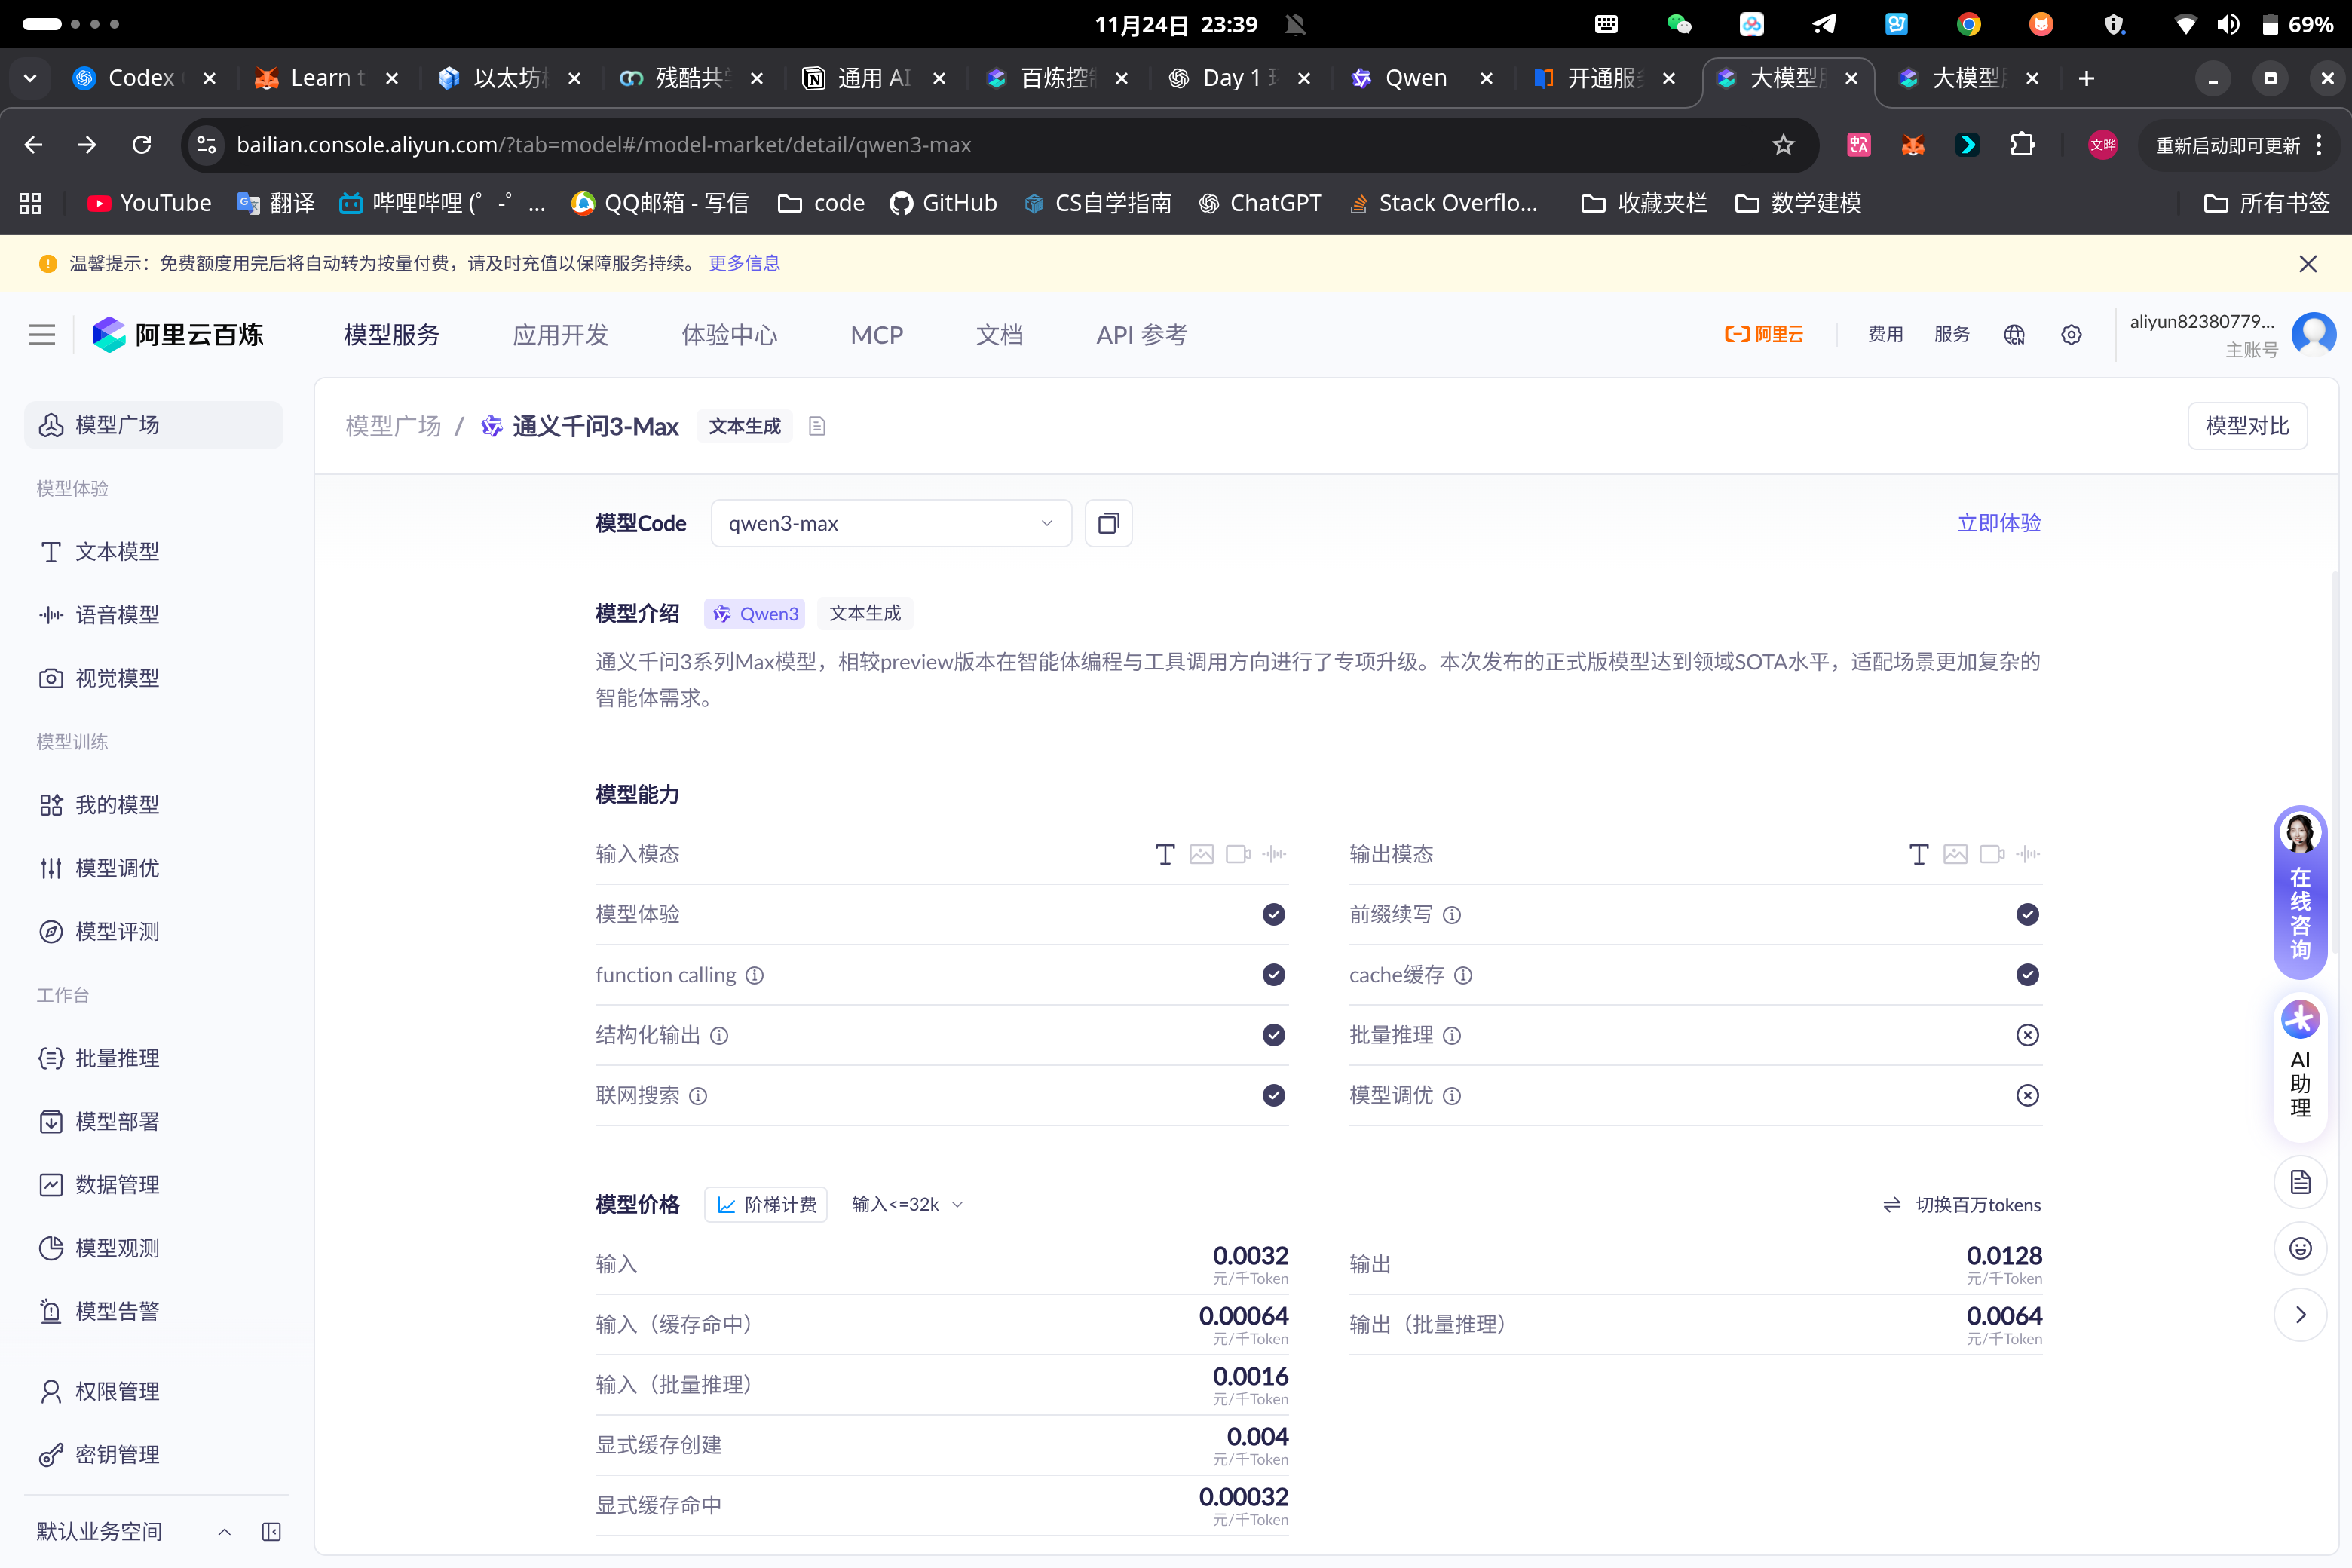
使用了 qwen-plus 模型,相比开源的小参数模型,它在指令遵循 (Instruction Following) 和工具调用稳定性上表现更佳。
- 在项目的根目录下配置.env文件,将密钥 地址 api_key等信息存入 这样可以避免每次启动终端都要配置临时变量
-
现象:脚本运行时提示 API Key 无效,尽管
.env文件已创建。 -
原因:脚本位于
examples/子目录,默认的load_dotenv()只在当前目录查找,无法读取根目录配置。 -
解决:引入
find_dotenv()函数,自动向上级目录遍历查找,成功定位配置文件。
-
现象:LLM 有时生成的 JSON 包含不规范的尾部逗号(Trailing Commas),导致标准
json.loads报错。 -
解决:引入
json5库替代标准库,提高了对非标准 JSON 格式的容错率。
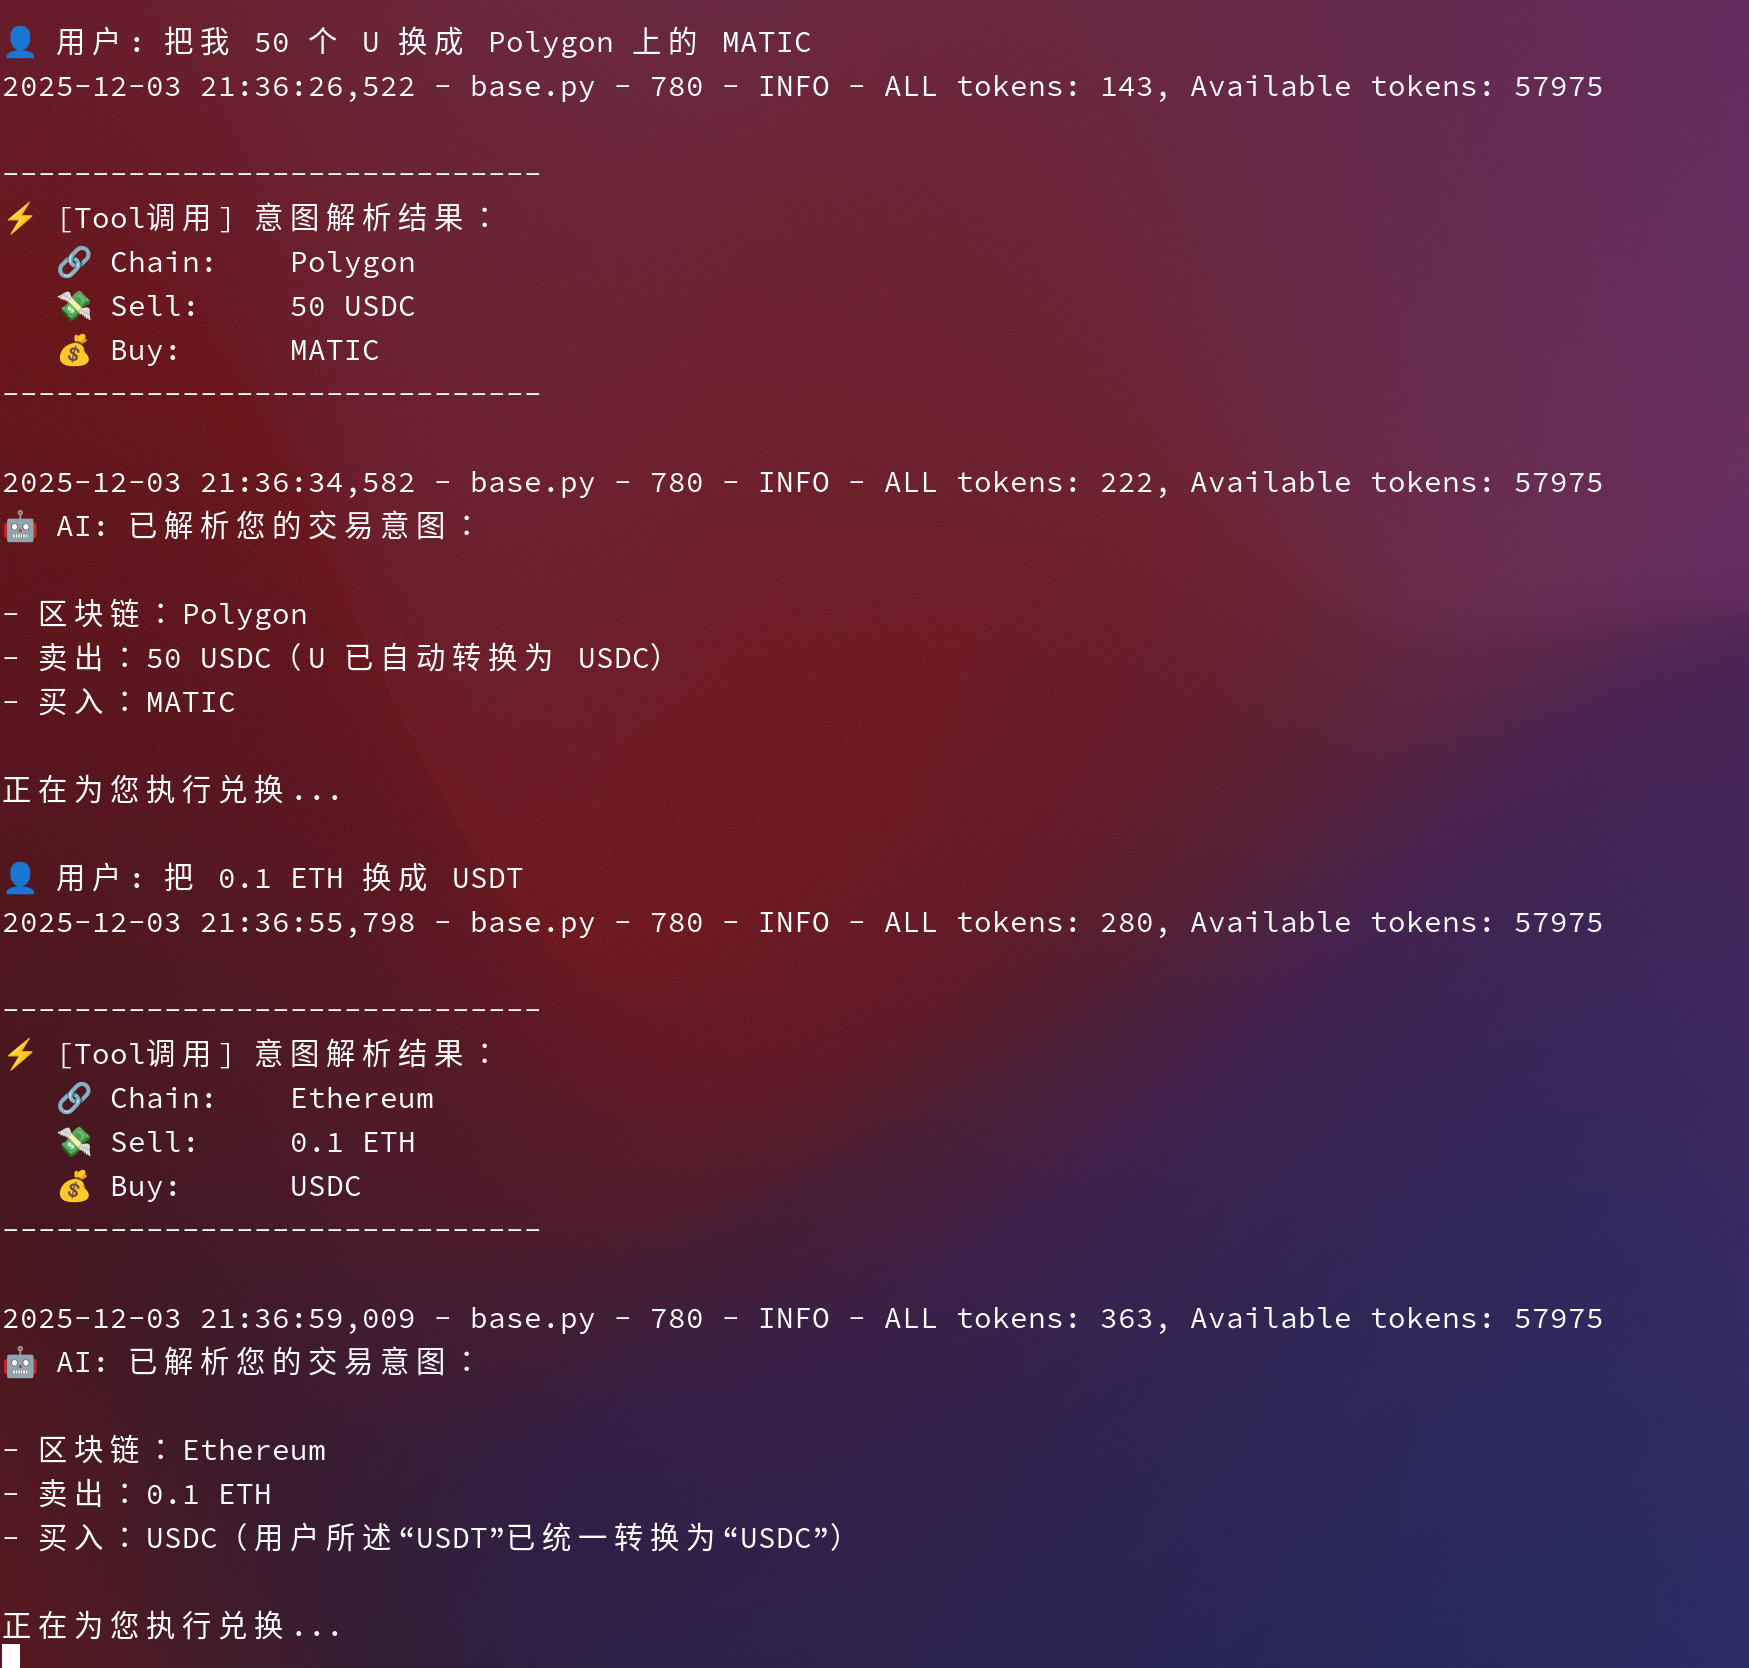
在终端交互测试中,Agent 成功展现了意图识别能力:
测试案例 1:标准指令
用户: "帮我在 Base 上用 10 USDC 换成 ETH" AI 解析:
{
  "chain": "Base",
  "token_in": "USDC",
  "token_out": "ETH",
  "amount": "10"
}
测试案例 2:模糊指令与同义词(验证 Prompt 有效性)
用户: "把我 50 个刀换成 Polygon 上的 MATIC" AI 解析:
token_in: 自动转换为 "USDC" (符合 Prompt 规则)
chain: 准确识别为 "Polygon"
Day 10 的核心不在于写了多少行代码,而在于理解了 AI Agent 的交互哲学:
-
描述即代码 (Prompt as Code):我们在 Tool 的
description中写的文字,实际上起到了代码逻辑的作用。 -
确定性与概率性的结合:Web3 交易需要 100% 的确定性(金额、地址不能错),而 AI 是概率性的。通过
Function Calling强类型约束,我们成功将概率性的 AI 输出收敛为确定性的系统参数。
1. 今日目标
-
用 Python 调一次 Qwen 模型 API。
-
理解:
-
怎么配 API Key
-
怎么选模型(
model参数) -
怎么构造
messages并在终端打印返回结果。
-
2. 环境与依赖
-
虚拟环境(venv)
cd ~/web3/qwen
python -m venv .venv
source .venv/bin/activate
确认:
which python # /home/eeeeye/web3/qwen/.venv/bin/python which pip # /home/eeeeye/web3/qwen/.venv/bin/pip -
安装 dashscope SDK
python -m pip install --upgrade pip
python -m pip install dashscope
3. Qwen 调用脚本要点(Python)
核心配置(基于官方示例改写):
import os
import dashscope
from dashscope import Generation

# 1)选择地域:新加坡(国际)
dashscope.base_http_api_url = "https://dashscope-intl.aliyuncs.com/api/v1"

# 2)API Key 从环境变量读取
api_key = os.getenv("DASHSCOPE_API_KEY") or os.getenv("QWEN_API_KEY")

messages = [
    {"role": "system", "content": "You are a helpful assistant."},
    {
        "role": "user",
        "content": "请用中文简要介绍一下 ZetaChain,它的定位、核心功能和跨链优势。"
    },
]

response = Generation.call(
    api_key=api_key,
    model="qwen-turbo",      # 最终采用的模型
    messages=messages,
    result_format="message",
)

if response.status_code == 200:
    print(response.output.choices[0].message.content)
else:
    print("HTTP返回码:", response.status_code)
    print("错误码:", response.code)
    print("错误信息:", response.message)
环境变量设置:
export DASHSCOPE_API_KEY=sk-xxxx   # 或 export QWEN_API_KEY=sk-xxxx
python qwen_api_demo.py
4. 遇到的问题与排查过程
-
PEP 668:系统环境不让用 pip
-
报错:
externally-managed-environment -
原因:Arch 系统不允许直接在系统 Python 上 pip 装包。
-
解决:用
python -m venv .venv创建虚拟环境,在 venv 里安装依赖。
-
-
401 Unauthorized(第三方 API + Qwen Key 不匹配)
-
开始用
https://api.aimlapi.com/v1/chat/completions+ Qwen key 调,返回 401。 -
原因:aimlapi 需要自己的 key,不能用 Qwen/DashScope 的 key。
-
解决:改用 Qwen 官方
dashscopeSDK +dashscope-intl.aliyuncs.com/api/v1。
-
-
403 AccessDenied.Unpurchased(模型未开通)
-
使用
model="qwen-plus"返回:错误码:AccessDenied.Unpurchased
-
原因:当前账号没开通
qwen-plus模型权限。 -
解决:改用
model="qwen-turbo"等已对账号开放的模型。
-
-
跨链 AMM / DEX / Swap
-
多链资产 → 转成 ZRC-20,在 ZetaChain 上做一次 Swap。
-
背后自动完成:源链锁定资产 / 消息传递 / 目标链解锁或铸造。
-
-
跨链收益聚合器(Yield Aggregator)
-
用户在任意链存一笔钱。
-
ZetaChain 通用合约作用:
-
把资金分散到不同链的借贷/农场/激励池;
-
定期再平衡,把收益统一聚合。
-
-
-
LSD / Restaking / LSDFi 方向
-
把多种 LSD(stETH、rETH 等)统一进 ZetaChain。
-
通用合约负责在多条链上做再质押、收益复投。
-
用户只看到一个「LSD 金库」,不需要自己跨链配置。
-
-
跨链借贷 / 抵押 & 稳定币
-
抵押在 A 链上的资产,在 B 链上借出稳定币或开杠杆。
-
ZetaChain 负责跨链读写抵押状态、防止双花+清算。
-
-
通用 NFT / 全链会员
-
一份 Universal NFT = 用户在多链上的统一身份/会员/权益。
-
DeFi 协议可以用 NFT 表示份额、治理权、收益凭证等。
-
-
目标用户
- 想拿稳定收益但不想研究多条链、多种协议的普通用户。
-
要解决的问题
-
稳定币收益分散在不同链、不同协议,信息不透明、操作麻烦。
-
用户频繁跨链、换桥,成本高、风险大。
-
-
粗略方案(跨链 / 通用资产使用方式)
-
用户侧:
-
在任意支持链(Base / Arbitrum / Sepolia 等)存入 USDC / USDT。
-
资产在 ZetaChain 映射成相应 ZRC-20,记入 Vault 份额。
-
-
协议侧(在 ZetaChain 上的 Universal 合约):
-
根据策略,把 ZRC-20 稳定币跨链分配到不同链的优质收益池。
-
定期再平衡,把多链收益统一计入用户份额。
-
-
退出:
- 用户可以选择任意一条链提取本息(不是必须回到原来那条链)。
-
创建项目骨架
根据官方文档 直接使用CLI脚手架创建项目:
# 1)初始化项目
npx zetachain@next new --project swap
# 2)进入项目目录
cd swap
# 3)安装依赖
yarn
# 4)拉取 Solidity 依赖
forge soldeer update
# 5)编译合约
forge build
UNIVERSAL=$(npx tsx commands deploy --private-key $PRIVATE_KEY | jq -r .contractAddress) && echo $UNIVERSAL
0x7Ff868a3158c134aF373a4228d02bf52d7404473
调用人地址(EVM)
RECIPIENT=$(cast wallet address $PRIVATE_KEY) && echo $RECIPIENT
查询“目标链资产”的 ZRC-20 地址
ZRC20_ETHEREUM_ETH=$(zetachain q tokens show --symbol sETH.SEPOLIA -f zrc20) && echo $ZRC20_ETHEREUM_ETH
此时出现报错:
网络请求失败:PostHogFetchNetworkError: Network error while fetching PostHog … ECONNREFUSED 表示 CLI 在向远程服务获取数据时连不上(可能是本地网络代理、VPN、或临时的网络故障)。这会阻止 CLI 查询可用 ZRC-20 资产列表。
代币符号不存在:最后提示 Token with symbol 'sETH.SEPOLIA' not found,意味着当前网络环境中并没有名为 sETH.SEPOLIA 的 ZRC‑20 资产,或者 CLI 无法从链上获取到它。
查阅
zetachain q tokens list
发现是当前没有sETH.SEPOLIA这个链 进而将命令转为,成功执行
ZRC20_ETHEREUM_ETH=$(zetachain q tokens show --symbol ETH.ETHSEP -f zrc20) && echo $ZRC20_ETHEREUM_ETH
返回地址:
0x05BA149A7bd6dC1F937fA9046A9e05C05f3b18b0
-
通过 CLI 运行
npx zetachain evm deposit-and-call --chain-id 11155111 --amount 0.001 --types address bytes bool --receiver $UNIVERSAL --values $ZRC20_ETHEREUM_ETH $RECIPIENT true发起跨链调用时,出现Failed to retrieve private key: Private key not found错误。这表明 CLI 无法找到用于签名交易的私钥。 -
查阅官方文档可知,部署或调用任何通用合约前,必须准备一个在 ZetaChain 测试网 和 连接的 EVM 测试网 上都有余额的私钥zetachain.com。而 CLI 的
deposit-and-call命令也提供了--private-key选项用于传入私钥。如果未指定,CLI 会尝试从账户管理工具读取默认账户,但若未导入私钥则会报错。
解决方案与执行步骤
-
导入或指定私钥:
-
通过
zetachain accounts import --type evm --name default --private-key <私钥>导入 EVM 私钥(仅需一次)。之后可以不再在命令中指定私钥。 -
或者在
deposit-and-call命令中显式加入--private-key $PRIVATE_KEY参数,以便 CLI 正确签名交易:npx zetachain evm deposit-and-call \ --chain-id 11155111 \ --amount 0.001 \ --receiver $UNIVERSAL \ --private-key $PRIVATE_KEY \ --types address bytes bool \ --values $ZRC20_ETHEREUM_ETH $RECIPIENT true
使用
--private-key后即可避免“私钥未找到”的报错。 -
-
资金准备:确保私钥对应地址在 ZetaChain 测试网及 Ethereum Sepolia 上都有足够资金支付 gas。文档中强调部署前需要在两个链上为私钥充值。
-
本次测试的来源链为 Ethereum Sepolia (chain ID 11155111)。通过
deposit-and-call命令,用户从 Sepolia 发送 0.001 ETH 及 ABI 编码的参数到 ZetaChain。CLI 会将 Sepolia 的 ETH 锁定,并在 ZetaChain 上铸造等量 ZRC‑20 代币,随后调用 Universal Swap 合约。 -
在 ZetaChain 上,Universal Swap 合约的
onCall函数接收跨链调用,其中包含:-
从源链转入的 ETH 的 ZRC‑20 表示;
-
目标资产的 ZRC‑20 地址(如 Ethereum Sepolia ETH 对应的 ZRC‑20);
-
目标收款地址(Ethereum Sepolia 的 EVM 地址);
-
是否自动提现的布尔标记。
-
-
合约首先使用部分 ZRC‑20 资产兑换目的链的 gas 代币以支付跨链提款手续费;然后在 ZetaChain 的 Uniswap v2 池中将剩余 ZRC‑20 资产交换为目标 ZRC‑20;最后调用 Gateway 的
withdraw,将目标 ZRC‑20 烧毁并把等值原生资产发送到用户的目标链地址。整个过程由一次交易完成,用户无需在目的链预存 gas 或手动执行桥接。
| ZRC‑20 | ERC‑20 | |
|---|---|---|
| 资产来源 | 代表其他链的原生代币或指定 ERC‑20 代币,通过锁定资产后铸造 | 在部署链上发行,资产只存在于该链 |
| 跨链能力 | 内置跨链存取功能,可从任何连接链存入或提取到原链 | 无跨链机制,需要借助桥或第三方协议 |
| 铸造限制 | 只能由 ZetaChain 协议铸造,受总流动性上限限制 | 任意合约可按逻辑铸造,不具备跨链流动性上限 |
| 统一接口 | 具备扩展方法用于查询跨链余额、执行跨链调用等 | 标准仅定义基本的转账与授权接口 |
| 典型应用 | 构建 Omnichain DEX、跨链借贷等可统一管理多链资产的 DeFi 协议 | 单链内的代币发行、交易与支付 |
ZRC-20 Standard
according to zetachain.com
-
Cross-Chain Support: The ZRC-20 standard is a token standard on ZetaChain that facilitates the cross-chain transfer of assets. Tokens created using this standard can represent native tokens from other blockchains, such as Ethereum or Bitcoin, and can be moved across different chains without the need for intermediary services.
-
Asset Locking and Minting: When a user deposits an asset from a connected chain, the native token is locked in a trusted secure storage (TSS) or an ERC-20 wrapper on ZetaChain, and an equivalent ZRC-20 token is minted and sent to the user’s ZetaChain address.
-
Withdrawal and Burning: When a user wants to withdraw assets, the ZRC-20 tokens are burned, and the equivalent amount of the original asset is released from the secure storage.
-
Cross-Chain Interoperability: ZRC-20 allows for the seamless flow of assets between different chains by creating representations of native assets that are standardized across chains.
Universal Token and Universal NFT standards enable seamless cross-chain asset deployment and transfer across all connected EVM-compatible chains. ZetaChain serves as the central routing hub, coordinating asset destruction on source chains and re-minting on destination chains.
Each universal asset implementation requires two contract types:
Universal Contract (deployed on ZetaChain)
-
Handles asset minting on ZetaChain
-
Manages cross-chain inbound/outbound transfers
-
Coordinates inter-chain asset movements
Connected Contract (deployed on target EVM chains)
-
Manages asset minting on connected chains
-
Processes local chain deposit/withdrawal operations
-
Deploy Universal contract on ZetaChain
-
Deploy Connected contracts on target EVM chains (Ethereum, Polygon, BSC)
-
Establish bidirectional trust relationships:
-
Universal contract:
setConnected(zrc20, connectedAddress) -
Connected contract:
setUniversal(universalAddress)
-
Universal Tokens enable sophisticated yield strategies across multiple chains. Users can deposit Bitcoin assets that automatically deploy across Ethereum lending protocols and other chain yield opportunities, with returns consolidated back to user accounts through ZetaChain's unified accounting.
Enterprises can deploy Universal NFT passes that maintain consistent identity across all connected chains. Members can purchase NFTs on any supported chain and access privileges across multiple dApps without cross-chain bridging operations, leveraging unique cross-chain token identifiers.
Businesses can utilize Universal Tokens for streamlined multi-chain payroll and vendor payments. Payment initiations on ZetaChain automatically distribute assets to recipients across different blockchain networks, eliminating complex multi-wallet management and bridge dependencies.
universal App是zetachain上的一个范式,与传统方式需要在每条链上分别部署合约不同,全链应用允许我们只在 ZetaChain 上部署一个主合约。对于用户来说,无需切换网络,就可以直接从他们资产所在的任何链(包括bitcoin这样的非智能合约链)通过发送交易来调用Universal App合约
其核心价值就在于跨链协调,就像今天workshop里面老师提到的,用户无需掌握复杂的跨链流程,只需要使用universal App这样一个黑盒,进行功能的使用,然后所有复杂的路由逻辑都由部署在 ZetaChain 上的单一合约在后台完成。这大大便利了开发者的开发流程以及降低了用户的使用门槛
- 对比hardhat/foundry:
通过查阅资料,发现hardhat强大在于庞大的插件生态系统和调试工具以及部署脚本灵活性,foundry则通过solidity实现了强大的性能,能够通过执行速度极快的测试
对于第一个Demo,我倾向于优先使用hardhat来完成快速原型开发。有多余的时间使用foundry,通过@nomicfoundation/hardhat-foundry 插件来实现无缝集成,以此升级测试速度和深度
- Localnet/Testnet
Locatnet具有如下优势:
-
极致速度与即时反馈:交易打包和区块生成是即时的,无需等待,适合在开发过程中快速验证逻辑和迭代 。
-
完全掌控与隐私:可以随时重置整个网络状态,回到干净的起点 。所有开发和测试都在本地进行,代码在部署到主网前完全保密 。
-
零成本测试:可以无限生成测试用的以太币和任何ERC-20代币,无需担心资源耗尽
Testnet:
-
真实环境验证:测试网有真实的网络延迟、Gas竞争和区块时间,能暴露在Localnet中无法发现的时序、Gas或跨链交互问题。
-
基础设施集成测试:可以在这里完整测试DApp与钱包(如MetaMask)、区块浏览器、索引服务等第三方组件的集成情况。
对于第一个Demo,我将从Localnet出发进行开发工作,后续测试使用Testnet以发现更多开发中存在的问题,解决问题才能更好的进步😊
| 模块组件 | |
|---|---|
| 智能合约 (业务逻辑) | 部署在 ZetaChain 上的单一合约,核心逻辑是记录/回应从任何链发来的消息。 |
| 跨链连接 (信息入口) | 用户在任何链(如以太坊、比特币)上向 ZetaChain 的 TSS 地址发送交易,附带消息数据,即可触发合约。 |
| 前端界面 (用户交互) | 一个 DApp 前端页面,内嵌通用钱包( MetaMask),帮助用户在不同网络上构建并发送交易。 |
| RPC 节点 (链上通信) | 前端通过 RPC 提供商(如QuickNode、Alchemy)或 ZetaChain 的公共 RPC 与区块链网络交互。 |
简单逻辑:
-
用户从任何支持的链(如 Ethereum、BSC、Polygon)发送一条消息
-
合约记录并永久存储以下信息:
-
消息内容(用户自定义)
-
来源链 ID 和名称
-
发送者地址(跨链映射后的地址)
-
时间戳
-
全局消息计数器
-
合约伪代码:
// 伪代码概念
function sendMessage(string memory message) external {
    // 记录跨链消息
    Message memory newMessage = Message({
        content: message,
        chainId: zetaContext.chainId,
        chainName: getChainName(zetaContext.chainId),
        sender: zetaContext.msgSender,
        timestamp: block.timestamp,
        messageId: totalMessages++
    });

    // 触发事件供前端监听
    emit MessageSent(
        newMessage.messageId,
        newMessage.content,
        newMessage.chainName,
        newMessage.sender
    );
}
这样既保持了helloworld的简洁,又体现出zetachain universal App的核心价值。
通用区块链(Universal Blockchain) 像 ZetaChain 这样的 L1,它自己就是一条链,但天生可以直接连很多其他链(Bitcoin / Ethereum / Solana 等),从一个中心统一管理不同链上的资产和调用。
直观理解:
-
一条专门用来“打通所有链”的 L1 公链,你可以把它想成“多链世界的操作系统”或“总控制台”。
-
它本身是一个 PoS L1(基于 Cosmos SDK),但内嵌了跨链能力,可以原生连接 Ethereum、Bitcoin、Solana 等各种链,包括没有智能合约的链(如 BTC)。[
在实际应用中的作用:
-
对用户:只和 ZetaChain 打交道,却能在背后同时操作多条链上的资产和合约——不用频繁切网络、桥资产。
-
对开发者:只在一个地方(ZetaChain)写逻辑,就能控制多链资产/合约,相当于“只写一次,多链生效”。
Universal EVM(通用 EVM) ZetaChain 上的 EVM 版本。对开发者看起来像普通 EVM(Solidity、工具都能用),但它内置跨链能力:合约可以直接收、发来自其他链的消息和资产。
在实际应用中的作用:
-
开发者仍然写 Solidity,但多了“跨链能力”,比如:
-
在一个合约函数里,同时读取 Ethereum 上某个池子的状态 + 操作 Bitcoin 资产 + 最终把结果发到 Solana 上。
-
它是“通用应用 / Universal Apps”真正跑的执行环境。
-
Omnichain Smart Contract(全链智能合约)
部署在 ZetaChain 的合约,但可以操作“任意已连接链上的资产和数据”,所以叫 Omnichain。[
与普通合约的对比:
-
普通合约:
- 部署在哪条链,只能管理这条链上的状态和资产。
-
Omnichain 合约:
-
部署在 ZetaChain 上,却能:
-
管理 Ethereum、Bitcoin 等链上的资金金库;
-
对这些链发交易(如调用 Uniswap、借贷协议等);
-
统一编排多链操作流程。
-
-
在实际应用中的作用:
-
大幅减少开发复杂度:
-
过去:每条链部署一份合约 + 自己写消息传递/安全逻辑;
-
现在:只要在 ZetaChain 部署一份 Omnichain 合约,由 ZetaChain 处理跨链消息与安全。
-
-
应用场景:跨链 DEX、跨链借贷、用 BTC 参与 DeFi 等。
Universal App(通用应用)
官方/代码层面的定义:
-
“Universal App 是部署在 ZetaChain 上、并且原生连接到其他区块链(Ethereum、BNB、Bitcoin 等)的智能合约(App)。”
-
这些应用通过 Gateway 接受来自各条链的调用和资产,统一在 ZetaChain 内部处理,再可以向外发起跨链操作。
具体例子(帮助理解应用价值):
1)跨链支付 / 汇款
-
用户:只在 Bitcoin 钱包里签一笔交易,给某个 Universal App。
-
App:
-
接收 BTC;
-
在 ZetaChain 上把 BTC 换成 ZRC-20 USDC;
-
再通过 Gateway 把 USDC 以原生 USDC 形式发到 Ethereum 的某个地址。
-
2)跨链 DEX / 聚合器
-
用户:在一个页面上输入“用 SOL 换成 Base 上的 ETH”;
-
Universal App:
-
从 Solana 接收 SOL;
-
中间可能经过多条链/多次 swap;
-
最终在 Base 上把 ETH 打给用户;
-
用户眼里只是一键 swap。
-
3)跨链借贷 / 做多
- 用 BTC 作为抵押,在多个 EVM 链上借出稳定币,再去做策略、挖矿,最后统一结算。
Gateway Gateway 是「入口 + 出口」:
-
在每一条外部链上(例如 Ethereum / Solana / Bitcoin),都有一个对应的 Gateway:
-
EVM 链上是一个 Gateway 合约;
-
Solana 上是一个 Gateway program;
-
Bitcoin 上是一个由验证者共同管理的多签地址。 这些 Gateway 负责接收用户的交易,把“我要调用哪个 Universal App、要带多少代币、要执行什么操作”等信息传入 ZetaChain。
-
-
在 ZetaChain 链上也有一个 Gateway 合约:
- 它负责把 Universal App 的指令执行到外部链上,比如:从 ZetaChain 把 ZRC-20 代币提到 Ethereum 变成原生 ETH,并且顺便在 Ethereum 上调用一个合约函数。
各个概念之前的关系
外围链用户/合约 → 各自链的 Gateway → ZetaChain(Universal Blockchain) → Universal EVM → Omnichain 合约 → Universal App → 再通过 Gateway 操作各外链资产和合约。
[Bitcoin 链]
|
[Gateway-BTC]
|
[Solana 链] -- [Gateway-Solana] [Ethereum 链] -- [Gateway-ETH]
\ /
\ /
\ /
[ ZetaChain ]
[ Universal EVM ]
[ Universal Apps ]
/ \
/ \
[Gateway-Zeta → 其它链调用/提币 ...]
1. 为什么在 ZetaChain 上开发 在我看来,在 ZetaChain 上开发的意义在于,它把多条区块链整合成一个统一的应用平台。我只需要在 ZetaChain 的 Universal EVM 上写一份合约,就可以同时调度 Bitcoin、Ethereum、Solana 等不同链上的资产和状态,而不用在每条链上分别部署合约、维护多套跨链桥逻辑,这大大降低了开发和安全成本。对用户而言,只需在自己熟悉的钱包和链上发起操作,后台由 ZetaChain 自动完成跨链路由和结算,使多链使用体验尽量接近“用一个应用、面对一个界面”的单链体验。
2. ZetaChain 架构设计概览 我理解的 ZetaChain 架构是:以一条 PoS 公链为中心,在链上运行 Universal EVM 和 omnichain 合约,由验证人网络去观察外部区块链的事件,并通过各链上的 Gateway 完成资产和消息的跨链转发。外部资产会在 ZetaChain 上被映射成统一标准的代币,这样合约可以像操作本地资产一样统一管理多链资金。整体上它采用“中心 Hub + 多条辐射链”的模式,把复杂的多对多跨链关系简化为一条主链与多条外链的连接,为上层的 Universal App 提供一个简单而统一的多链基础设施。
测试官网的运行指令(在本地跑起3条链):
zetachain localnet start ✔ 21:32:50
[LOCALNET] Starting anvil on port 8545 with args: -q
[LOCALNET] Skipping Ton...
[LOCALNET] Skipping Solana...
[LOCALNET] Skipping Sui...
[LOCALNET] EVM default wallet address: 0xf39Fd6e51aad88F6F4ce6aB8827279cffFb92266
[LOCALNET] EVM default wallet private key: 0xac0974bec39a17e36ba4a6b4d238ff944bacb478cbed5efcae784d7bf4f2ff80
[LOCALNET] Default wallet mnemonic: test test test test test test test test test test test junk
Ethereum (11155112)
┌───────────────┬────────────────────────────────────────────┐
│ Contract │ Address │
├───────────────┼────────────────────────────────────────────┤
│ erc20Custody │ 0xa85233C63b9Ee964Add6F2cffe00Fd84eb32338f │
├───────────────┼────────────────────────────────────────────┤
│ gateway │ 0x09635F643e140090A9A8Dcd712eD6285858ceBef │
├───────────────┼────────────────────────────────────────────┤
│ zetaConnector │ 0x67d269191c92Caf3cD7723F116c85e6E9bf55933 │
├───────────────┼────────────────────────────────────────────┤
│ zetaToken │ 0x7a2088a1bFc9d81c55368AE168C2C02570cB814F │
├───────────────┼────────────────────────────────────────────┤
│ USDC.ETH │ 0x1fA02b2d6A771842690194Cf62D91bdd92BfE28d │
└───────────────┴────────────────────────────────────────────┘
ZetaChain (31337)
┌───────────────────┬────────────────────────────────────────────┐
│ Contract │ Address │
├───────────────────┼────────────────────────────────────────────┤
│ gateway │ 0xB7f8BC63BbcaD18155201308C8f3540b07f84F5e │
├───────────────────┼────────────────────────────────────────────┤
│ uniswapV2Factory │ 0xe7f1725E7734CE288F8367e1Bb143E90bb3F0512 │
├───────────────────┼────────────────────────────────────────────┤
│ uniswapV2Router02 │ 0x9fE46736679d2D9a65F0992F2272dE9f3c7fa6e0 │
├───────────────────┼────────────────────────────────────────────┤
│ uniswapV3Factory │ 0xCf7Ed3AccA5a467e9e704C703E8D87F634fB0Fc9 │
├───────────────────┼────────────────────────────────────────────┤
│ uniswapV3Router │ 0xa513E6E4b8f2a923D98304ec87F64353C4D5C853 │
├───────────────────┼────────────────────────────────────────────┤
│ zetaToken │ 0x5FbDB2315678afecb367f032d93F642f64180aa3 │
├───────────────────┼────────────────────────────────────────────┤
│ ZRC-20 ETH.ETH │ 0x2ca7d64A7EFE2D62A725E2B35Cf7230D6677FfEe │
├───────────────────┼────────────────────────────────────────────┤
│ ZRC-20 USDC.ETH │ 0xd97B1de3619ed2c6BEb3860147E30cA8A7dC9891 │
├───────────────────┼────────────────────────────────────────────┤
│ ZRC-20 BNB.BNB │ 0x65a45c57636f9BcCeD4fe193A602008578BcA90b │
├───────────────────┼────────────────────────────────────────────┤
│ ZRC-20 USDC.BNB │ 0x05BA149A7bd6dC1F937fA9046A9e05C05f3b18b0 │
└───────────────────┴────────────────────────────────────────────┘
BNB (98)
┌───────────────┬────────────────────────────────────────────┐
│ Contract │ Address │
├───────────────┼────────────────────────────────────────────┤
│ erc20Custody │ 0x70e0bA845a1A0F2DA3359C97E0285013525FFC49 │
├───────────────┼────────────────────────────────────────────┤
│ gateway │ 0x0E801D84Fa97b50751Dbf25036d067dCf18858bF │
├───────────────┼────────────────────────────────────────────┤
│ zetaConnector │ 0x9d4454B023096f34B160D6B654540c56A1F81688 │
├───────────────┼────────────────────────────────────────────┤
│ zetaToken │ 0x99bbA657f2BbC93c02D617f8bA121cB8Fc104Acf │
├───────────────┼────────────────────────────────────────────┤
│ USDC.BNB │ 0xf953b3A269d80e3eB0F2947630Da976B896A8C5b │
└───────────────┴────────────────────────────────────────────┘
在shell中创建自己的钱包
npx zetachain accounts create --name mywallet
Creating accounts for all supported types...
EVM account created successfully!
Key saved to: /home/eeeeye/.zetachain/keys/evm/mywallet.json
Address: 0x784f02F6a80c0D2Dc8485b9F05Ce2A549EDa60A3
SOLANA account created successfully!
Key saved to: /home/eeeeye/.zetachain/keys/solana/mywallet.json
Address: GNPPUzwT1jn4VroozW7BoPr2XdvMBXtgXD1aFLTUDZiG
SUI account created successfully!
Key saved to: /home/eeeeye/.zetachain/keys/sui/mywallet.json
Address: 0x98aec9ebf7d1797313c7e863e4ef4e7f89c7e87286f1e7375ca24934180e98ba
BITCOIN account created successfully!
Key saved to: /home/eeeeye/.zetachain/keys/bitcoin/mywallet.json
Address: bc1qy3tafmggfkgp5fappxf5cqsswg2zms7haru0r9
TON account created successfully!
Key saved to: /home/eeeeye/.zetachain/keys/ton/mywallet.json
Address: 0QCvck3o6tKGPvzkairgUWnWO0-vCKE0RvQdHZalpD1ak3p8
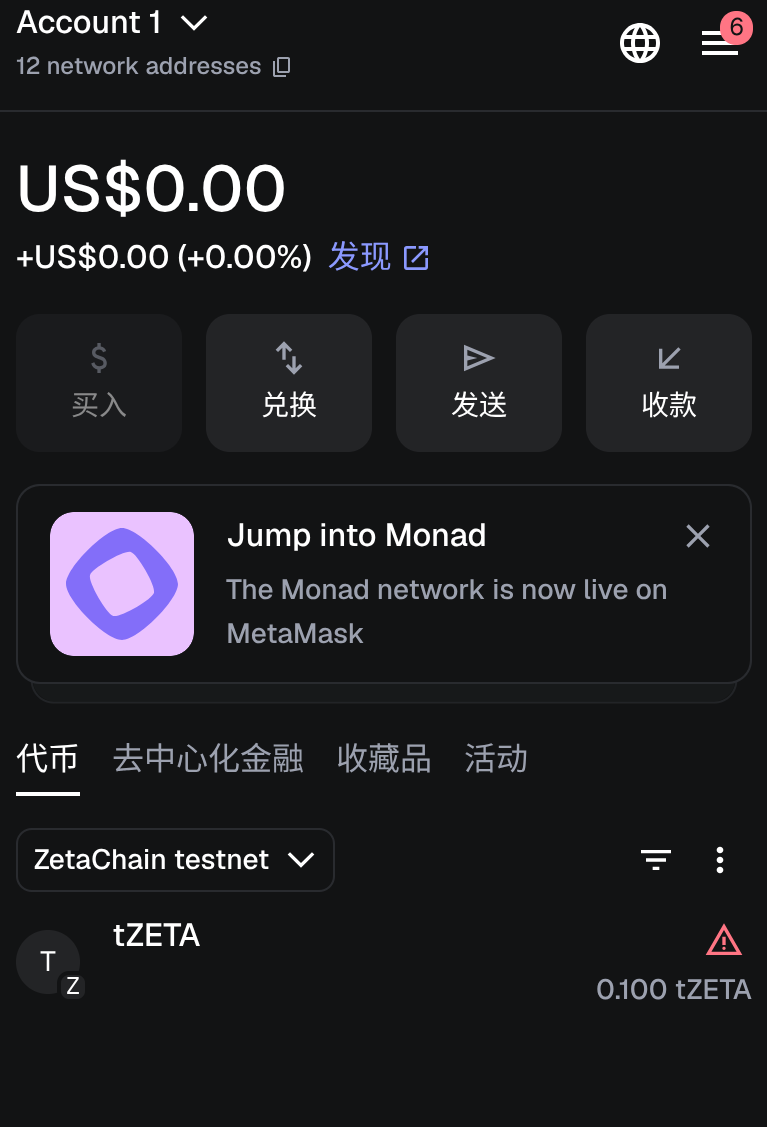
将metamask的Ethereum钱包地址放入https://zetachain.faucetme.pro/
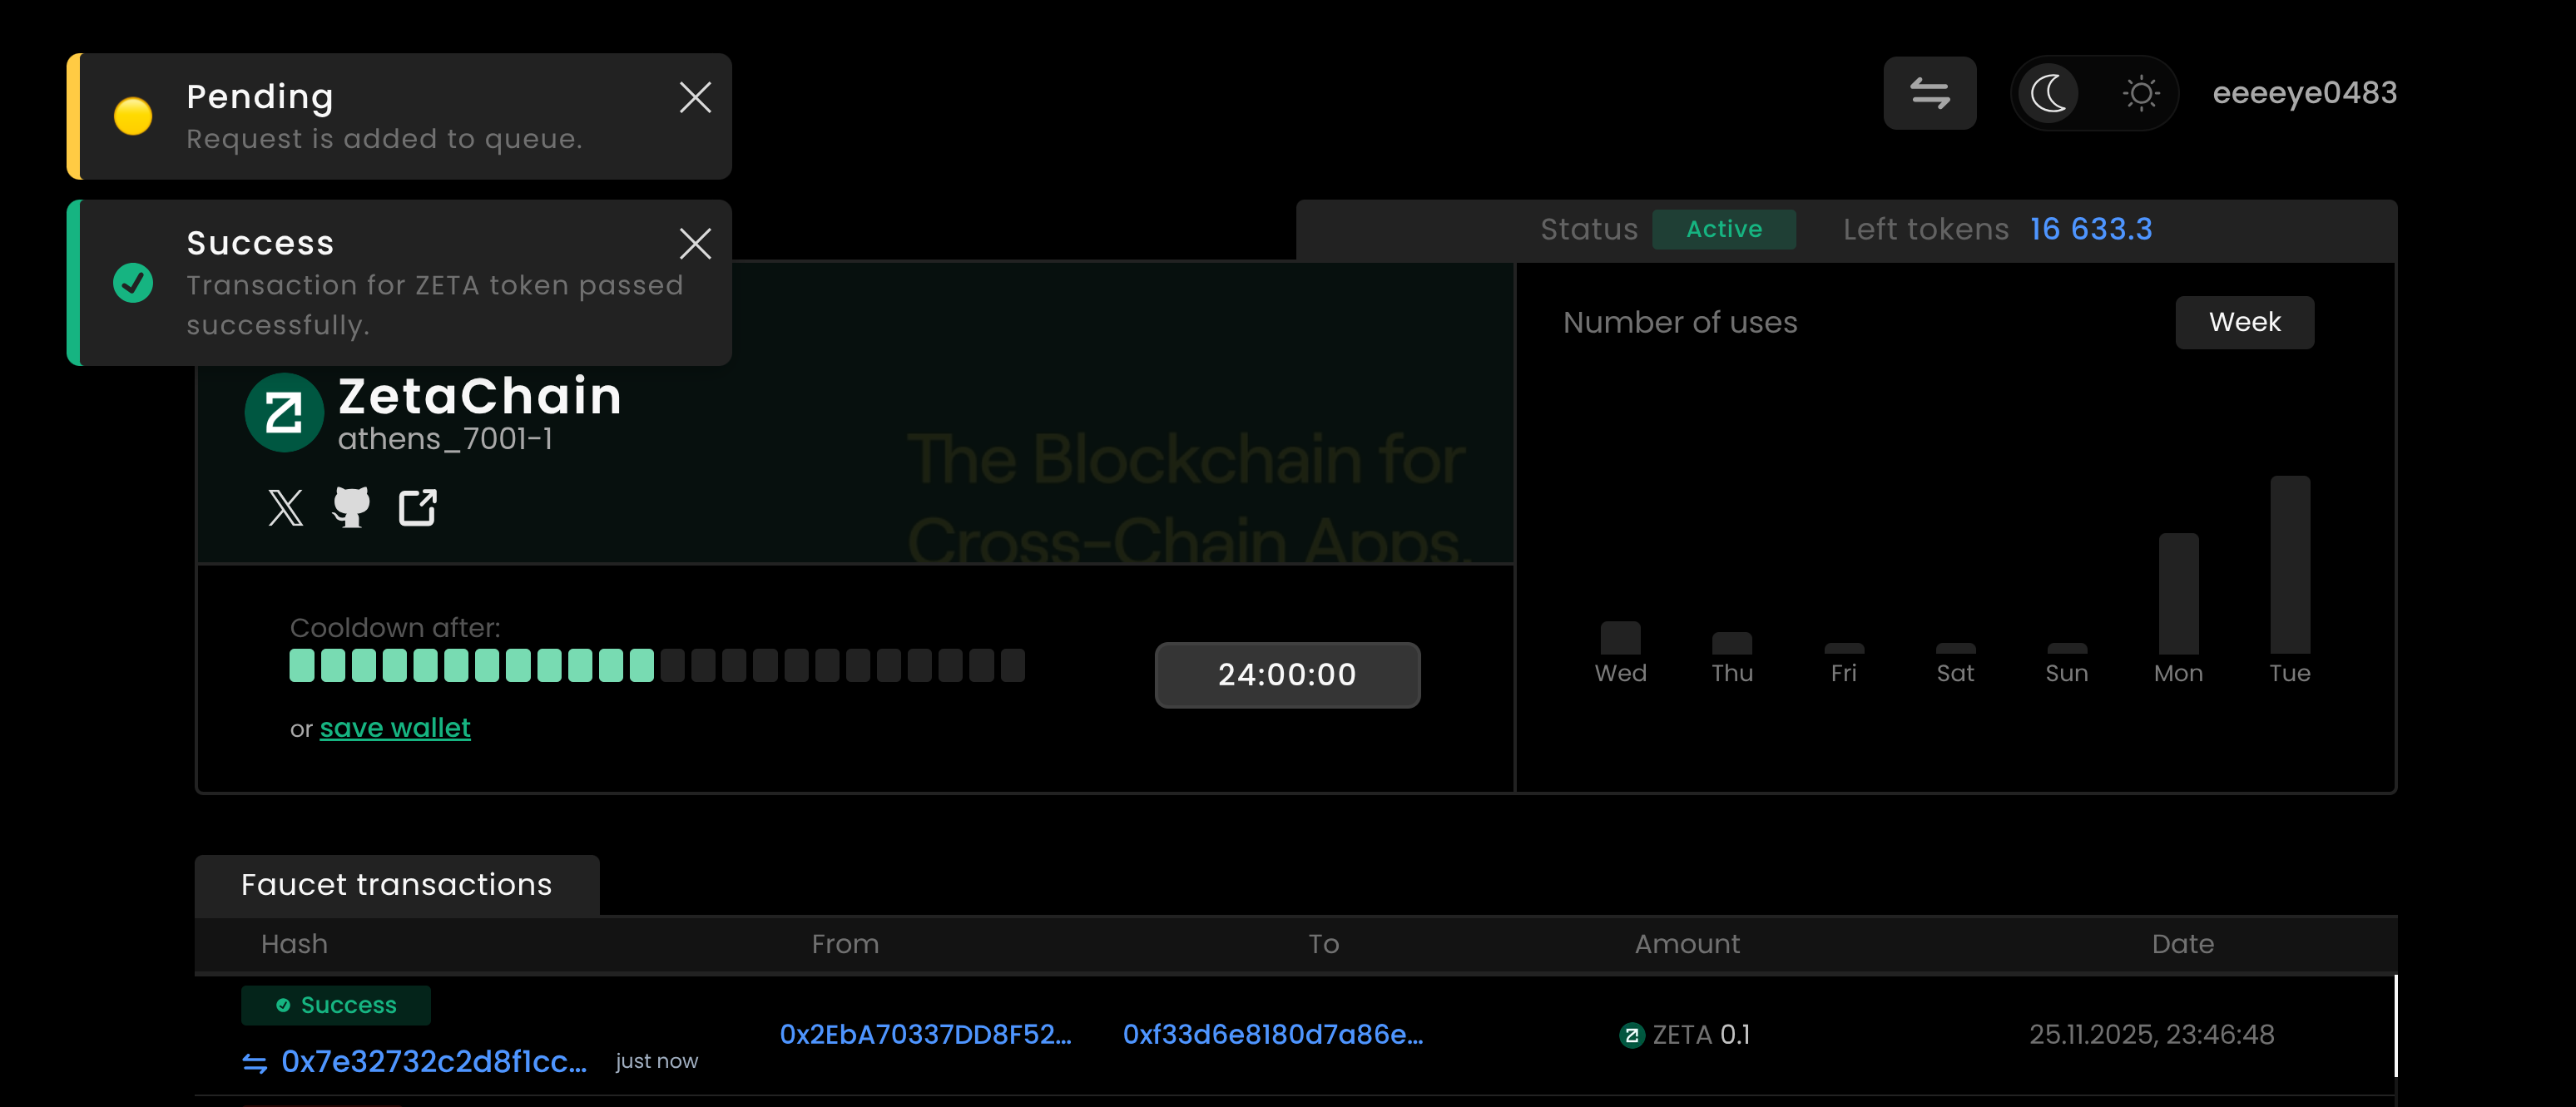
在钱包中检查是否收到测试代币:
RPC 就是让你的电脑与区块链节点通信的入口,是区块链的 API 网关,所有读写都要通过它。
通读了官方文档中的以下部分
学习了4 种智能合约类型:
| 合约 | 类比 | 用途 |
|---|---|---|
| connector | 跨链大脑 | 验证跨链消息、路由消息 |
| erc20Custody | 银行保险柜 | 锁仓原链 ERC20,映射到 ZetaChain |
| gateway | 跨链 API | 用户和 dApp 调用的入口 |
| tss | 多签安全系统 | 验证 ZetaChain 节点签名,确保安全跨链 |
- 虚拟环境启动:
source .venv/bin/activate
- 添加如下代码到qwen_test.py解决代理问题:
os.environ["HTTP_PROXY"] = ""
os.environ["HTTPS_PROXY"] = ""
os.environ["ALL_PROXY"] = ""

 npm install -g zetachain
zetachain query chains list
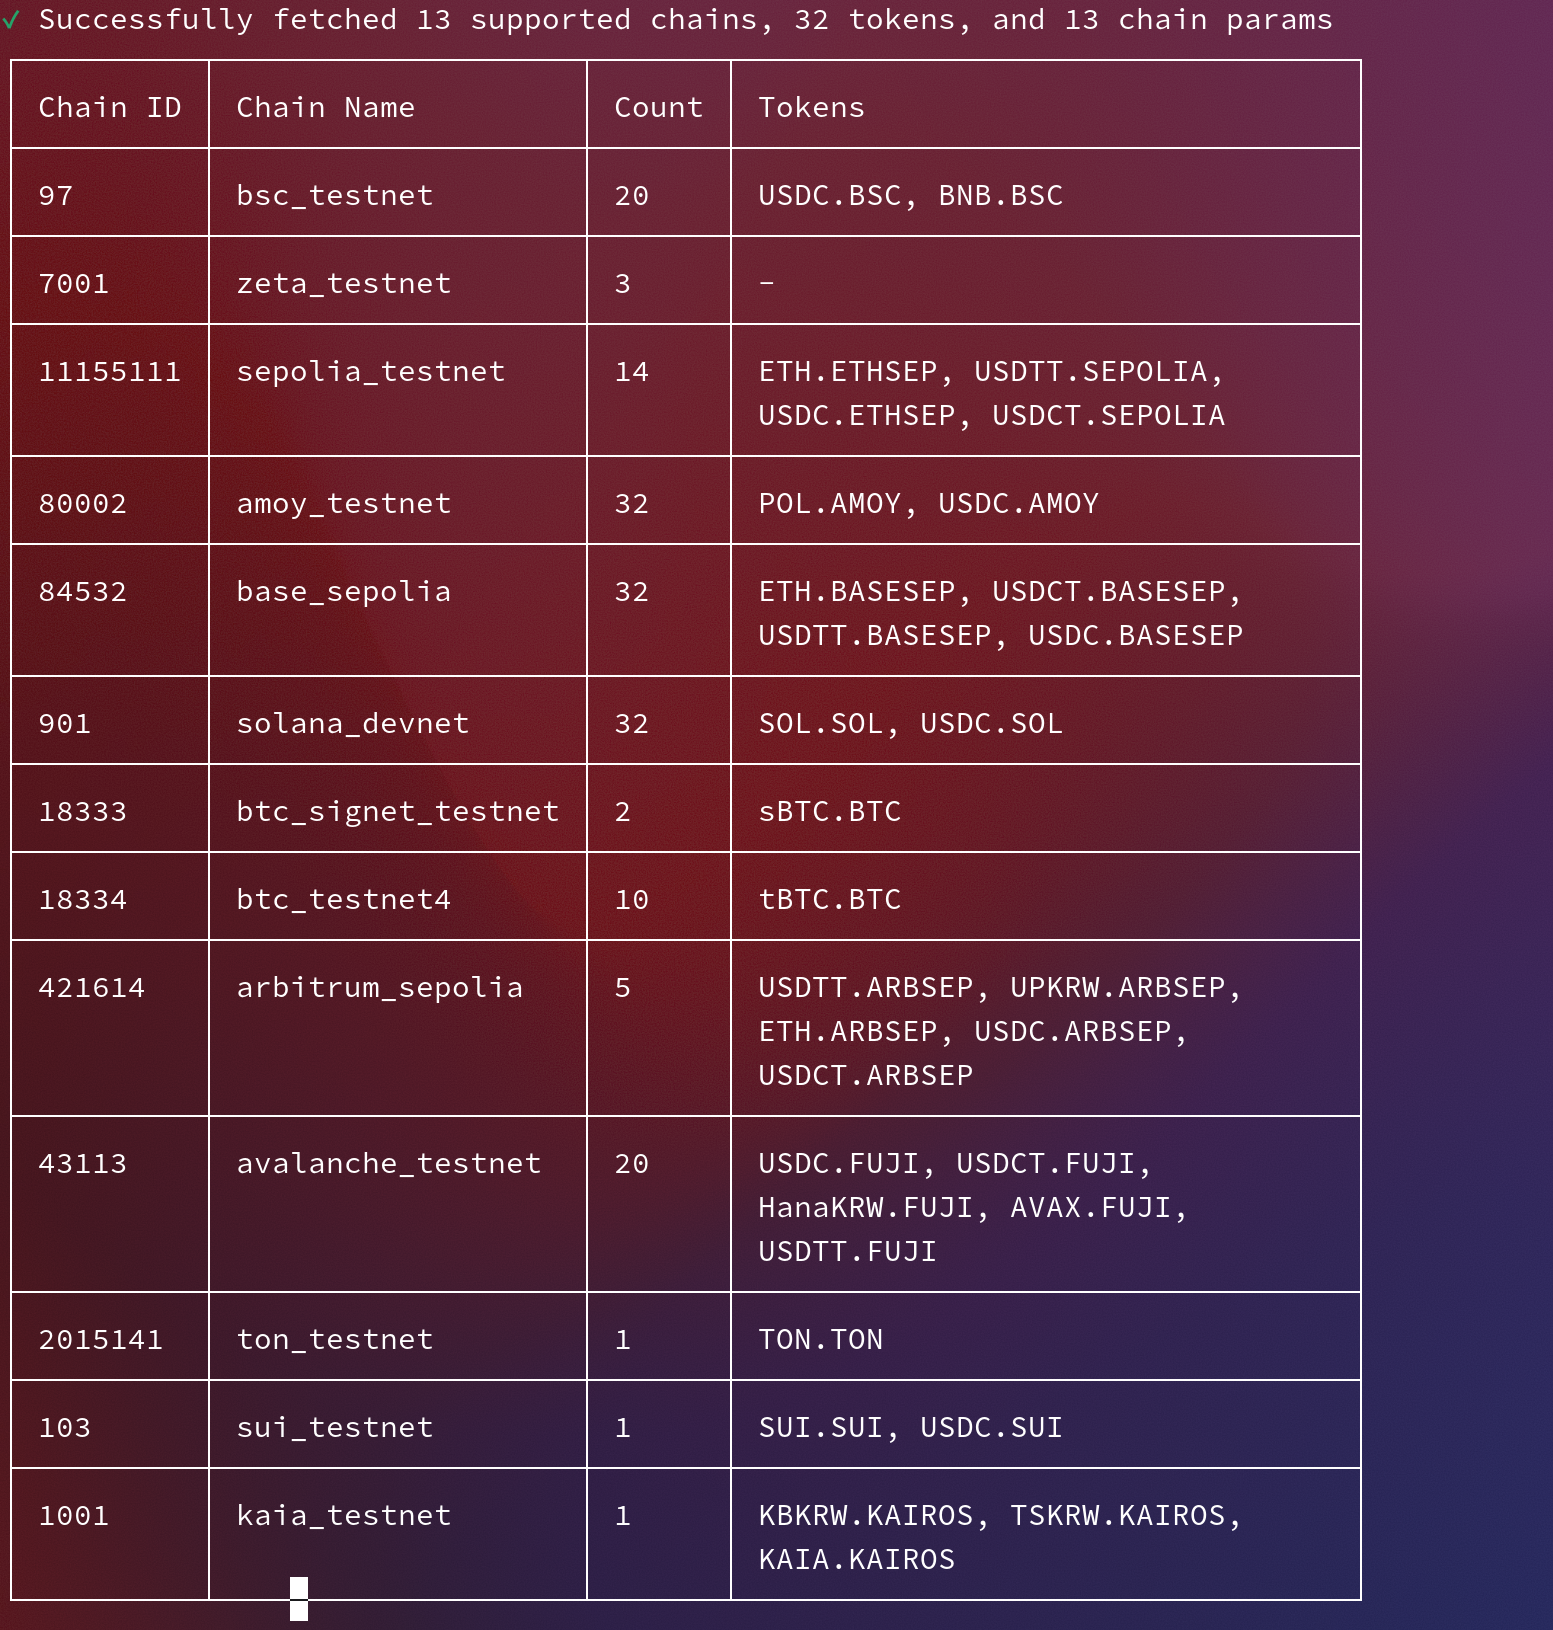
generate the API key and use python visual environment to run test.sh
here is the content of .sh(the "DASHSCOPE_API_KEY" has been set to my API_KEY:
import os
from openai import OpenAI
client = OpenAI(
# 若没有配置环境变量,请用百炼API Key将下行替换为:api_key="sk-xxx",
api_key=os.getenv("DASHSCOPE_API_KEY"),
base_url="https://dashscope.aliyuncs.com/compatible-mode/v1",
)
completion = client.chat.completions.create(
model="qwen3-max",
messages=[
{"role": "system", "content": "You are a helpful assistant."},
{"role": "user", "content": "你是谁?"},
],
stream=True
)
for chunk in completion:
print(chunk.choices[0].delta.content, end="", flush=True)

Join the community in wechat
