Heat is the main project in the OpenStack Orchestration program. It implements an orchestration engine to launch multiple composite cloud applications based on templates in the form of text files that can be treated like code.
- A Heat template describes the infrastructure for a cloud application in a text file that is readable and writable by humans.
- Infrastructure resources that can be described include servers, floating ips, volumes, security groups, users, etc.
- Templates can also specify the relationships between resources (e.g. this volume is connected to this server). This enables Heat to call out to the OpenStack APIs to create all of your needed infrastructures in the correct order to completely launch your application.
- Heat manages the whole lifecycle of the application - when you need to change your infrastructure, simply modify the template and use it to update your existing stack. Heat knows how to make the necessary changes. It will delete all of the resources when you are finished with the application, too.
For more information on heat, visit this guide.
We want to try to replicate everything we did in this hands-on via heat, doing every step automatically.
Delete (in this order) everything we previously created: Virtual machine, security-groups, router and network.
Open a file .yaml (with vim or your editor of choice) and name it as you want. This will be our heat template.
~: vim example.yaml
Add these lines to it. They define the heat template version and the descritpion of what this template will do.
heat_template_version: 2015-04-30

description: Create a network, subnet, router and an instance with a floating ip and web-server installed.
First of all, we need to define the parameters we want the user to be able to modify, such as the various resources names, the image to use, etc.
parameters:
  demo_net_name:
    type: string
    default: demo-net
    description: Name for demo network
  demo_net_cidr:
    type: string
    default: 192.168.10.0/24
    description: CIDR for demo network
  demo_net_pool_start:
    type: string
    default: 192.168.10.10
    description: network pool start. typically .10 of whatever /24 is defined
  demo_net_pool_end:
    type: string
    default: 192.168.10.200
    description: network pool end. typically .100 of whatever /24 is defined
  demo_ext_net_name:
    type: string
    default: ext-net
    description: external net name.
  demo_key_name:
    type: string
    description: ssh key required for server creation
  demo_image_name:
    type: string
    description: image to use for the server
  demo_flavor_name:
    type: string
    default: m1.medium
    description: openstack server flavor name.
  demo_server1_name:
    type: string
    description: name of the server created.
After that, we start defining resources (under the resources: section) in the same order we did manually, so we first create the network, subnet and router we will use for our virtual machine:
demo_net:
  type: OS::Neutron::Net
  properties:
    name: { get_param: demo_net_name }

demo_subnet:
  type: OS::Neutron::Subnet
  properties:
    network_id: { get_resource: demo_net }
    cidr: { get_param: demo_net_cidr }
    dns_nameservers: [8.8.8.8]
    allocation_pools:
      - start: { get_param: demo_net_pool_start }
        end: { get_param: demo_net_pool_end }

demo_router:
  type: OS::Neutron::Router
  properties:
    external_gateway_info:
      network: { get_param: demo_ext_net_name }

router_interface:
  type: OS::Neutron::RouterInterface
  properties:
    router_id: { get_resource: demo_router }
    subnet_id: { get_resource: demo_subnet }
Now, we define the virtual machine we want to create...
server1:
  type: OS::Nova::Server
  properties:
    name: { get_param: demo_server1_name }
    image: { get_param: demo_image_name }
    flavor: { get_param: demo_flavor_name }
    key_name:  { get_param: demo_key_name }
    networks:
      - port: { get_resource: server1_port }
...attach it to the created network...
server1_port:
  type: OS::Neutron::Port
  properties:
    network_id: { get_resource: demo_net }
    fixed_ips:
      - subnet_id: { get_resource: demo_subnet }
    security_groups: [{ get_resource: webserver_security_group }]
...and we assign it a floating ip.
server1_floating_ip:
  type: OS::Neutron::FloatingIP
  properties:
    floating_network: { get_param: demo_ext_net_name }
    port_id: { get_resource: server1_port }
Now, we can create the necessary security groups to open the ports we need for our webserver (standard ssh and ping, and the http port).
webserver_security_group:
  type: OS::Neutron::SecurityGroup
  properties:
    description: Port 22 and 80 open for webserver.
    name: webserver-security-group
    rules: [
      {remote_ip_prefix: 0.0.0.0/0,
      protocol: tcp,
      port_range_min: 22,
      port_range_max: 22},
      {remote_ip_prefix: 0.0.0.0/0,
      protocol: tcp,
      port_range_min: 80,
      port_range_max: 80},
      {remote_ip_prefix: 0.0.0.0/0,
      protocol: icmp}]
We now need to manage the operations required to install and configure the nginx service. To do so, add the "user_data:" section under the resource server1, like this:
      ...
    user_data_format: RAW
    user_data:
      str_replace:
        params:
          wc_notify: { get_attr: ['wait_handle', 'curl_cli'] }
        template: |
          #!/bin/bash
          echo "141.250.2.227   openstack.fisica.unipg.it       controller" >>  /etc/hosts
          apt-get update
          apt-get dist-upgrade -y
          apt-get install nginx -y
          wget https://github.com/Cloud-PG/Handson-Openstack/raw/master/web-server.tar.gz
          tar -zxvf web-server.tar.gz -C /var/www
          service nginx restart
          wc_notify --data-binary '{"status": "SUCCESS"}'
As you can see, we introduced an element called "wait_handle", which is then updated at the end of the template section if the setup is successful. This is necessary to let Heat know when the stack deploy is completed, otherwise it will assume that as soon as the vm is created, the stack is successfully created.
This wait_handle is defined like this:
web-server-deploy:
  type: OS::Heat::WaitCondition
  properties:
    handle: { get_resource: wait_handle }
    count: 1
    timeout: 1200

wait_handle:
  type: OS::Heat::WaitConditionHandle
To verify everything is correct, compare your code to this complete template.
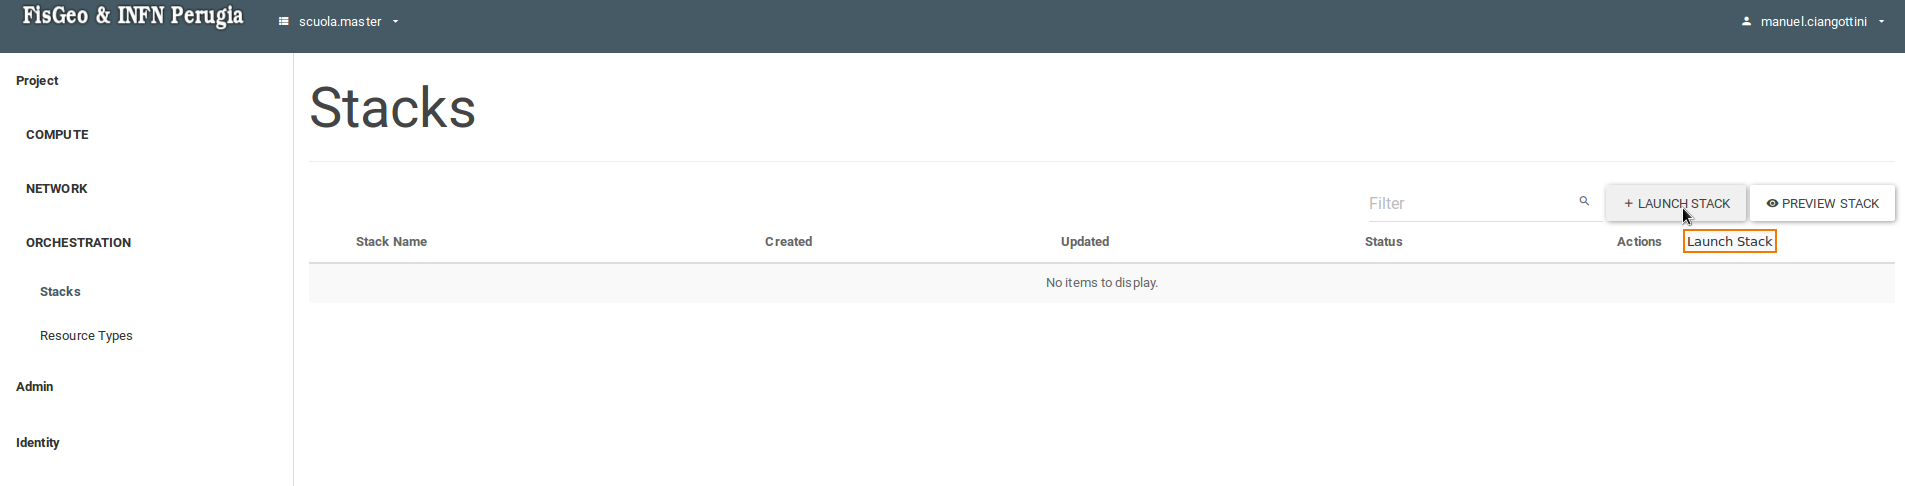
In the openstack dashboard, go to Project -> ORCHESTRATION -> Stacks -> Launch Stack.
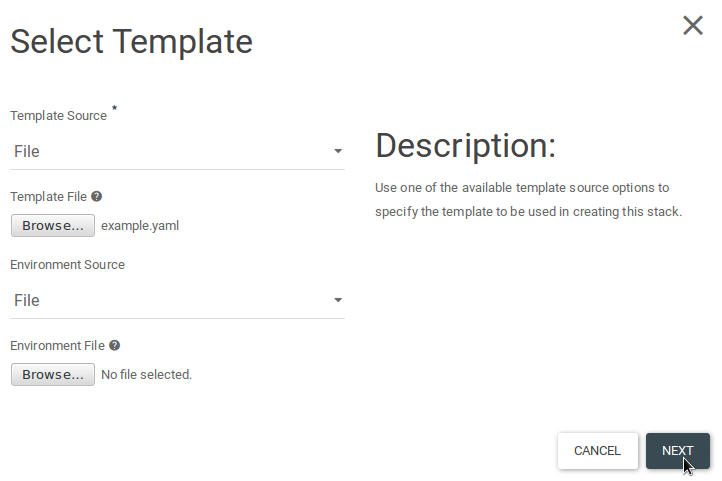
Select the yaml template and click next.
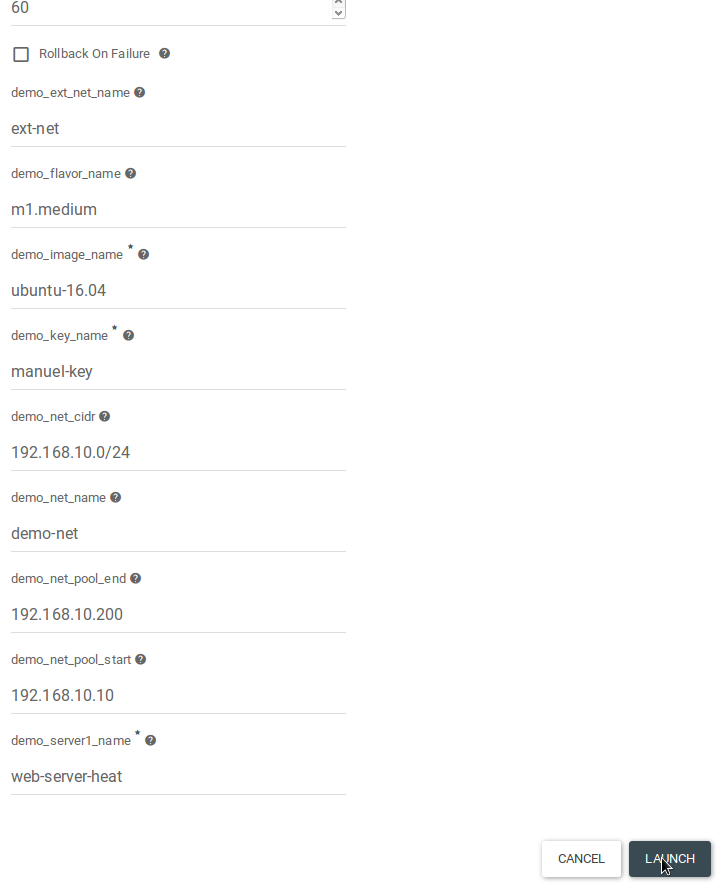
Fill in the empty fields and click Launch.
Once the stack creation is complete, point your browser to the floating ip of the newly created virtual machine and verify that you see this page.